Simple Guide: Evaluating a Math Bot
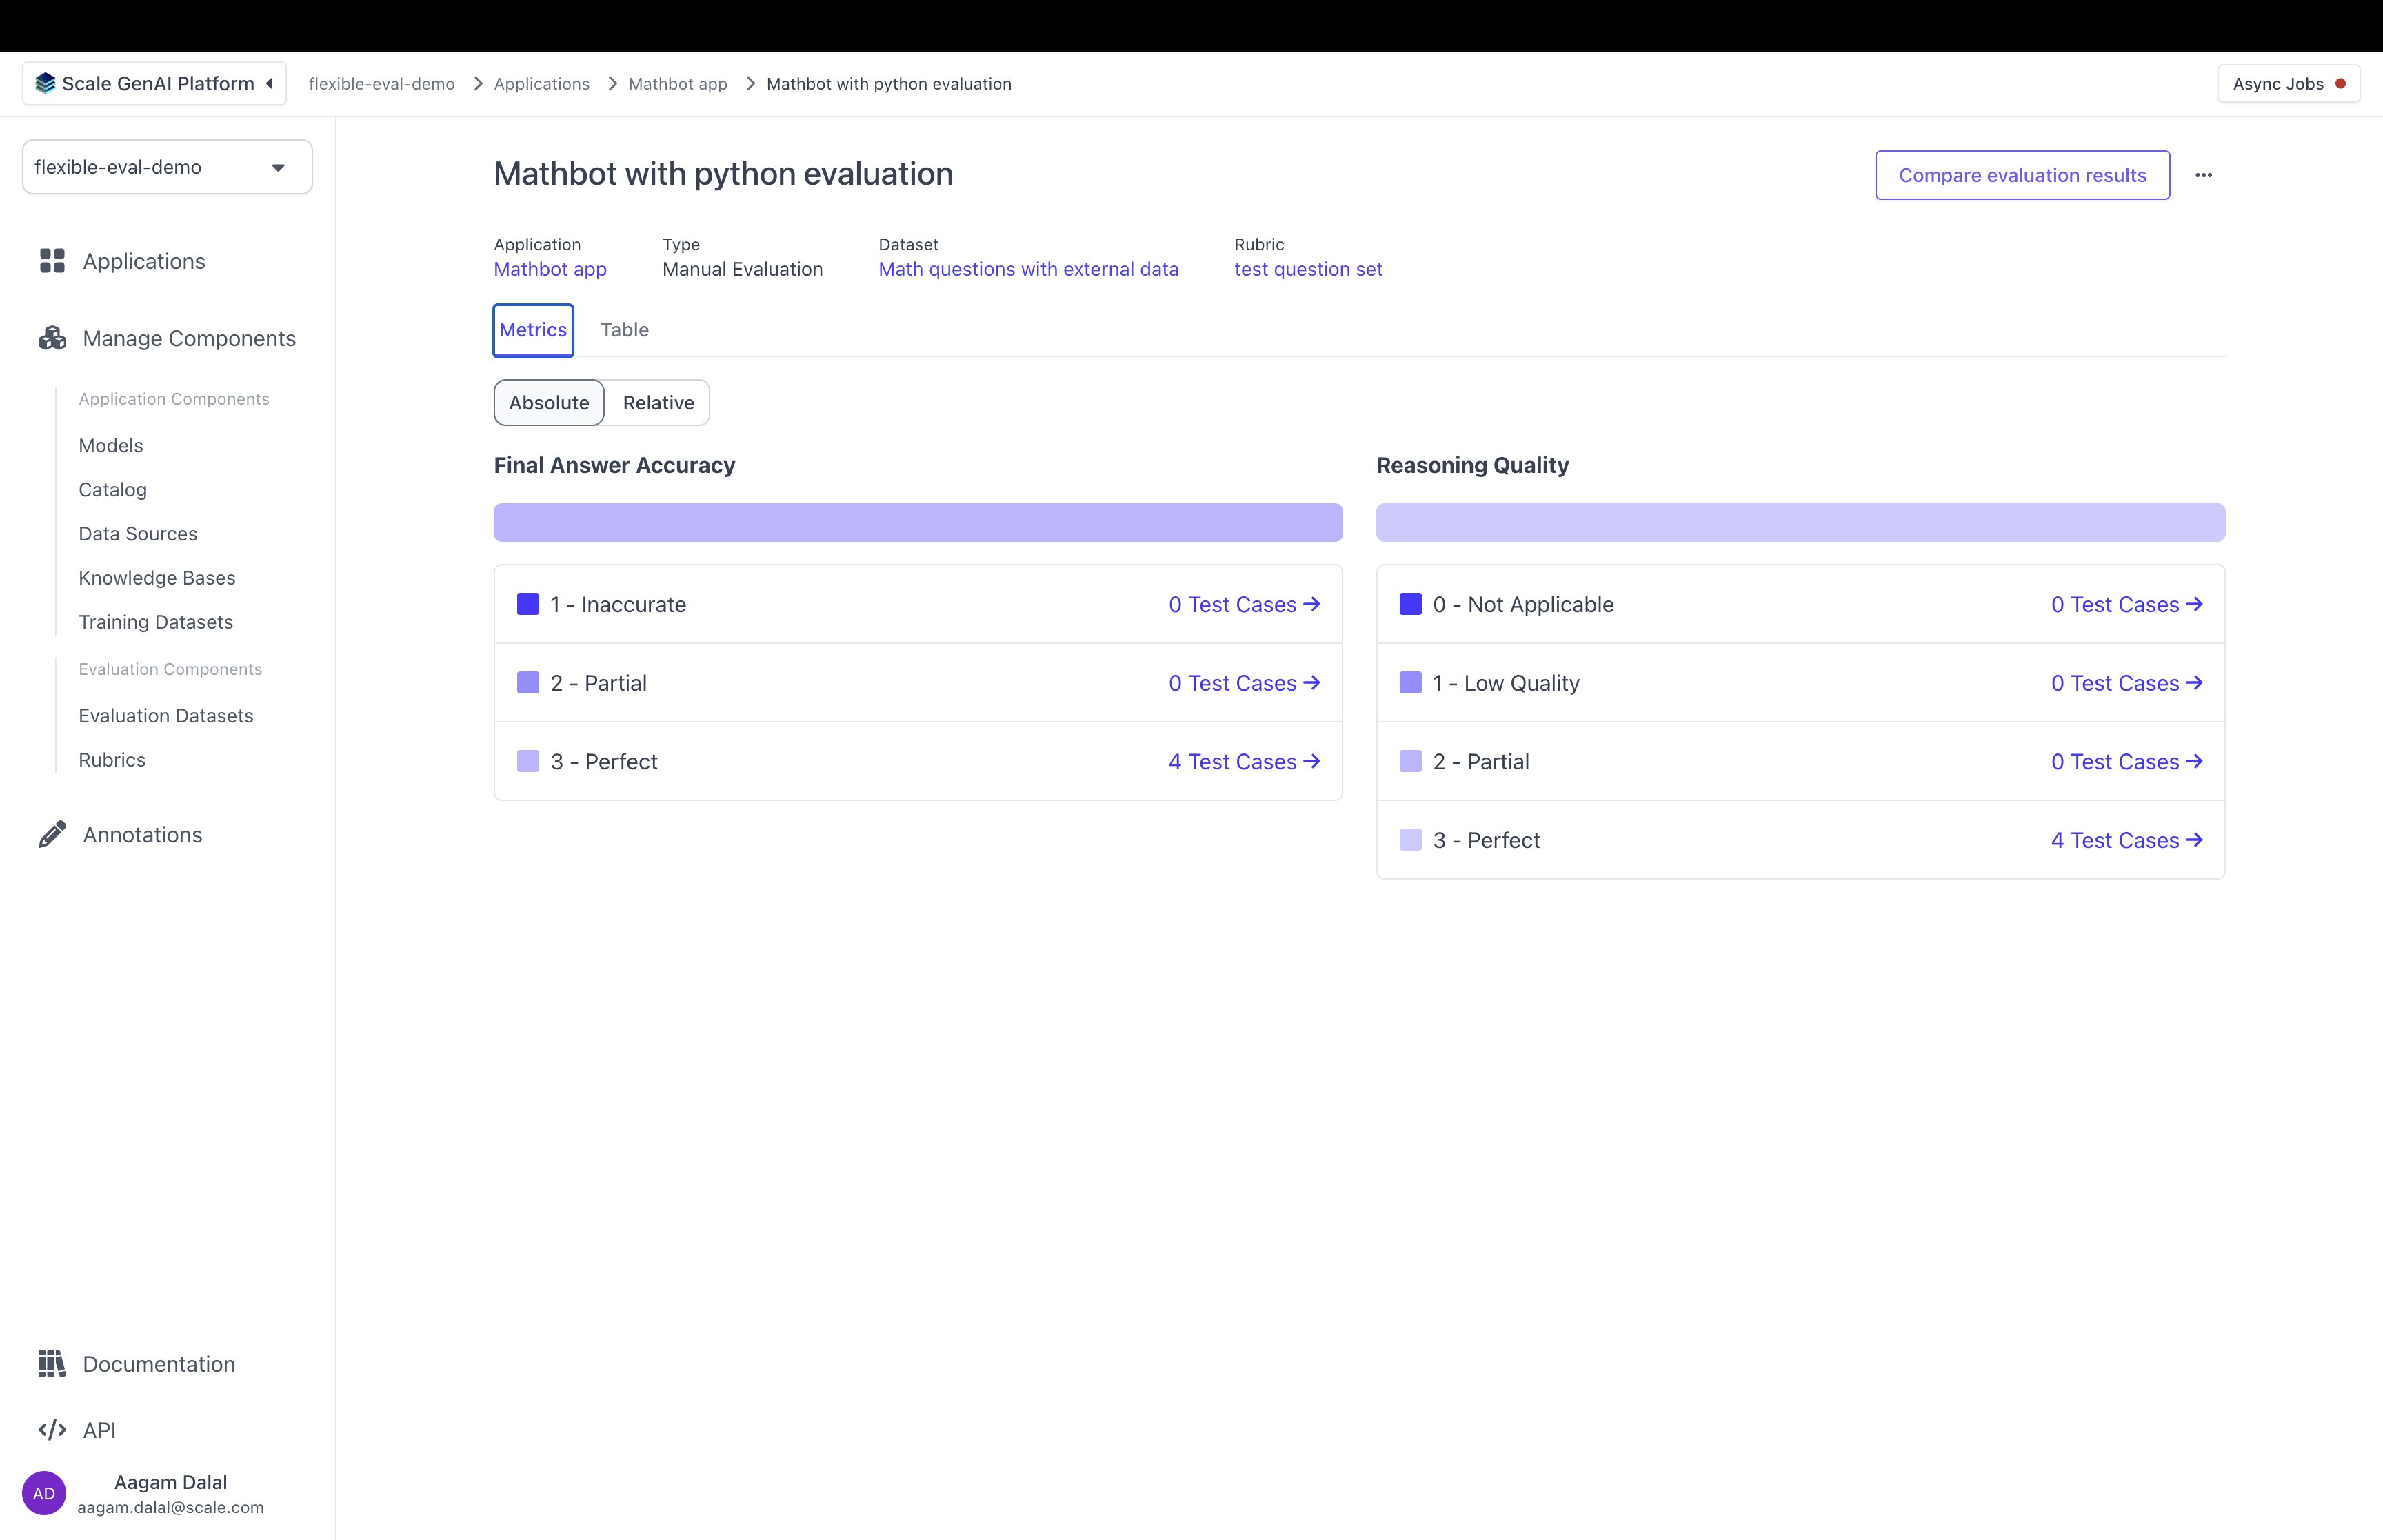
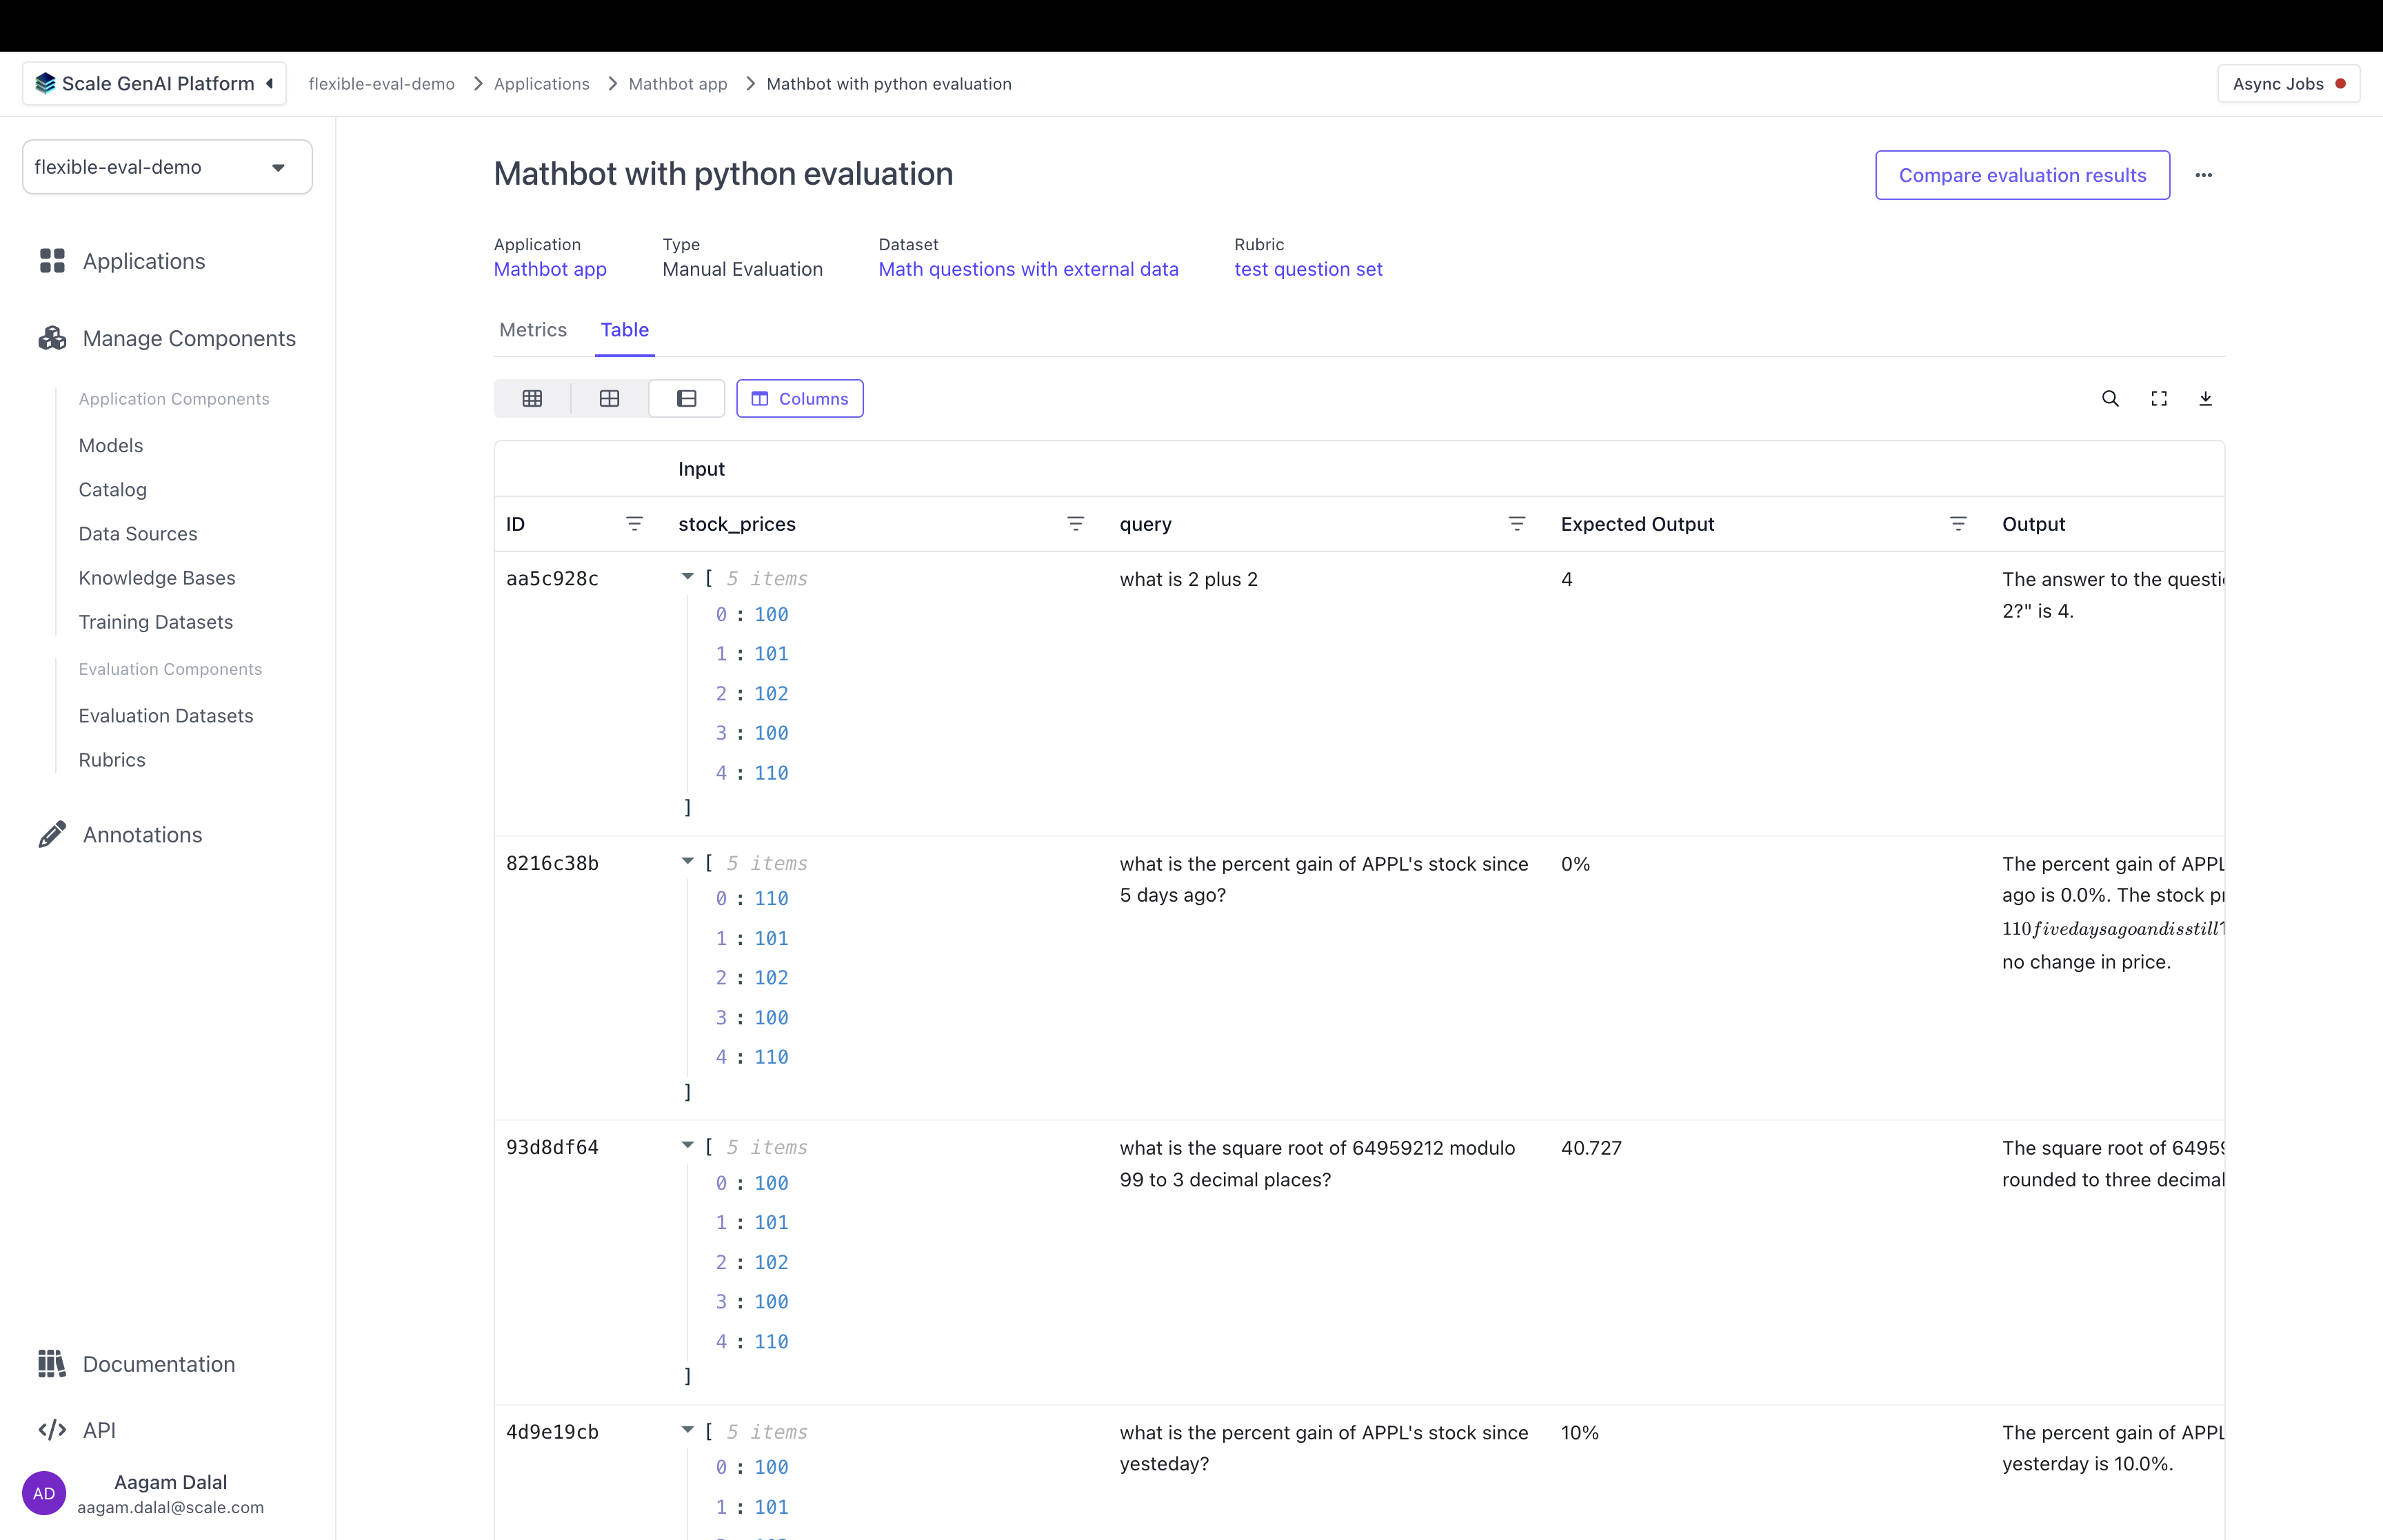
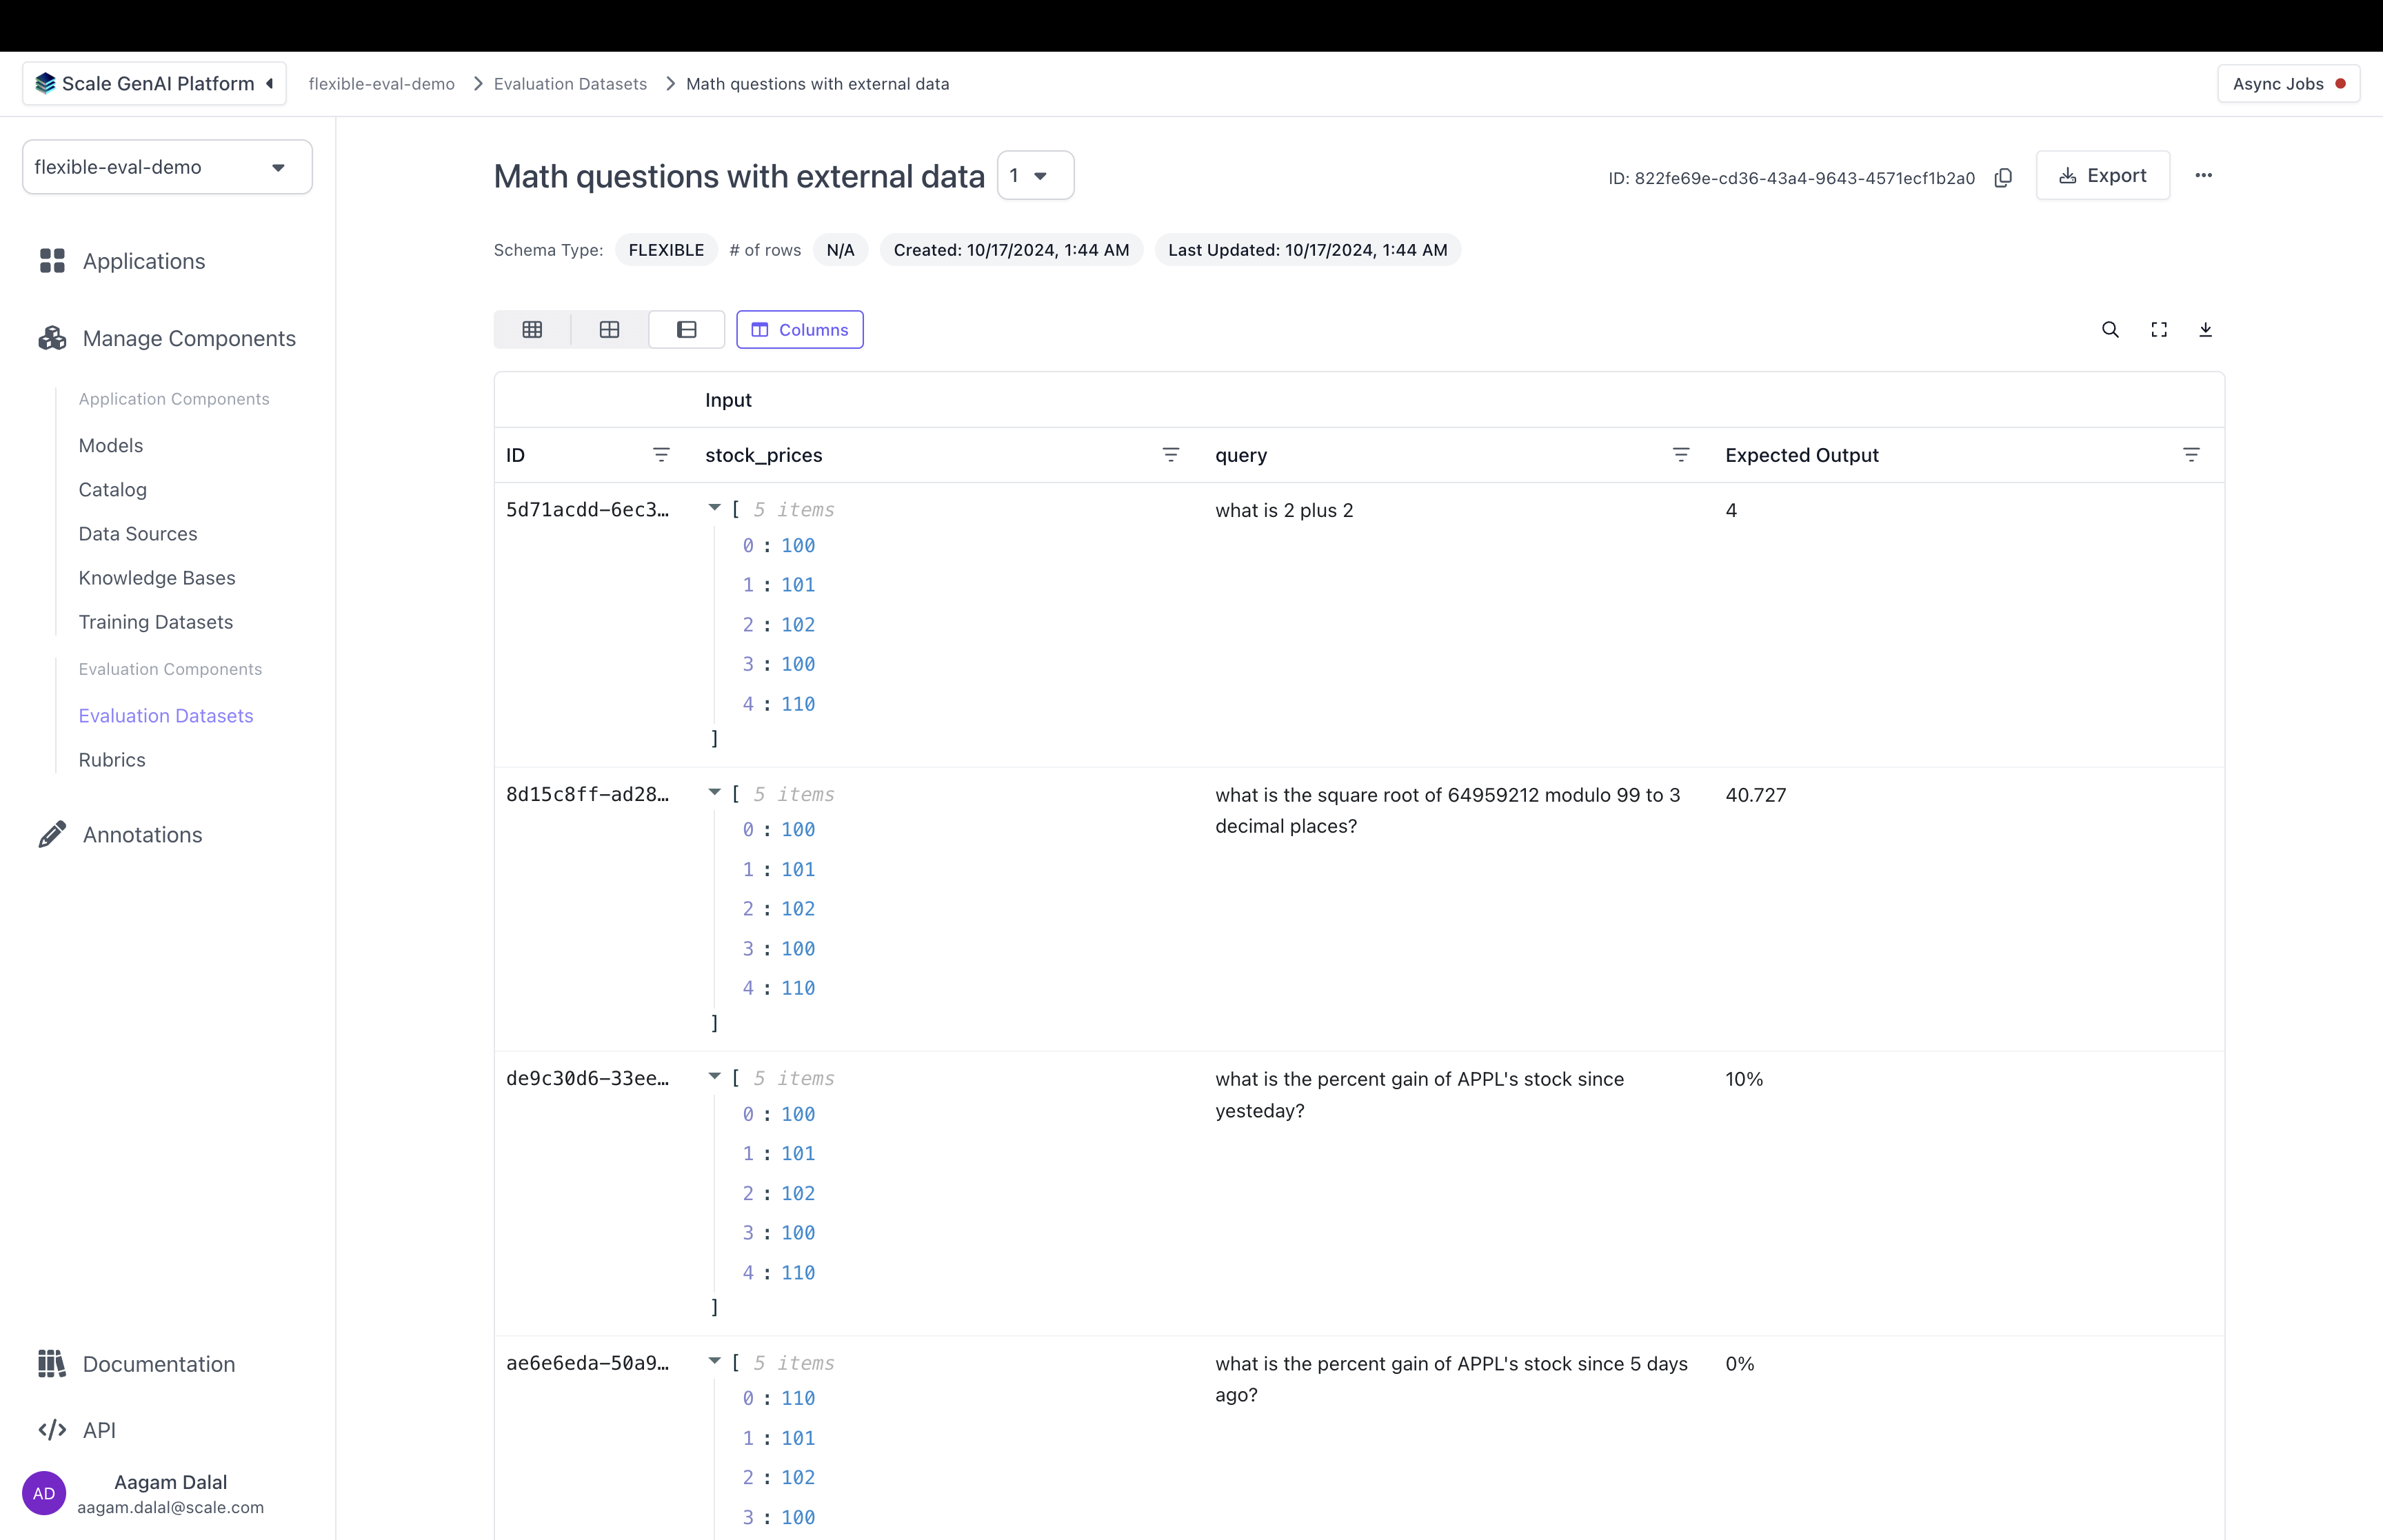
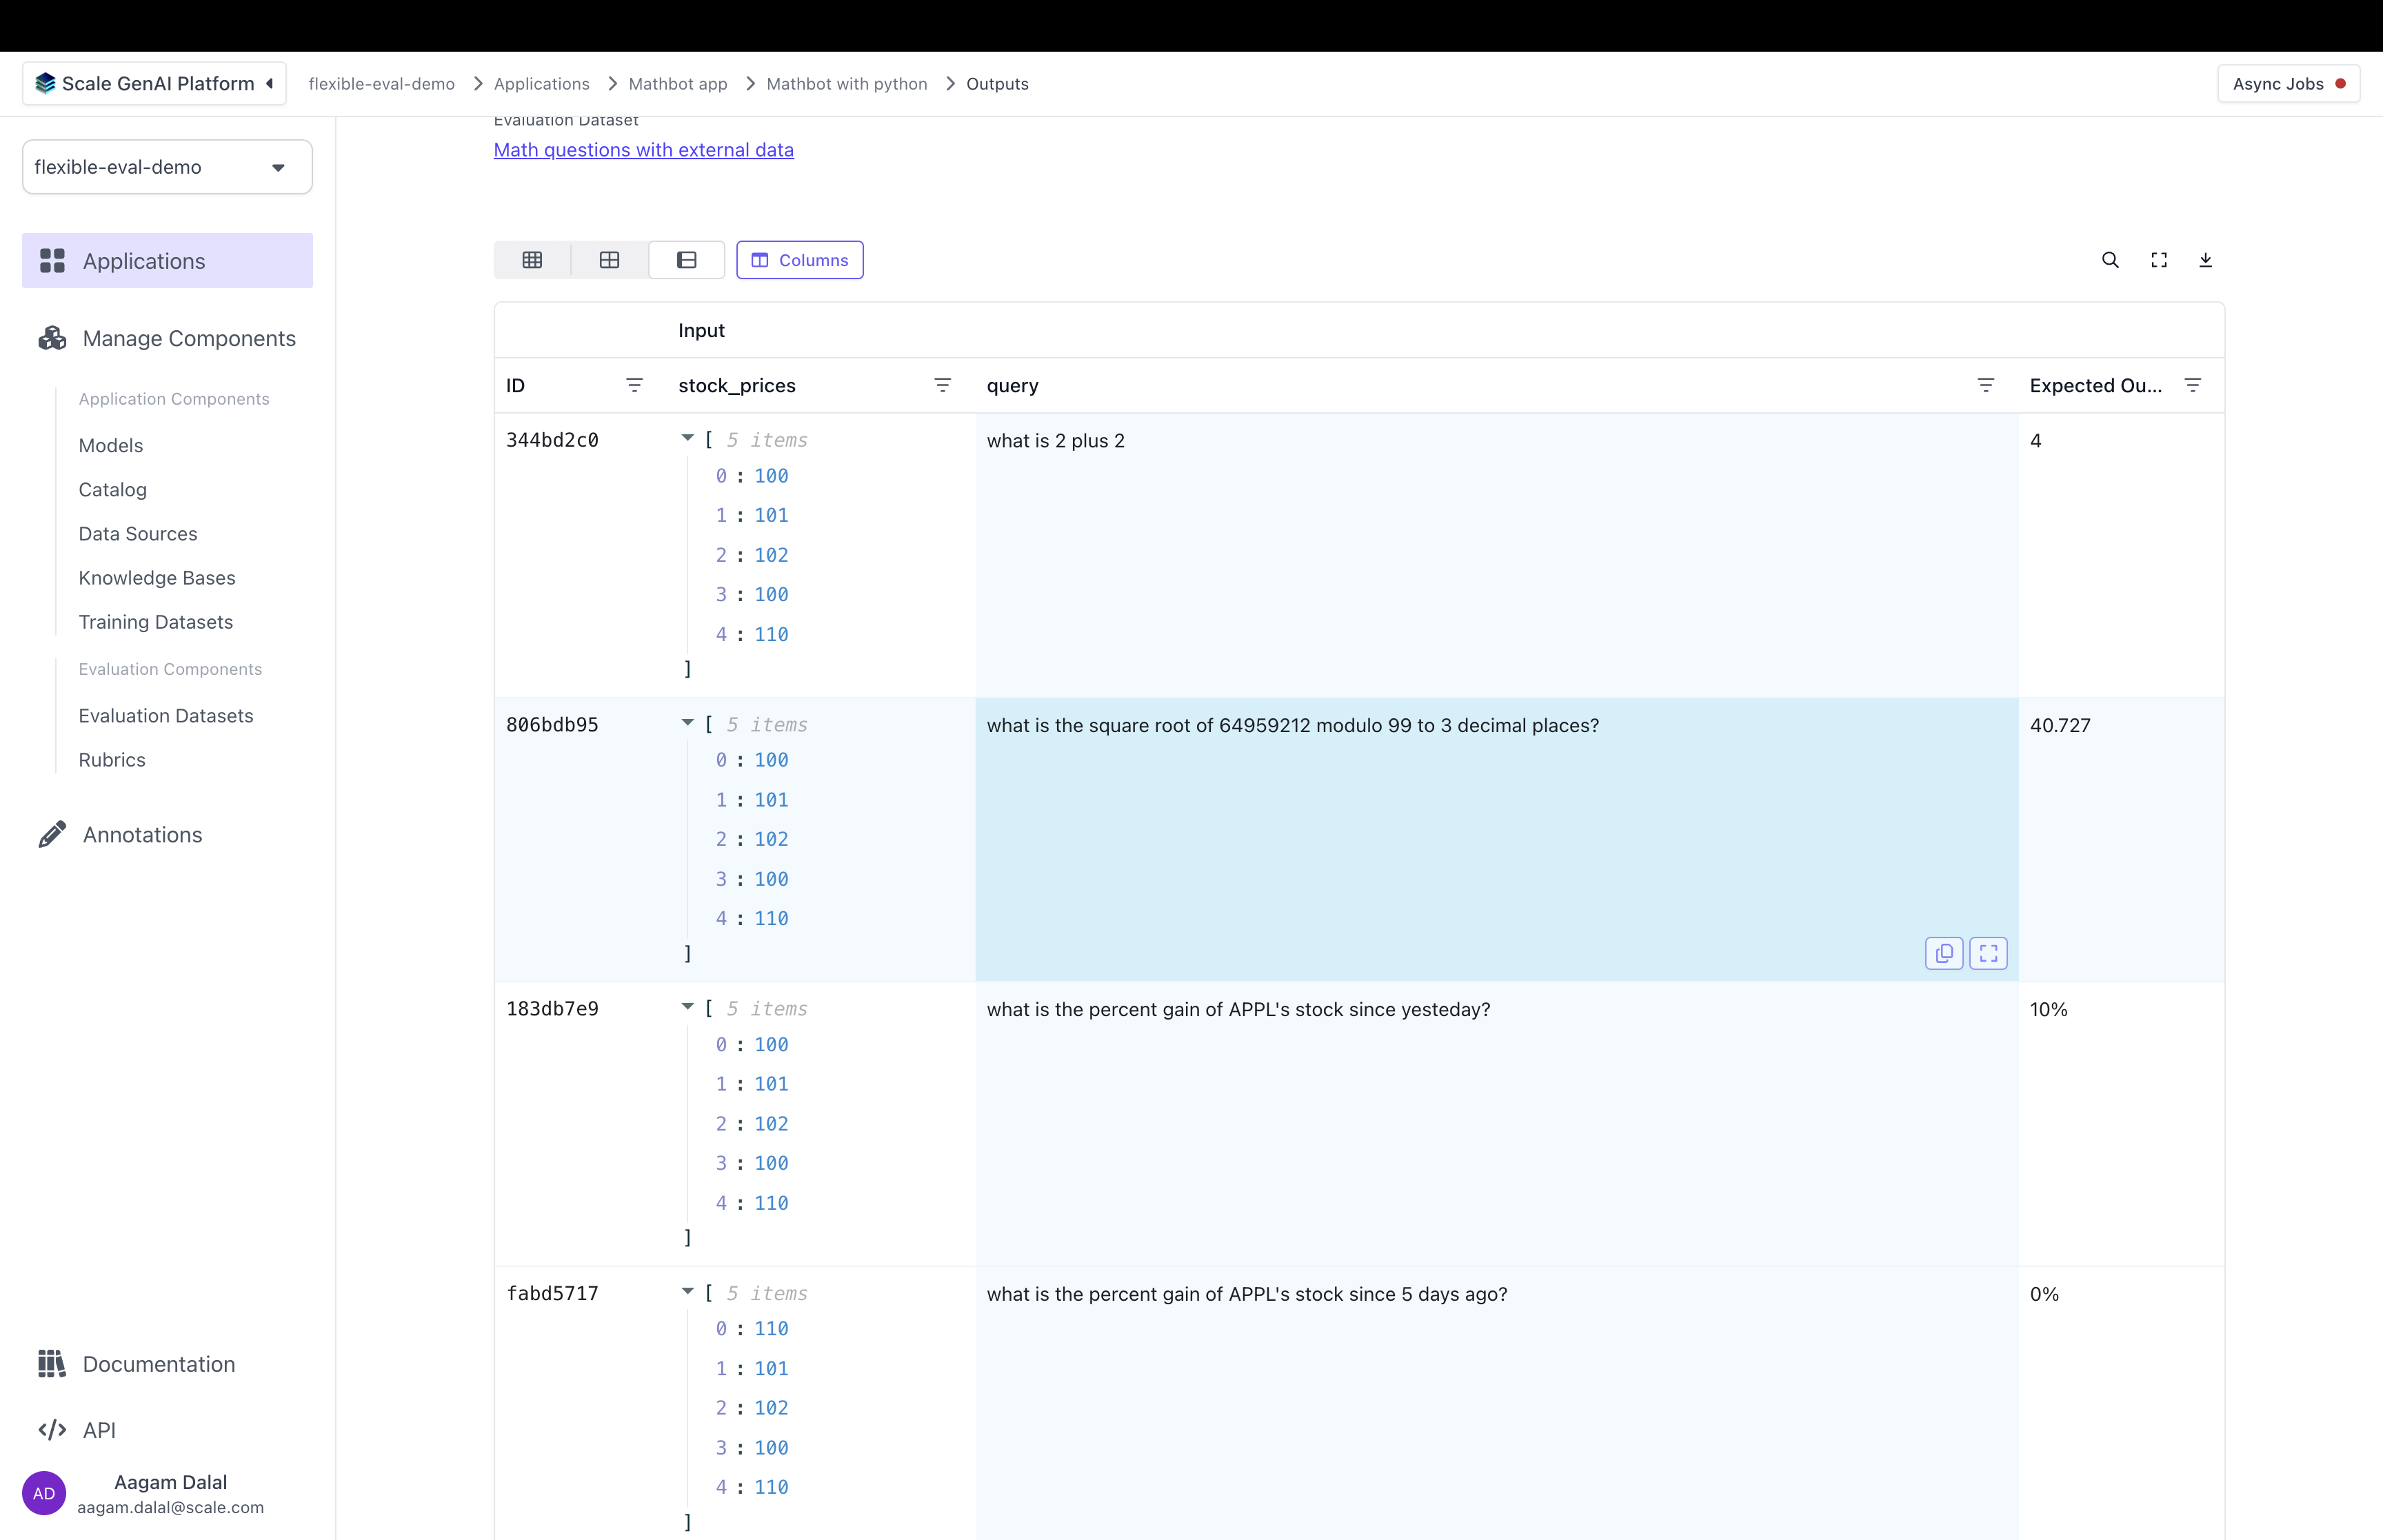
📘 Get code for this guide
This guide is based off of the Flexible Evaluation Recipe
With Flexible Evaluations, you can evaluate an application variant that has multiple inputs/outputs and multiple steps.
For example, imagine you have an application that can answer math questions using stock data from the last few days to answer questions like “What was the percent change in APPL over the last three days?”.
An evaluation dataset for this application would have two inputs:
query: the question the user asked the applicationstock_prices: A list that stores the stock prices for APPL over the last five days
An evaluation dataset for this application will look like the following:
We can generate outputs for these test cases (see the Flexible Evaluation Recipe for an example!). We can view them in the test case outputs table under our application variant:
Now, the dataset has 2 different inputs, so we would need to configure what the annotators can see. As part of the flexible evaluations process, there’s an object that users can use to tell the platform how to render the annotations UI called an Annotation Configuration. The annotation configuration is can pull data from different part of test case, test case output, and trace (using the data_loc field). You can see the full details of how the annotation configuration works, and how to construct them here.
Because the direction is set to row, the outer array of the components key will be rendered as rows and the inner array is displayed as columns of that row. This configuration is telling the UI to display three rows:
- The first row will have one box showing
queryas the label and the contents ofqueryfrom the dataset in the example above. The second box will show theoutputvalue of thetest_case_outputfrom the variant above. - The second row will show the
current_dateas the label and the contents ofcurrent_datefrom the dataset above. - The third row will show
expected_outputas the title and the contents ofexpected_outputfrom the dataset above.
Here is an example of what the Annotation UI will look like based on this configuration:
Once the evaluation result is complete, you will be able to see the results of the annotation by visiting the evaluations page and clicking on “Table”.
Flexible evaluation runs have many more powerful features. For instance, you can attach traces to the output which are the intermediate steps of the application’s execution, and examine them while annotating. Or you can use a different annotation configuration for different questions.
To learn more, you can move forward to the full guide to flexible evaluation or read the Flexible Evaluation Recipe.

