Overview
The goal of this guide is to help project leads (Admins, Managers, Members) navigate the user interface of the Scale Generative AI platform. We are making rapid improvements to the platform and will keep this page updated as we release new features.Admin Dashboard
An account is simply an organizational unit that is used to isolate resources from one another in Scale GP. It can be used to represent a team, a use case, or simply a namespace for a specific project. To view accounts, click “Admin” on the left side panel, and click the “Accounts” tab.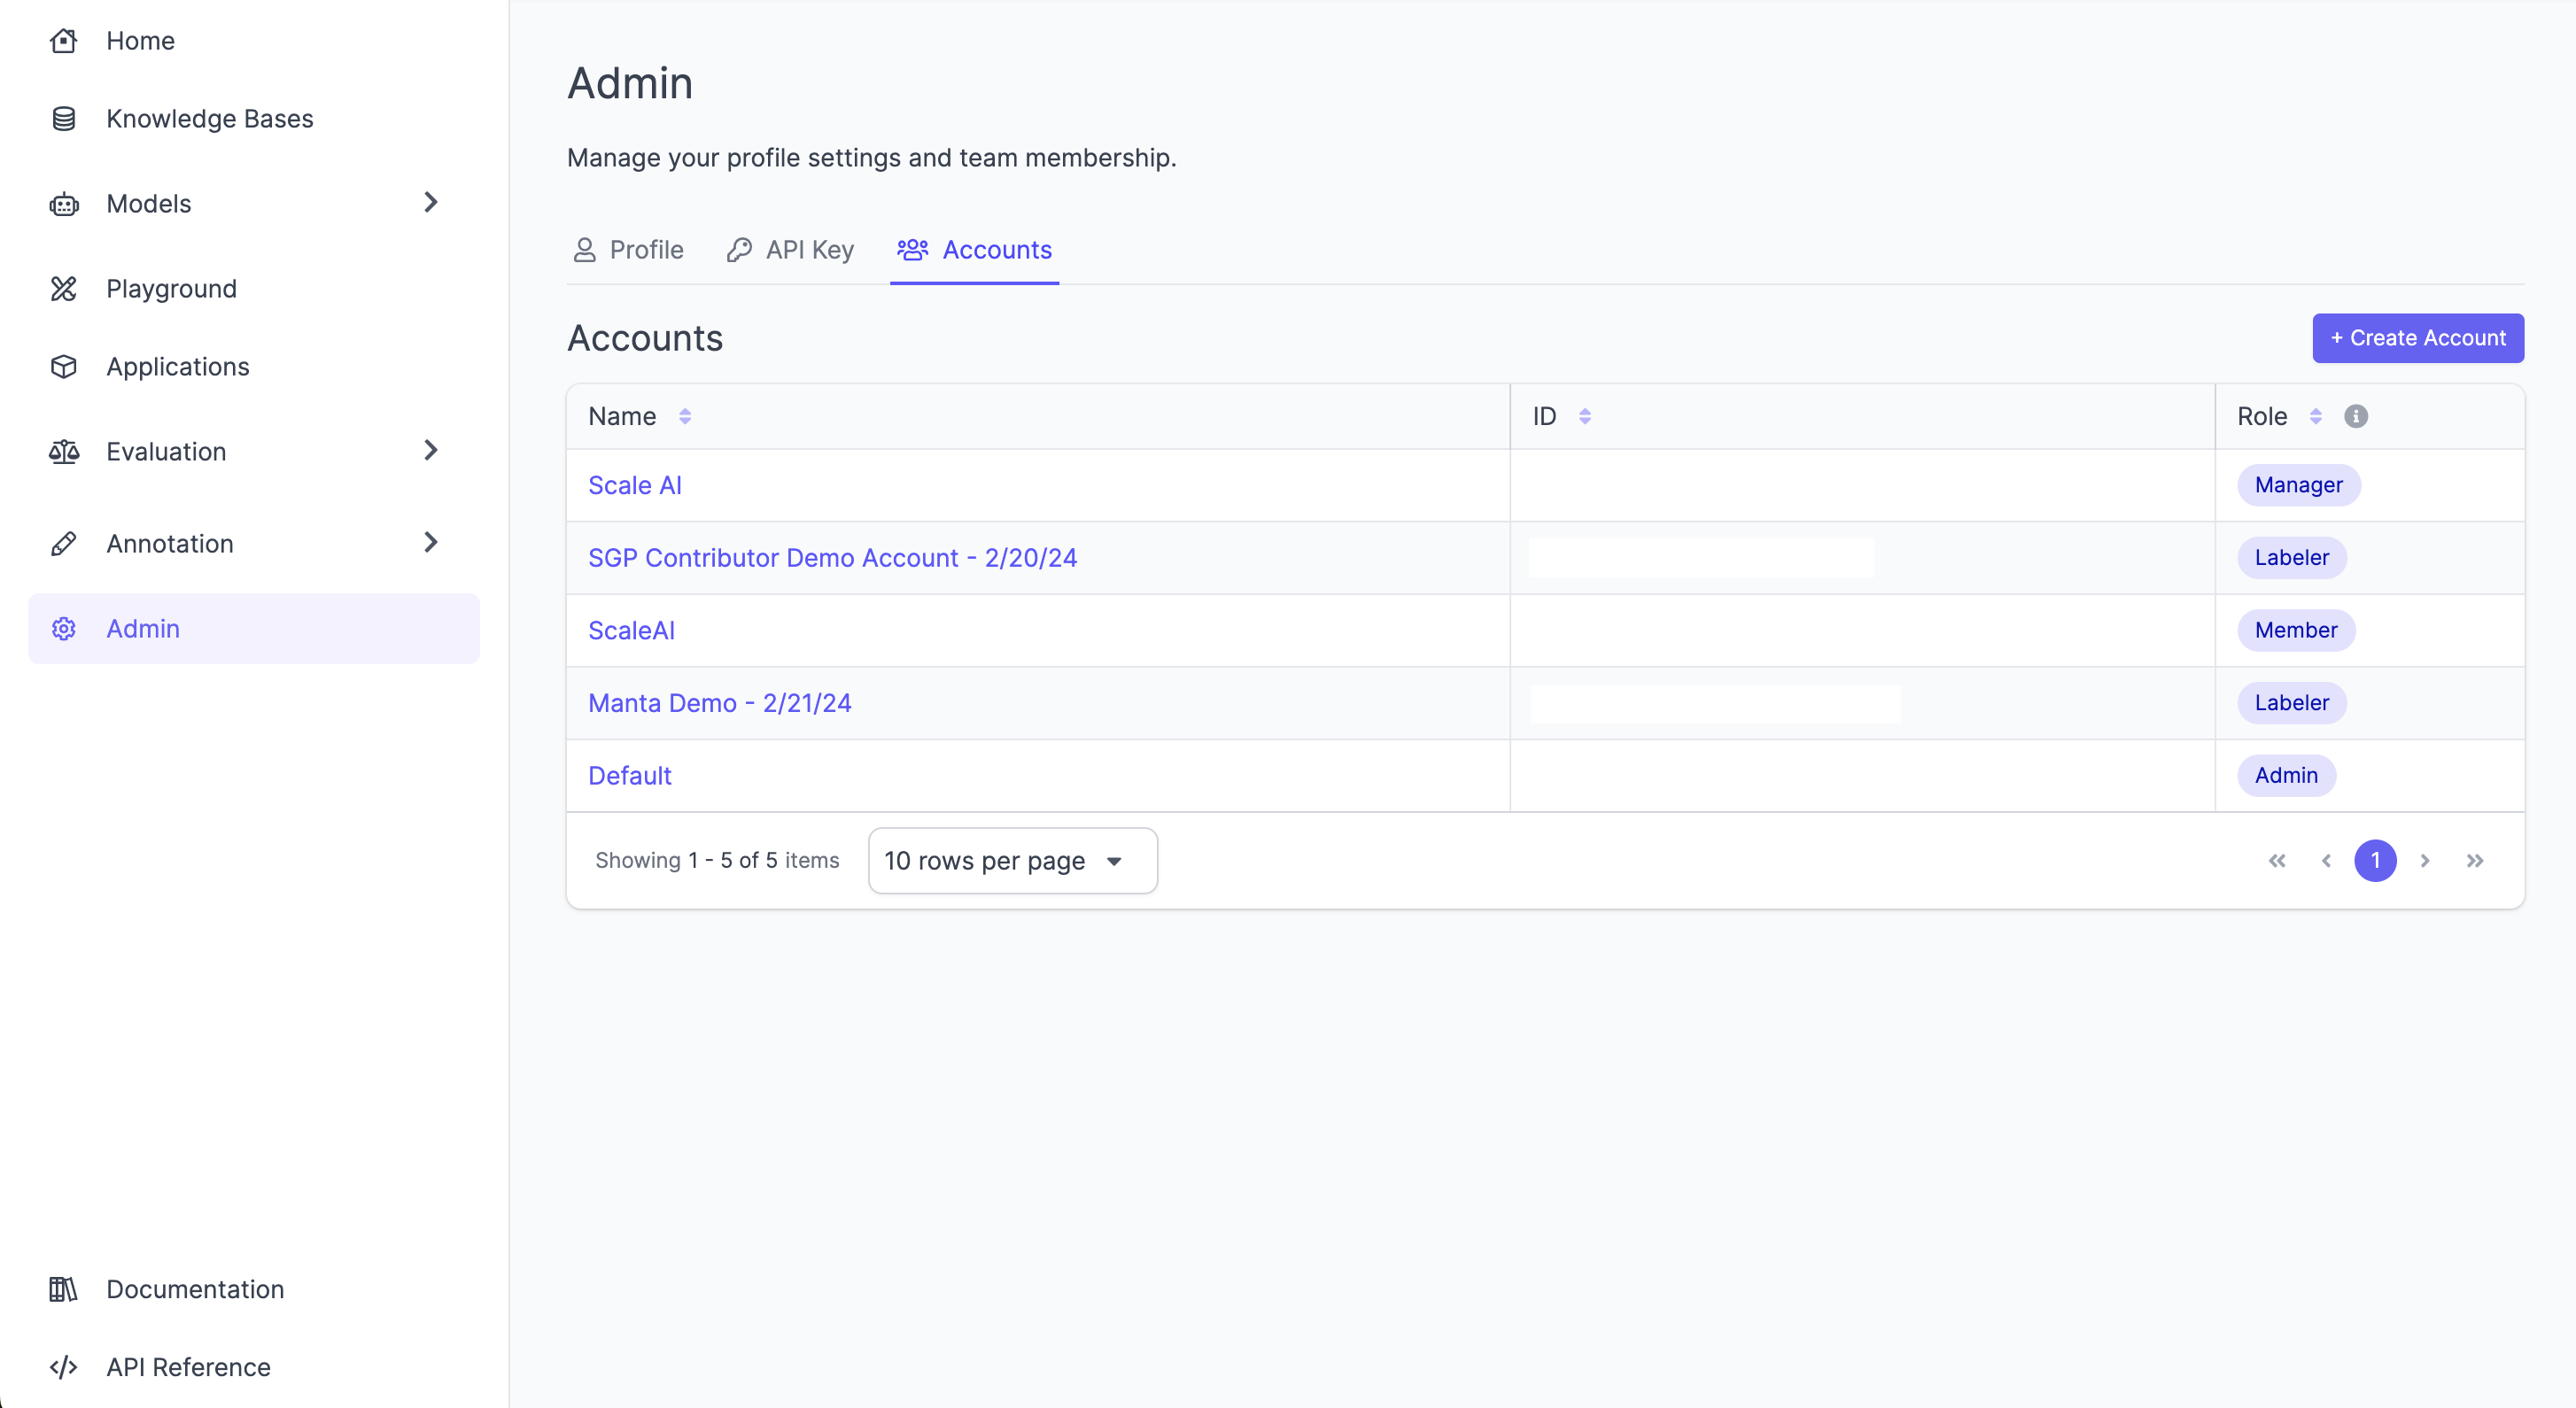
Register a New User
All new users are registered with Scale GP automatically by your company’s SAML provider when they first visit the Scale GP app. If a user would like to gain access to the application, simply navigate to the homepage. The homepage URL will have the following syntax. Your Scale GP representative will have given this URL to an administrator at your company. Please reach out to them for the full URL.https://app.<your_workspace_id>.workspace.egp.scale.com
Multi-Tenant Scale GP UsersIf you are demoing Scale GP using the multi-tenant Scale-hosted version of our product, the url is https://app.sgp.scale.com and your username / login information will have been given to you by a Scale representative.
Adding a user to a specific account
Prerequisites- The user must have first registered by going to the app themselves- The person adding the user to the account must be an “admin” or “manager” of the account.
- Navigate to the “Accounts” tab
- Click an account
- Click the “Add User” button and enter the user’s email address
- A success banner should appear saying the user was successfully added
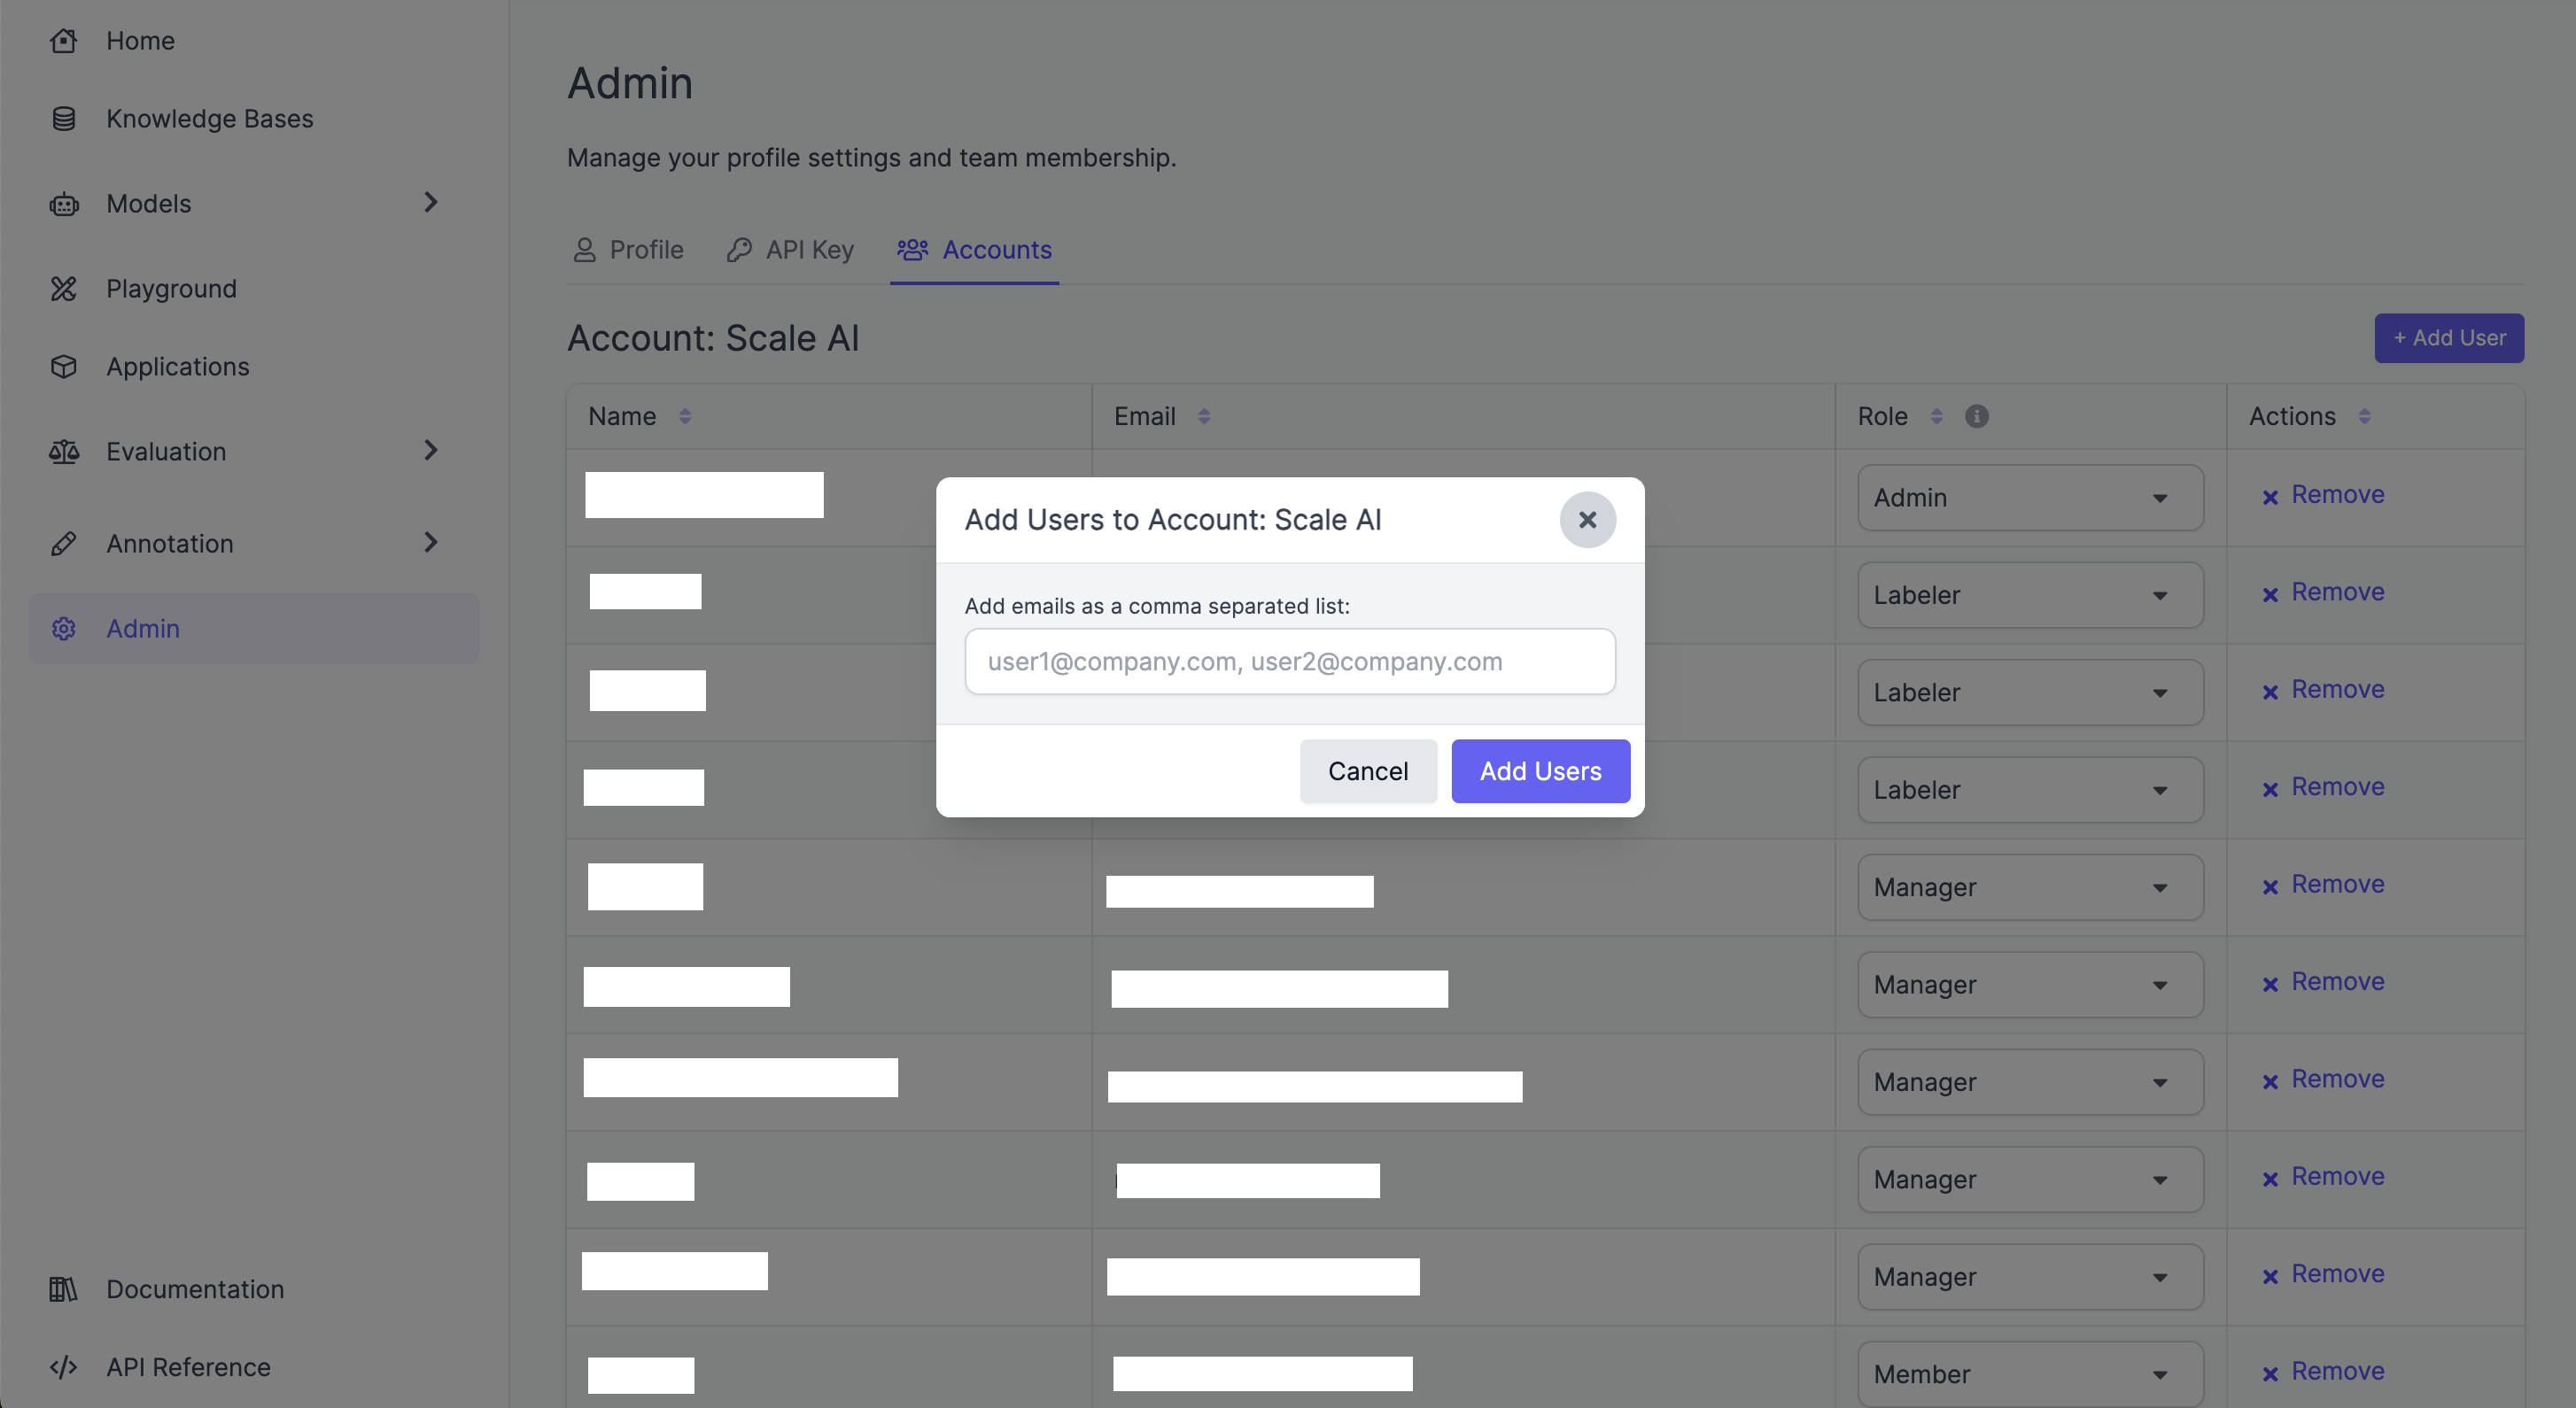
Noteif an error occurs to add a user to an account, it’s likely that they did not first access the site themselves. Please instruct them to do so.
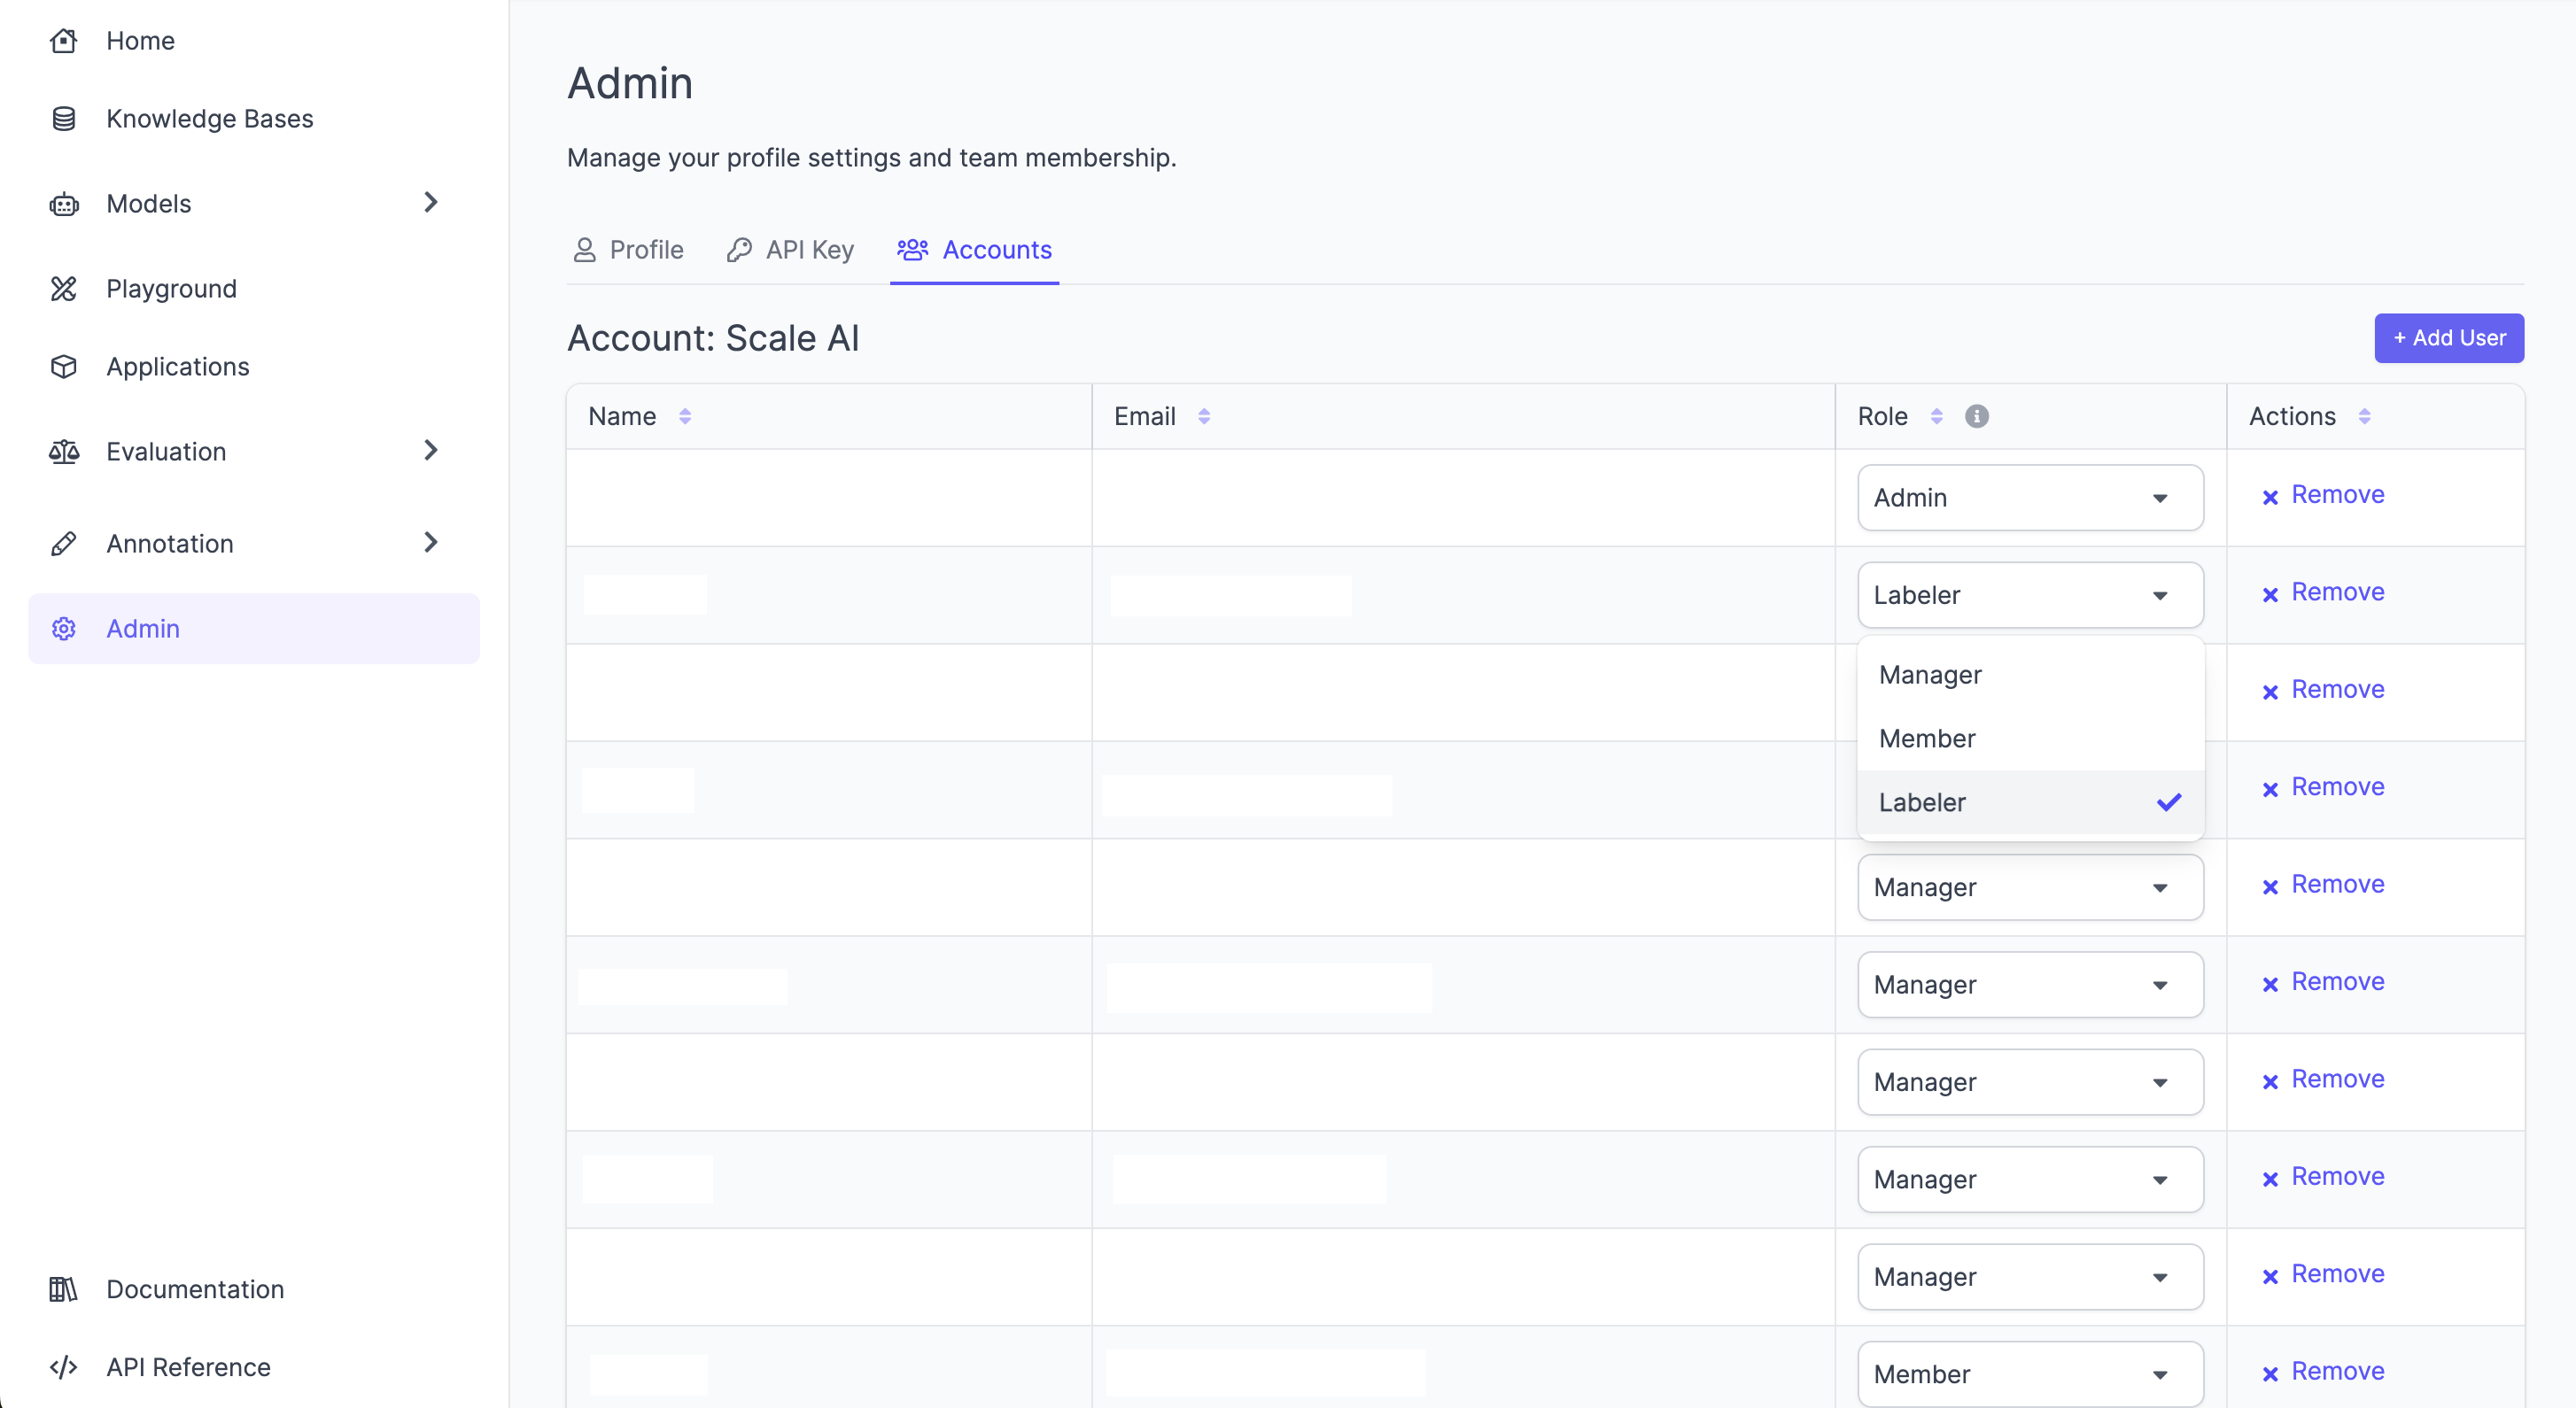
Change a users’ role
- Navigate to the “Accounts” tab
- Click an account
- Update the user’s role in the “role column”
Role Definitions
These are the permissions we will grant to each of the account level roles. Note that this will likely change in the future and we can update the doc accordingly.Admin/Manager
- Add user to account / approve access requests
- Change a user’s role for an account
- Create, view, update, and delete SGP resources (applications, evaluations, datasets, models, etc.)
- View and install resources (models, etc.) from component catalog
- Audit evaluation tasks
- Manage contributors and evaluation analytics
- All permissions of Editor, Members and Labelers
Editor
- Create, view, update, and delete SGP resources (applications, evaluations, datasets, models, etc.)
- View and install resources (models, etc.) from component catalog
- Audit evaluation tasks
- Manage contributors and evaluation analytics
- All permissions of Members and Labelers
Member
- View/Use existing SGP resources (applications, evaluations, datasets, models, etc.)
- View and rotate one’s own API key
- All permissions of Labelers
Labeler
- View and evaluate tasks
- Request access to an account
- Annotations Dashboard (Includes Auditing Instructions)
NoteThe views for evaluations will look different for contributors versus admins/managers. To learn more about what the experience looks like for contributors, please refer to the contributors quick guide. This doc will focus on the admin/manager experience.
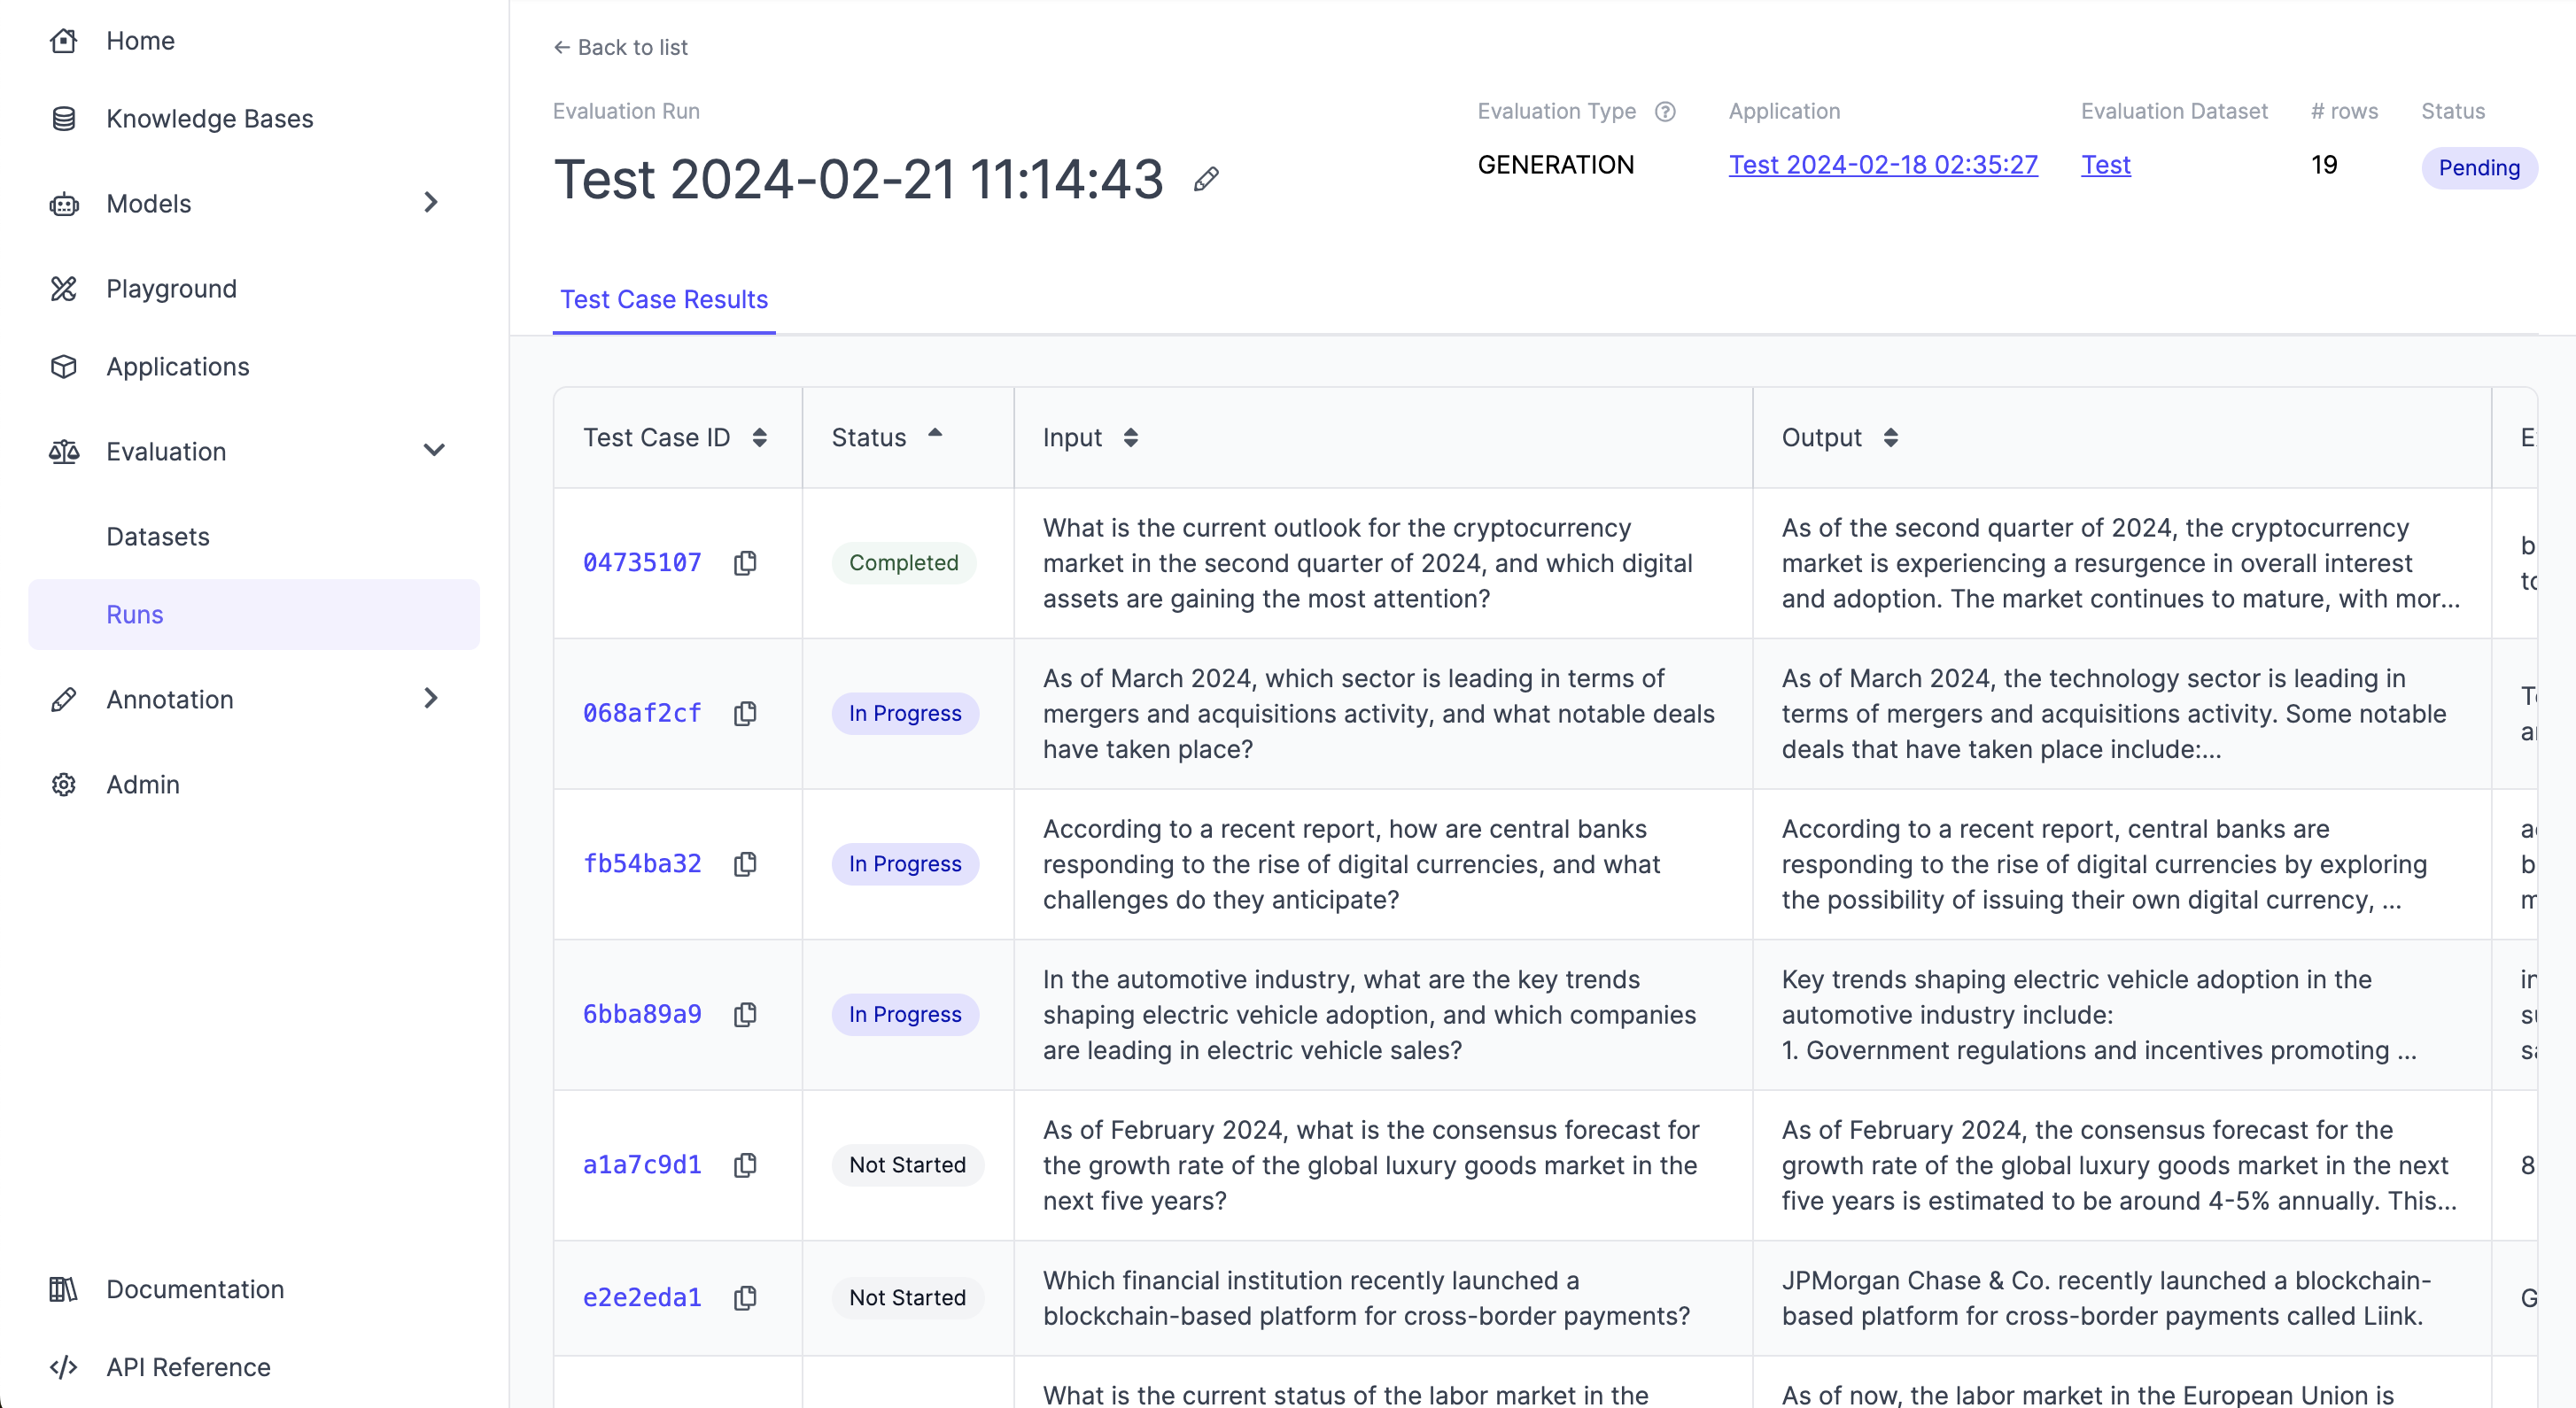
Evaluation > Evaluation Runs
An evaluation run combines a set of test cases with the outputs for these test cases of a GenAI application and sends these off as a batch of tasks to be evaluated based on a set of evaluation criteria. You can create a new evaluation by clicking the “New Evaluation” button.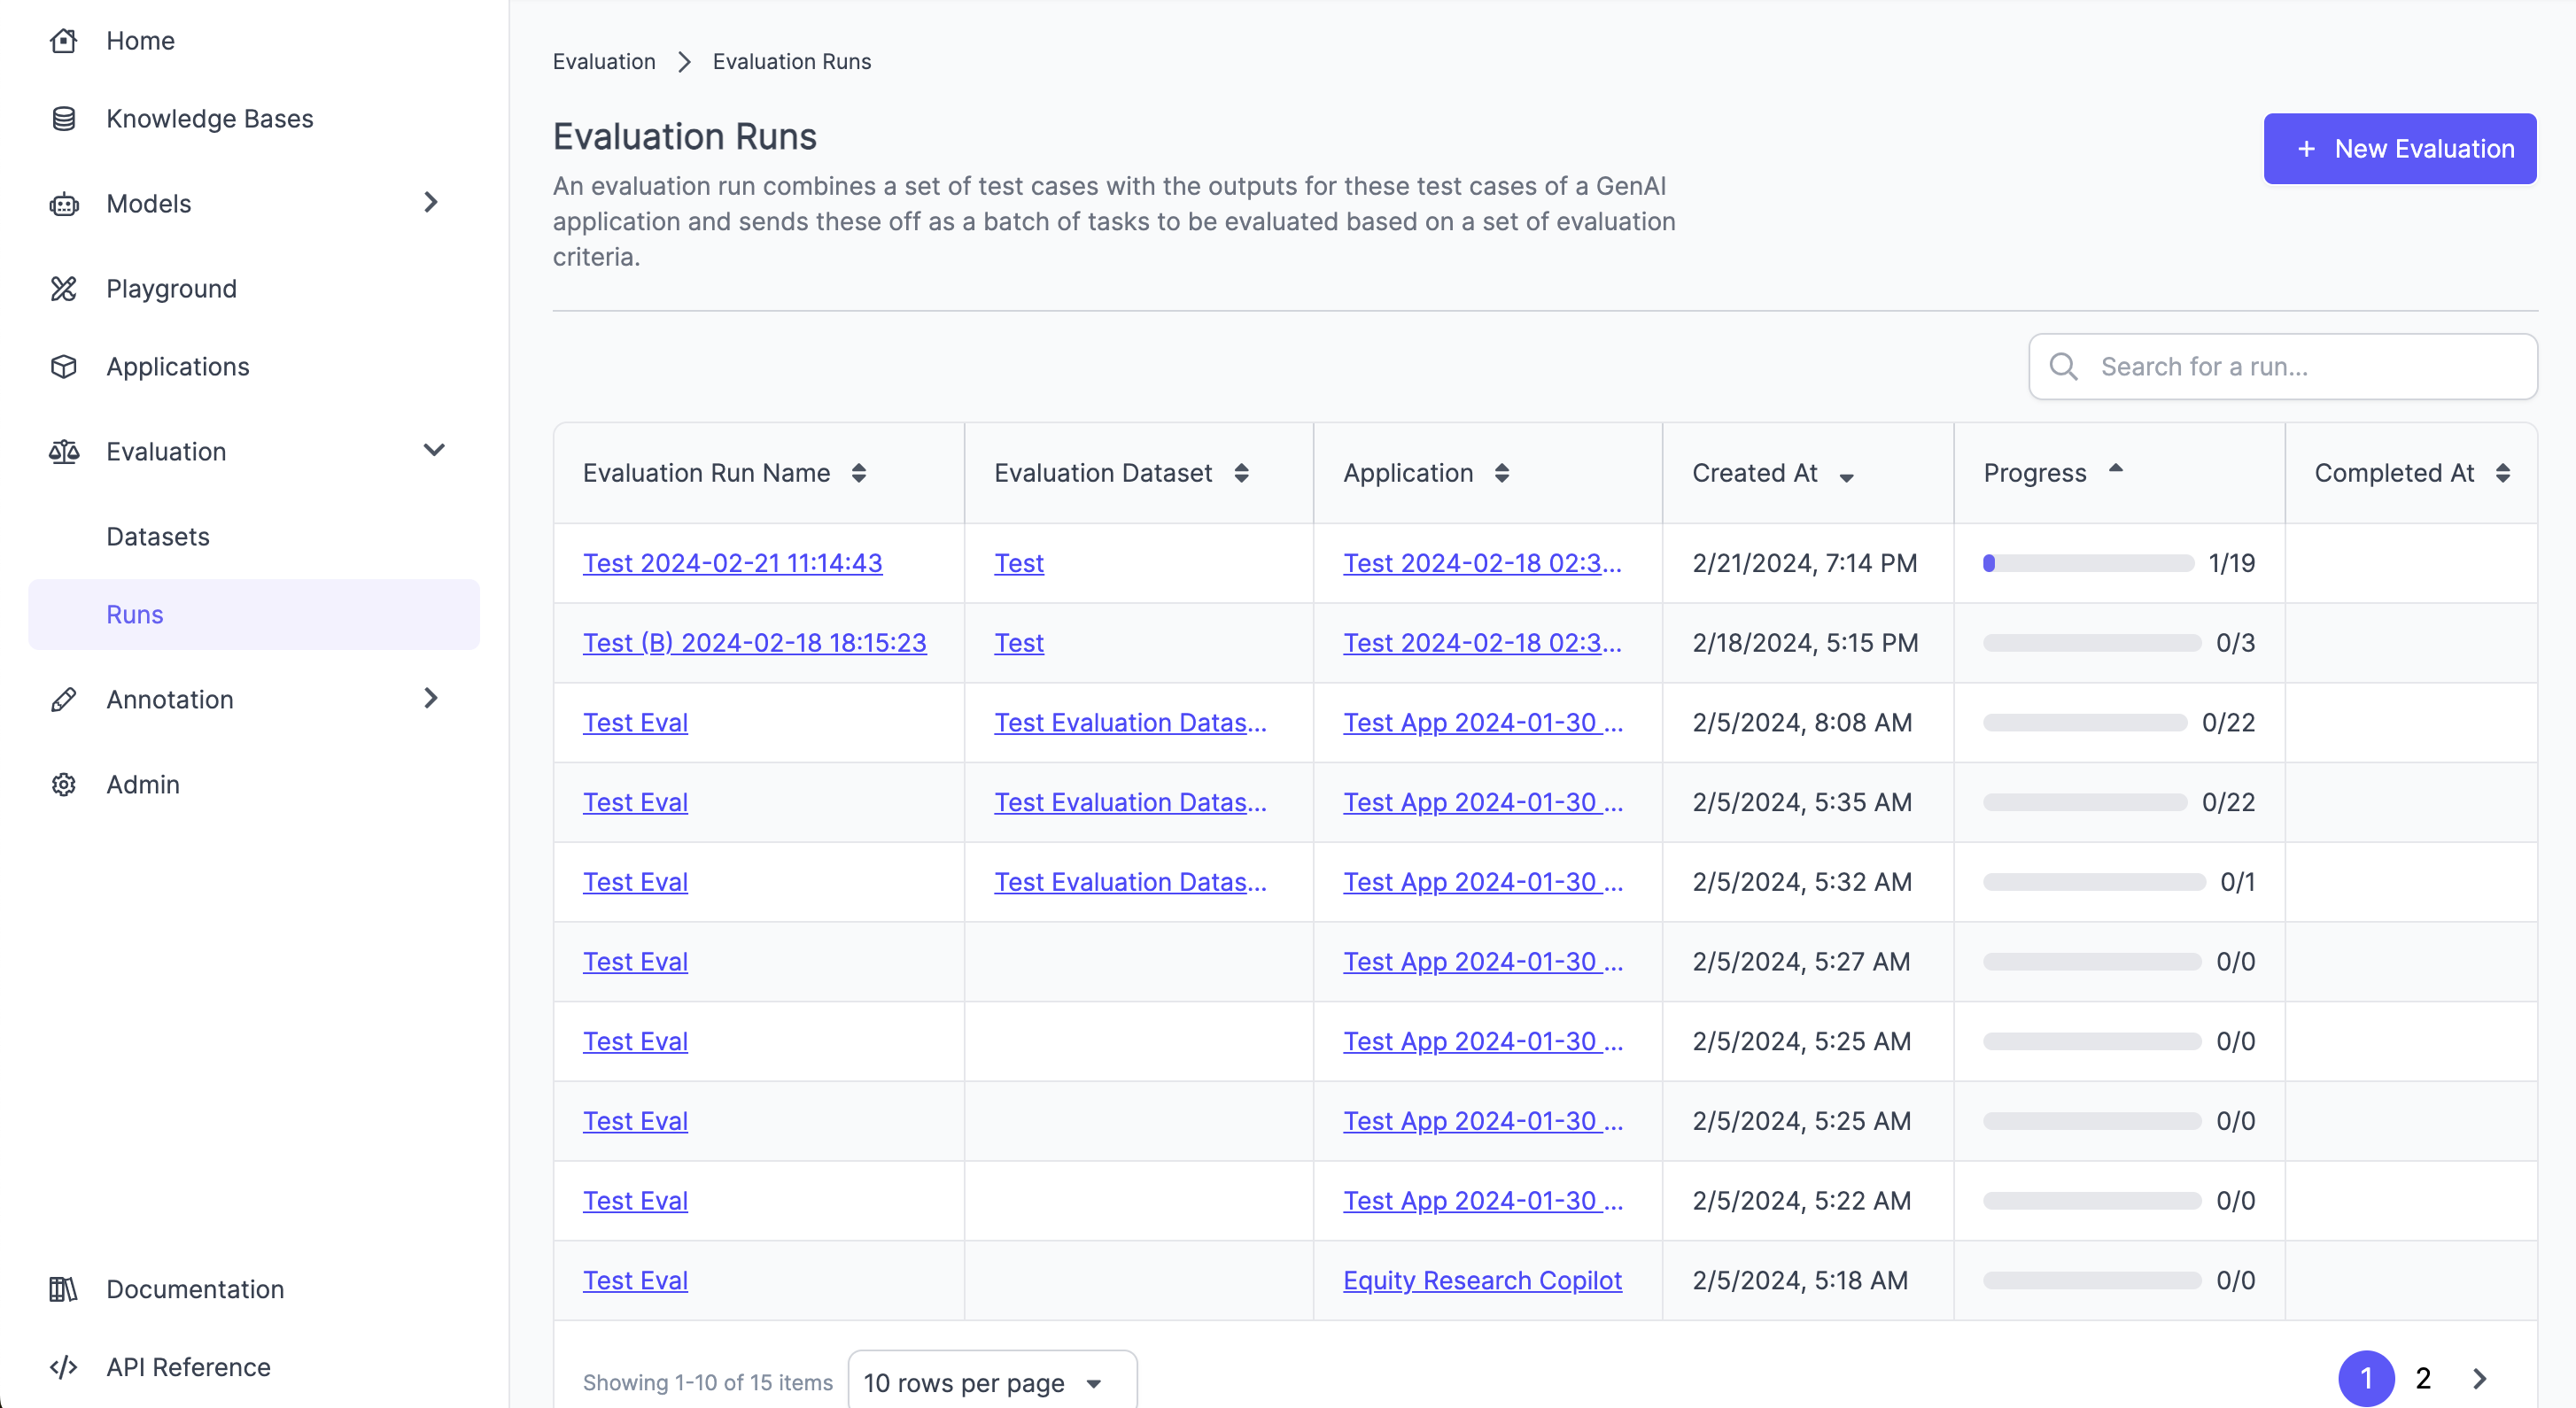
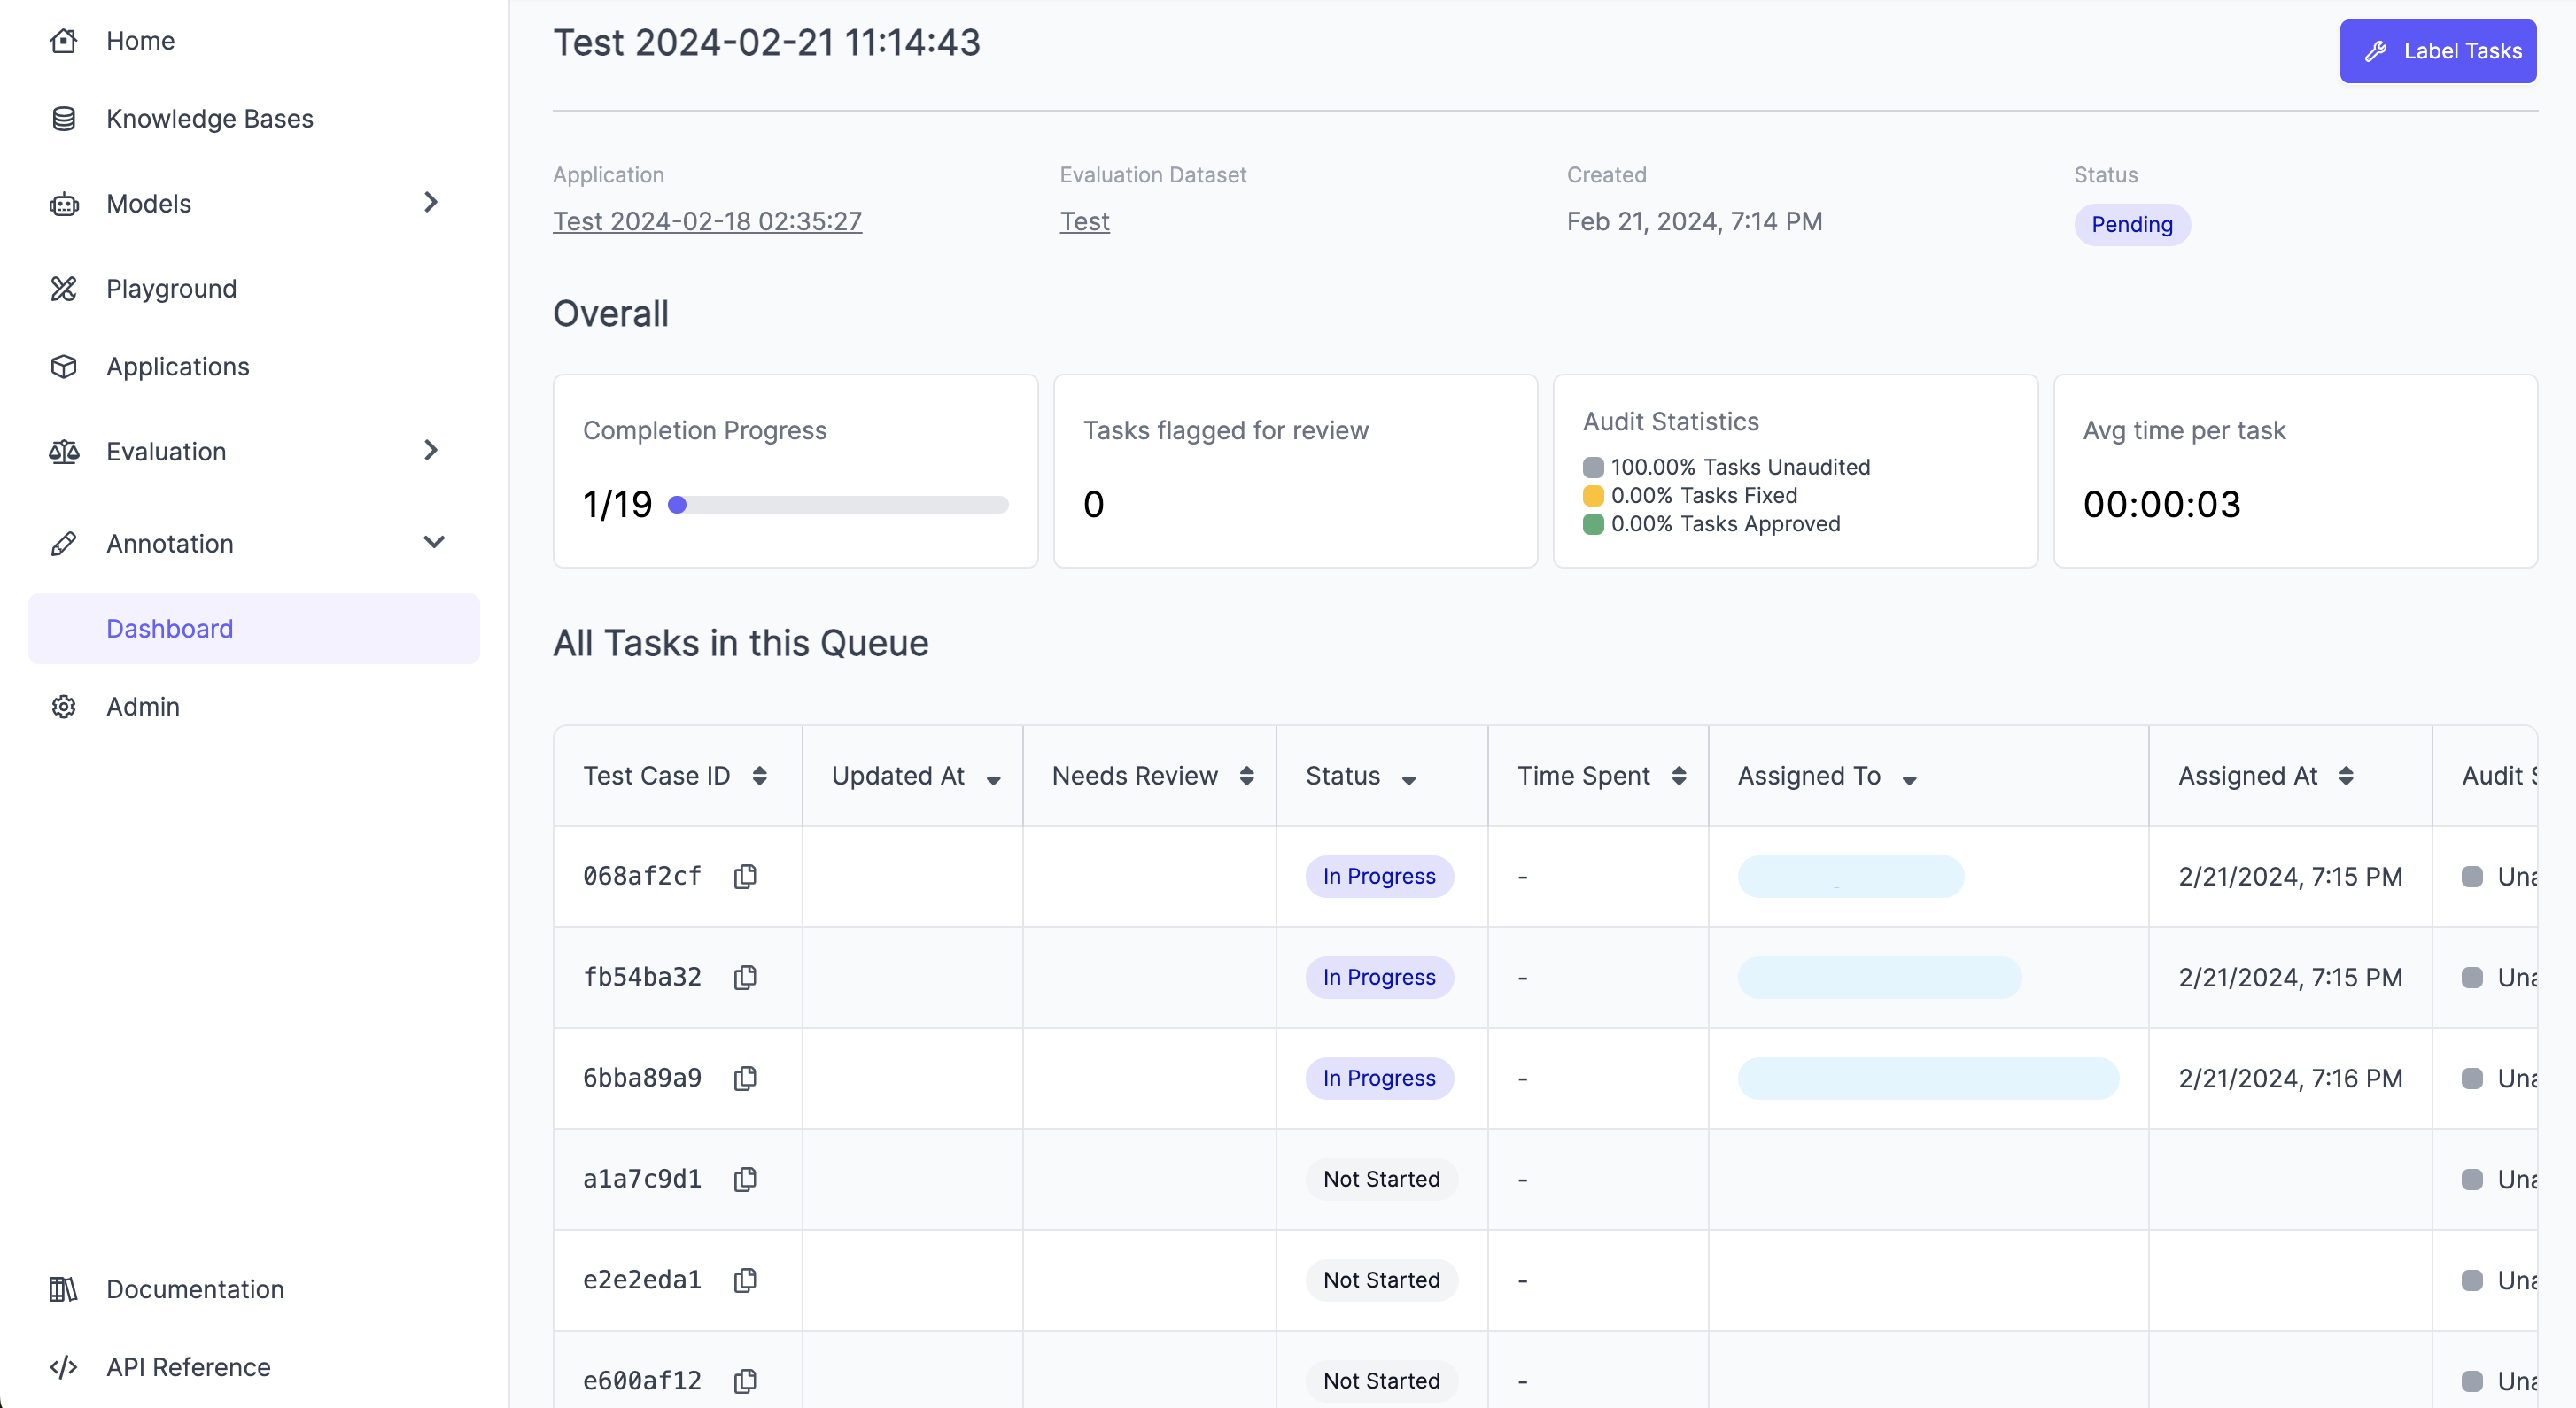
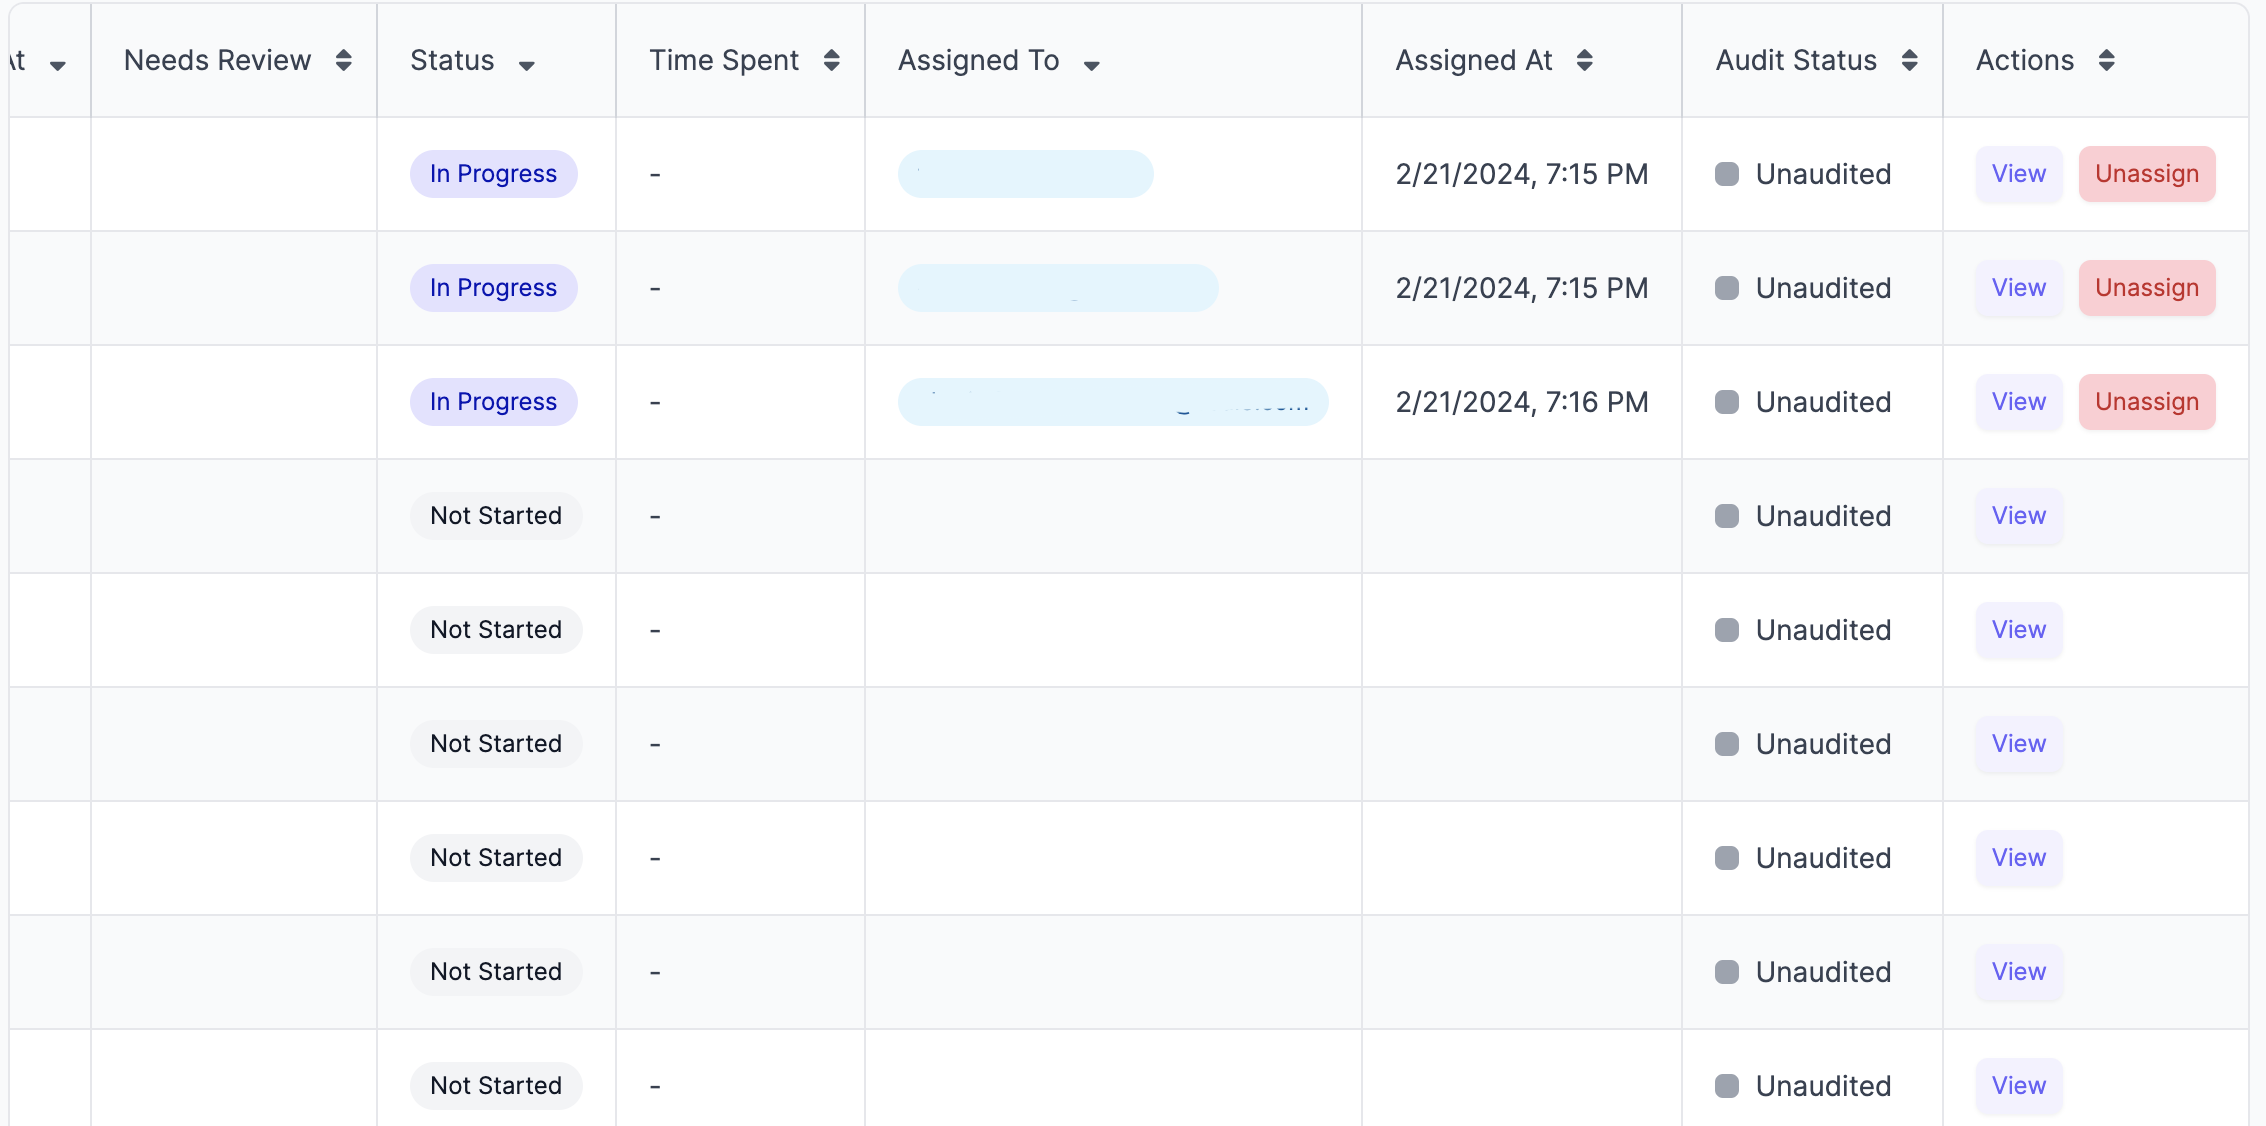
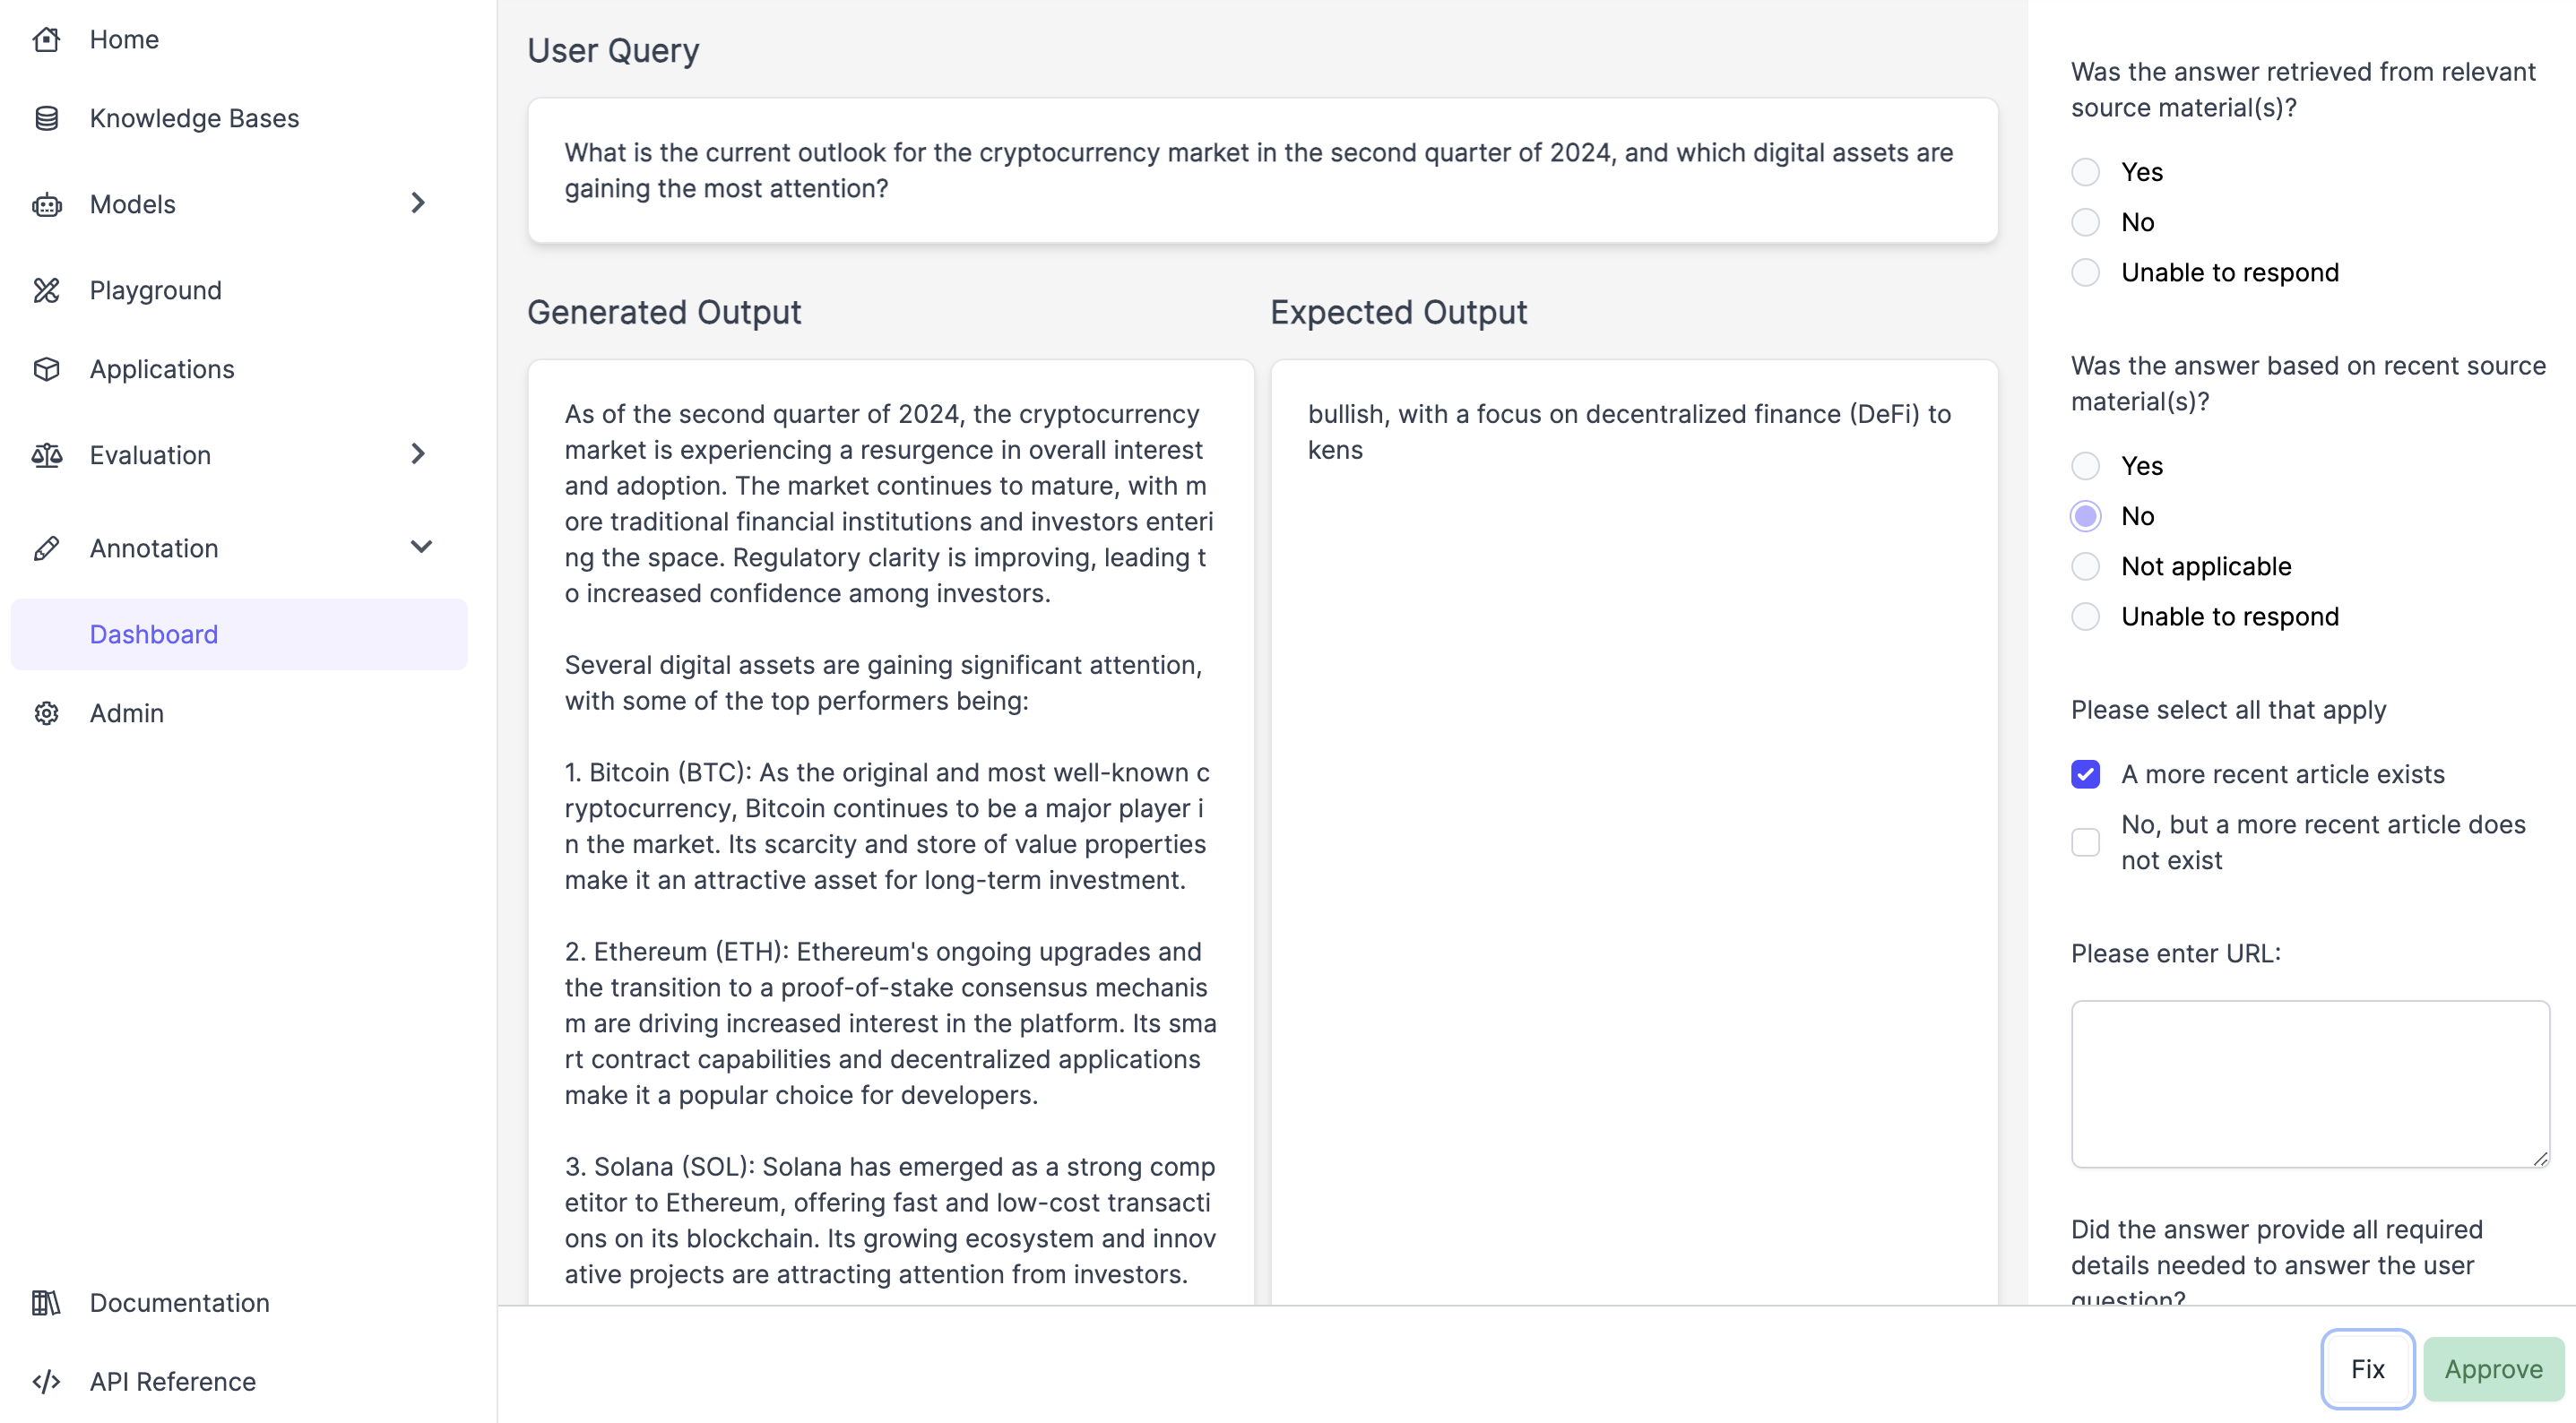
View Contributor Progress and Audit Evaluations
Click the “Annotations” tab on the left sidebar. If there are multiple projects available, they will all appear in this view. Users can start labeling a specific project by clicking on “Start Labeling.” Under the Contributor Dashboard, you will see two cards:- Evaluations in Progress
- Evaluations Completed
- Task Dashboard
- Start Labeling
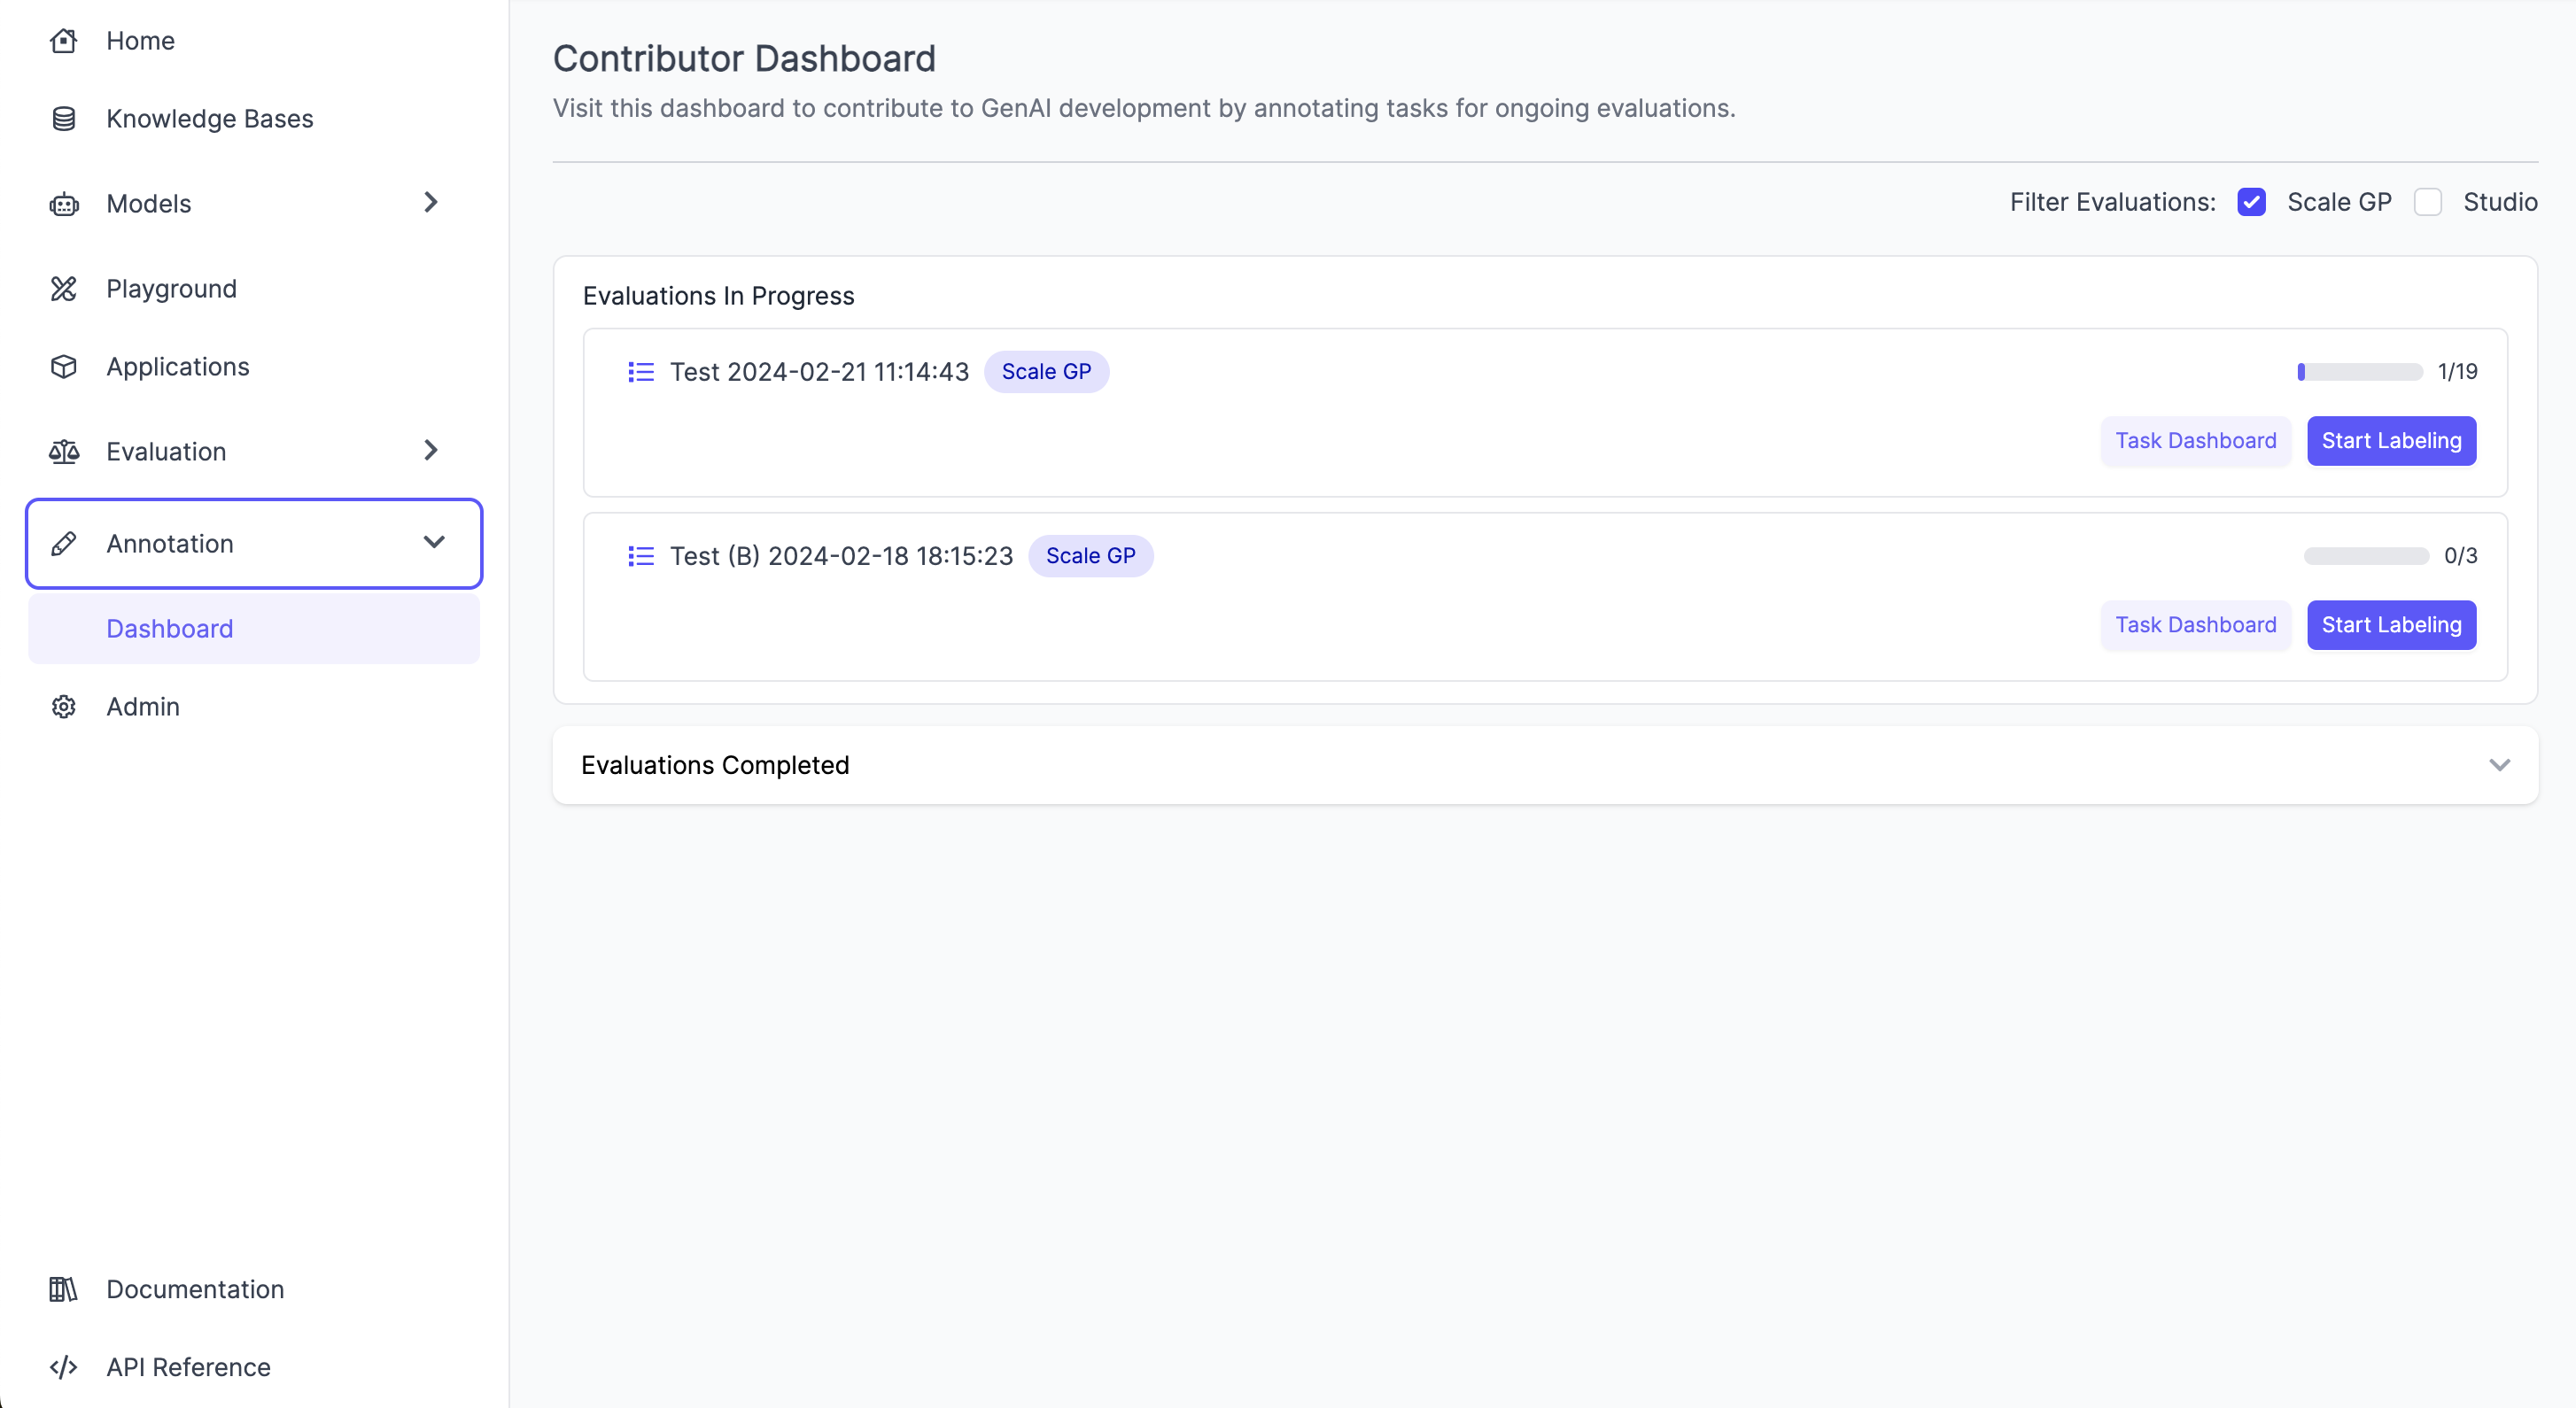
- Project throughput status (# completed / # total evaluations)
- # Tasks flagged for review
-
Audit statistics (You can use this as a preliminary indication of quality)
- % of tasks unaudited, accepted and fixed by the auditing team.
- Average time per task