Connecting a Data Source
Data sources can be connected here inside the platform. How they are connected depends on the data source that the user chooses. Currently, GenAI Platform supports the following sources:- AWS S3
- Google Drive
- Azure Blob Storage
- MS SharePoint
AWS S3
In order to connect a S3 bucket, you need to:- [In AWS] Configure an IAM Role and Trust Relationship.
- [In AWS] Configure an IAM Policy attached to that role to grant S3 privileges.
- [In SGP] Connect your data source.
Configuring an IAM Role
- Navigate to the IAM Service on the AWS Console.
- Select Roles on the left hand navigation pane.
- Select the following configurations:
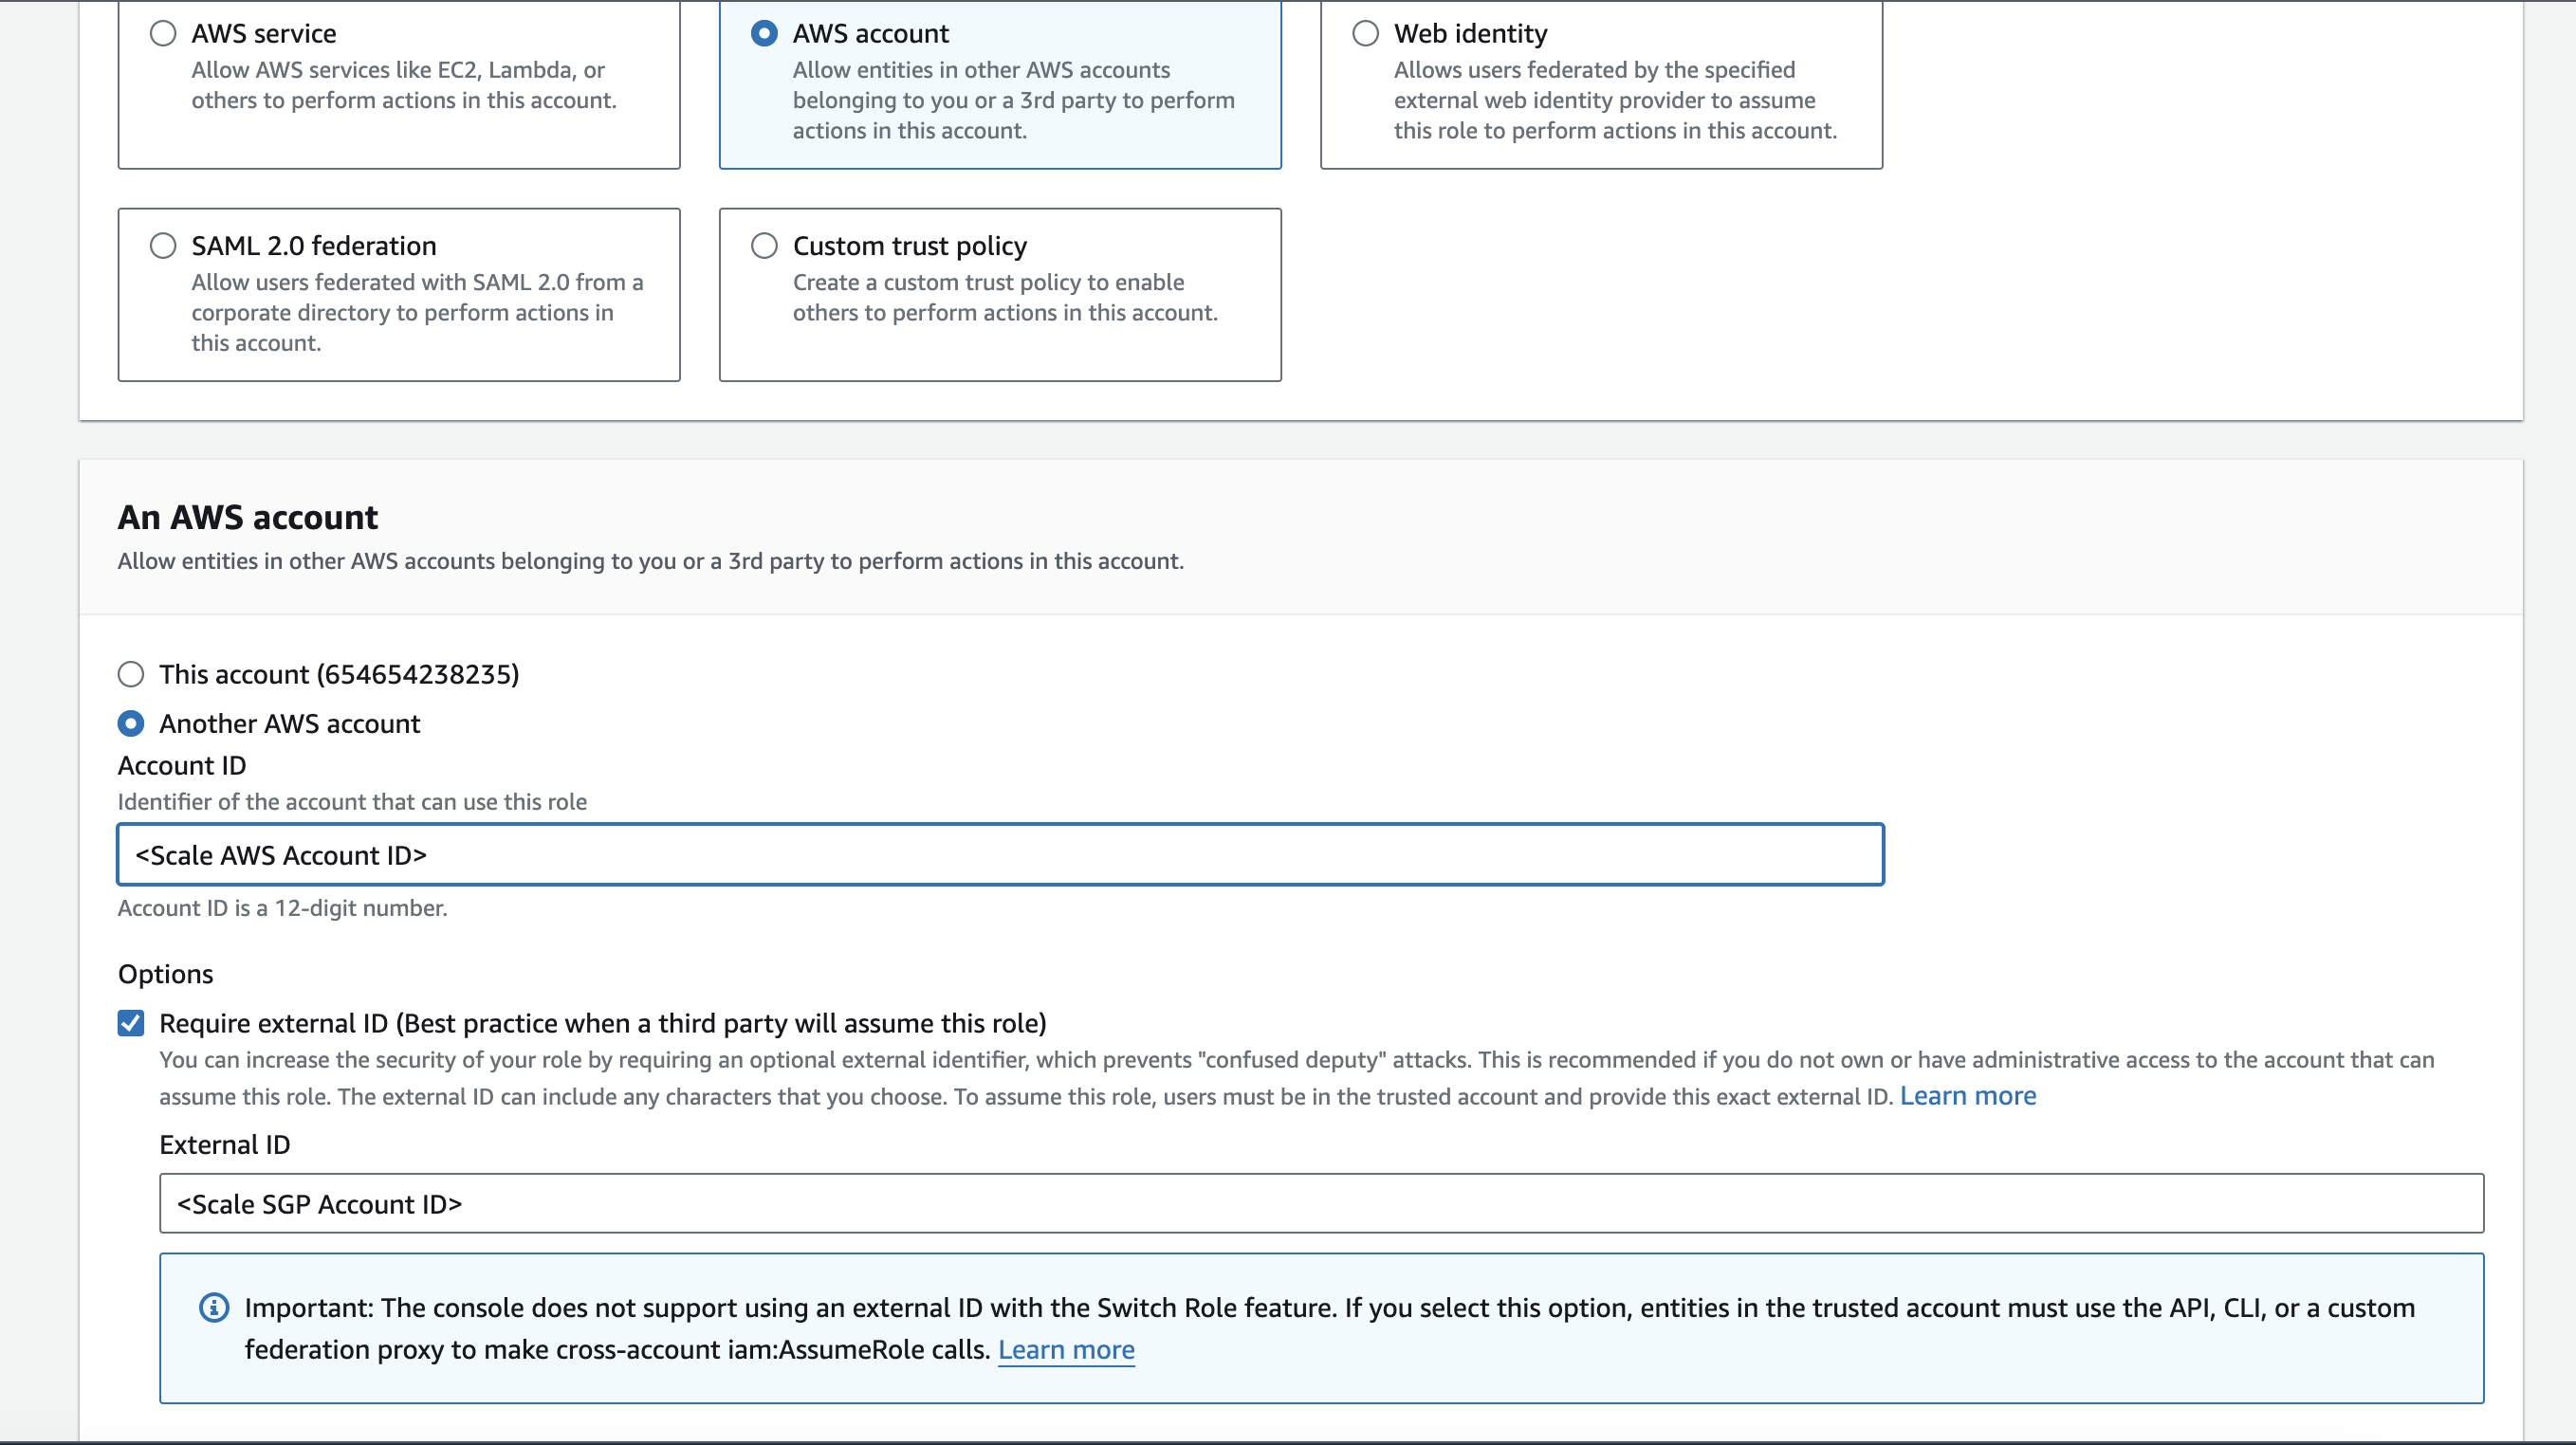
- Create role for AWS Account
- Another AWS account. the Scale AWS Account ID is: 307185671274
- Check the “Require external ID” box
- External ID: (located in SGP below)
The goal of AWS’s external ID is to provide protection against Scale accidentally assuming the role of a different external account. Given this, we map it to your account ID, and do not allow modification of it. You can find more details here.
- Click Next, and you should be able to see a Permissions tab. This maps to the Policies that we will create in the next section. If you already have a policy that matches, then you can attach it directly and skip the next section. Otherwise, just click Next again.
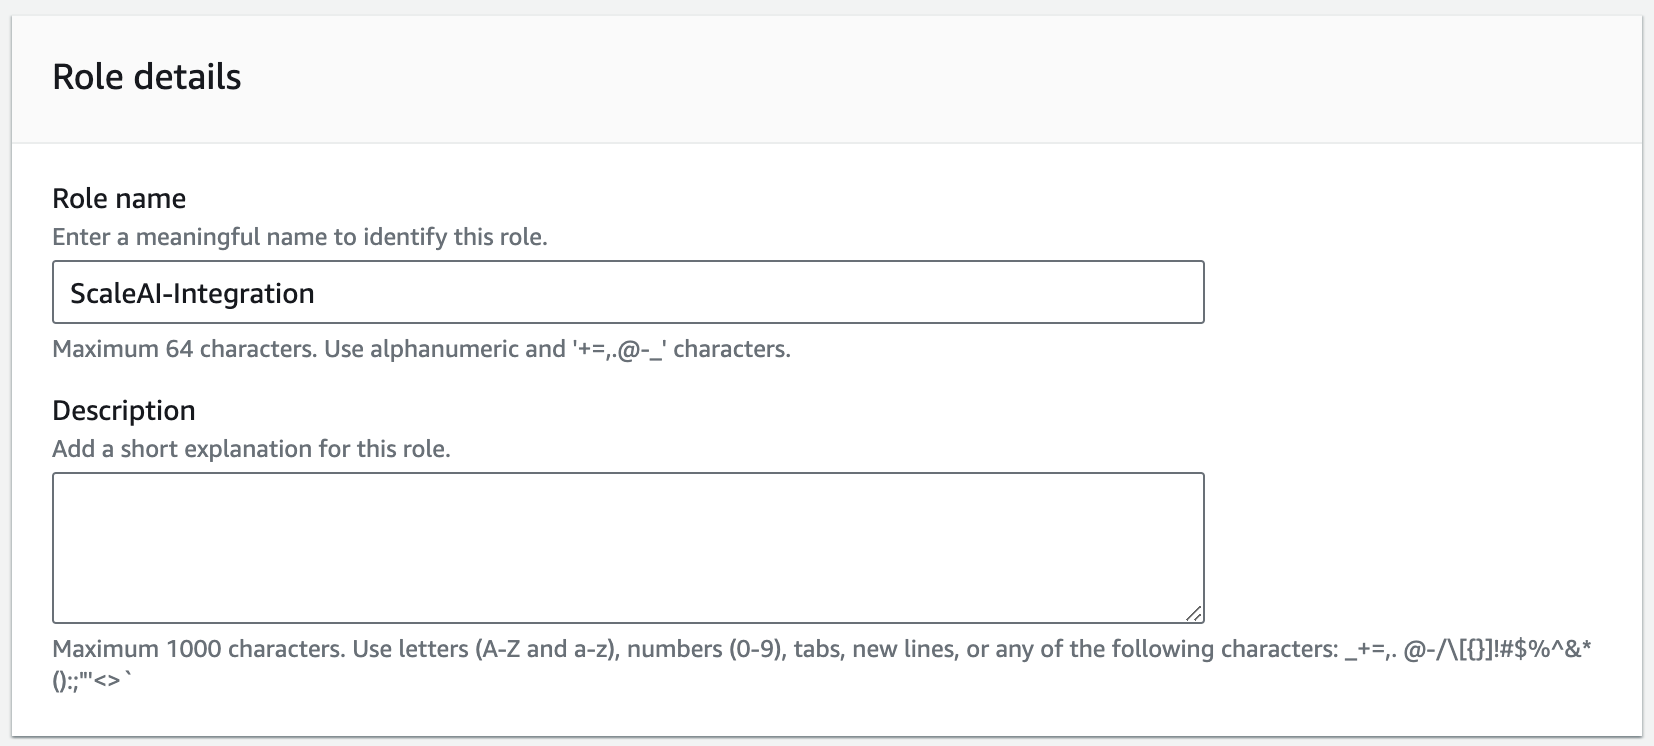
- At the last step, give the role the name ScaleAI-Integration. Below that pane, you should be able to see the generated IAM Trust Policy for the Role.
Sample IAM Role Trust Relationship
Configuring an IAM Policy for the Role
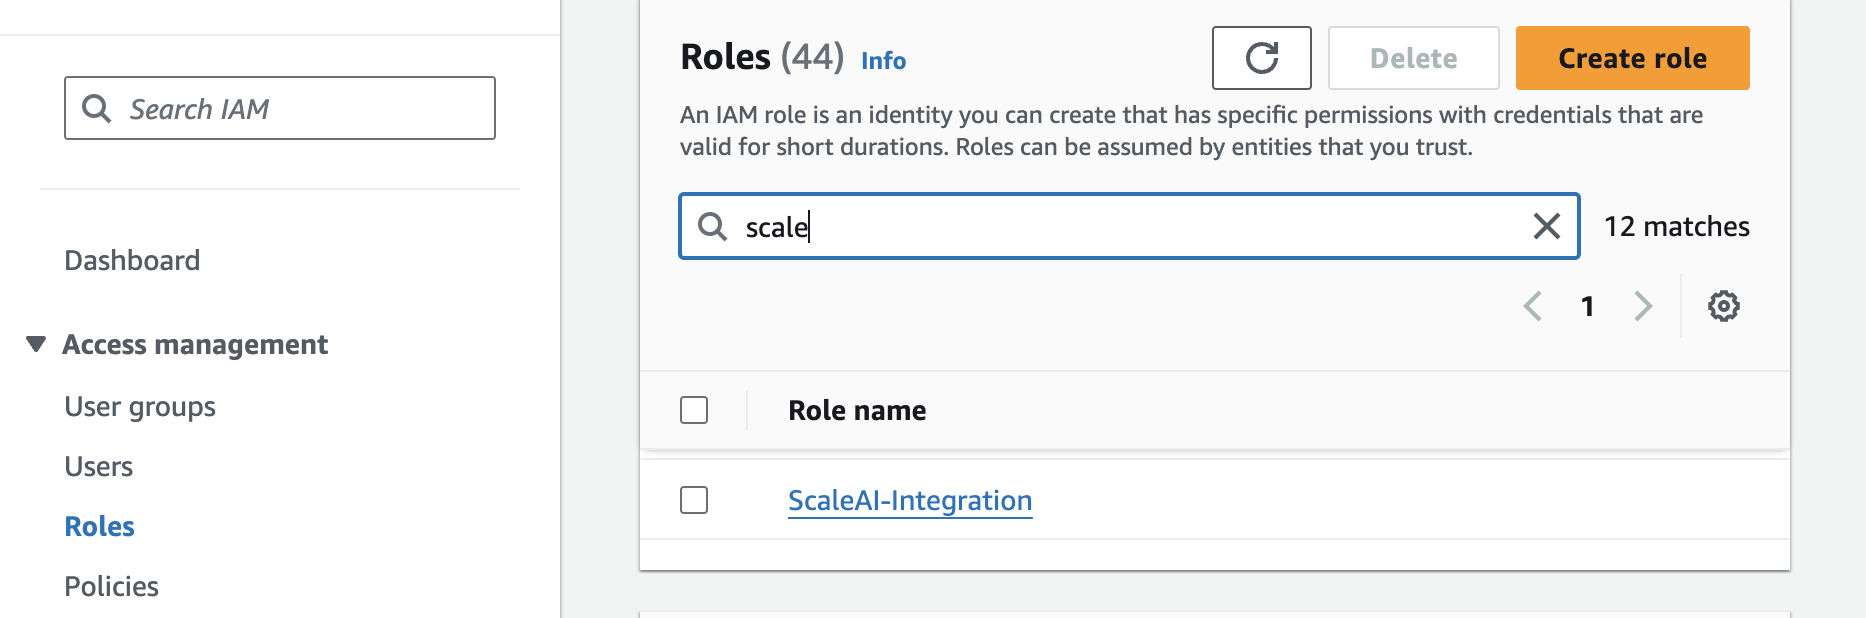
- Navigate back to the Roles tab and click on the ScaleAI-Integration role.
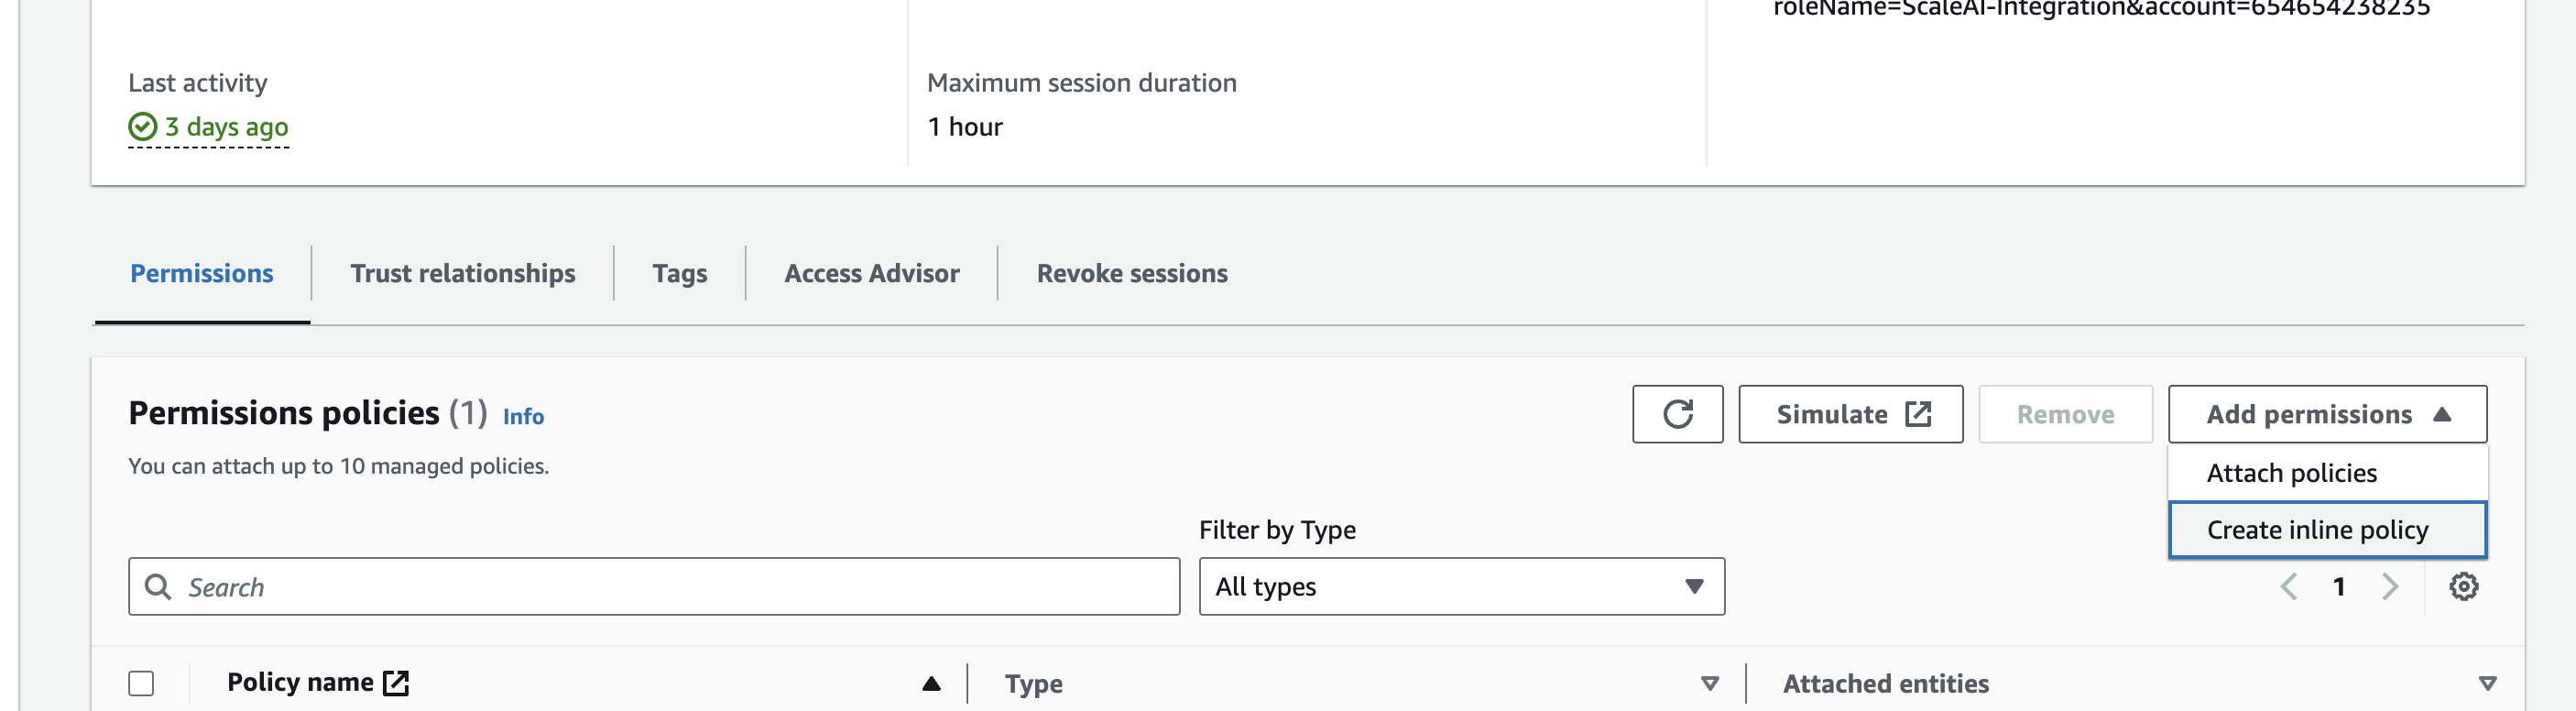
- Go to the block called Permissions Policies. On the right-hand side, select Add Permissions, and then select Create Inline Policy.
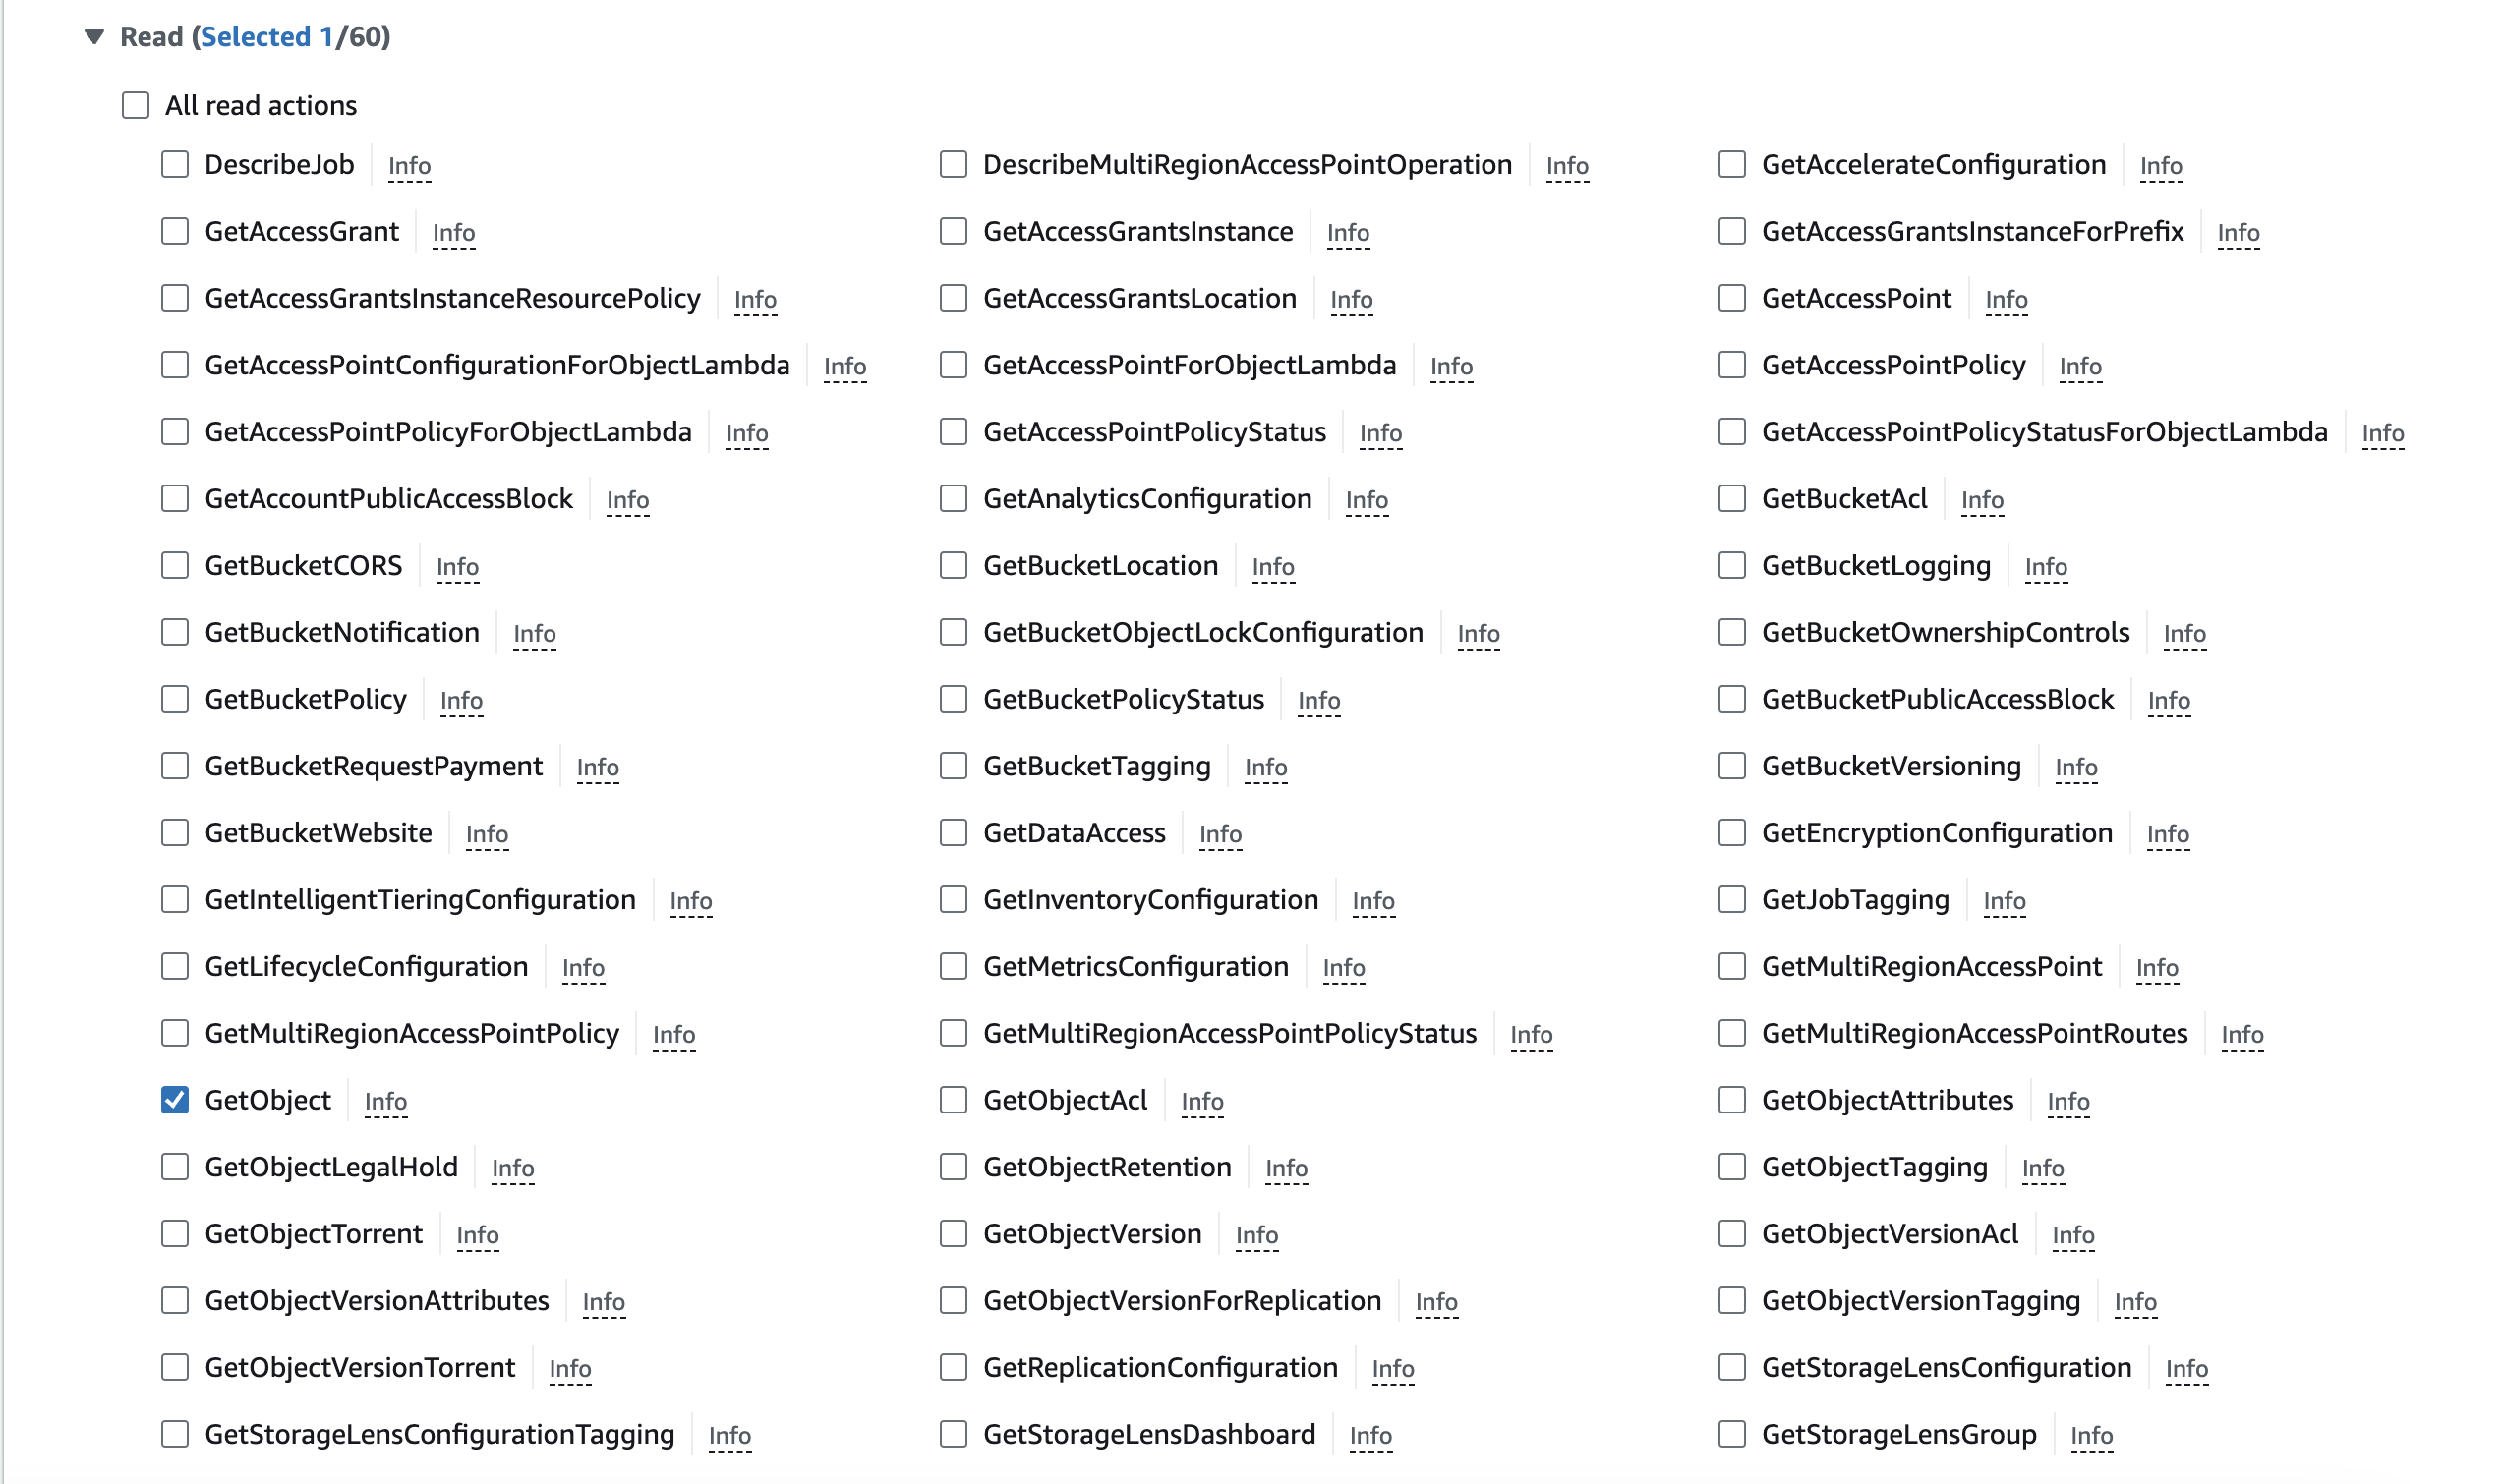
- Under Select a Service, select S3. SGP will need 2 permissions in order to properly read the files in your bucket:
- ListBucket, under the List section
- GetObject, under the Read section
- Next, look for the Resources section below the Permission section. These permissions will determine the buckets and objects Scale’s GenPlatform can read.

For best results with our ingestion pipelines, we recommend specifying certain buckets and then allowing all objects within that bucket to be read.
- To select a bucket to give access to, click Add ARNs in the bucket row.
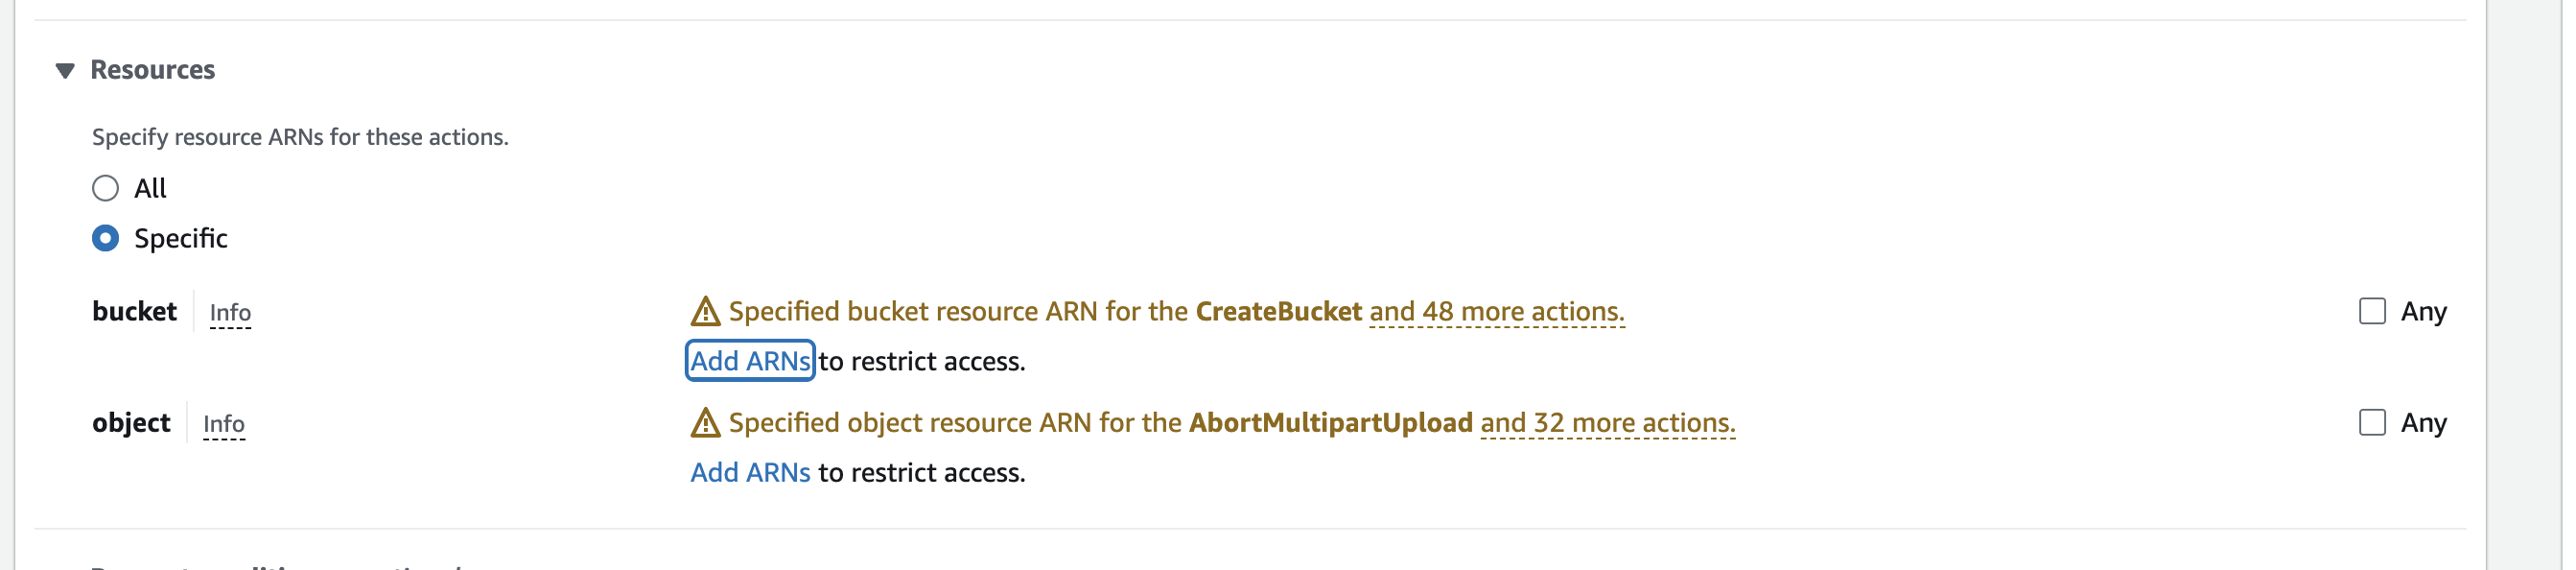
- To select which objects in that bucket to give access to, click Add ARNs in the object row. For best results, we recommend allowing the entire bucket to be read.

- After selecting which buckets and objects to give permission to, name the Policy any name, and then select Create Policy.
Connect Your Data Source
- Navigate to Data Sources in the GenAI Platform.
- Click New Data Source and select AWS S3
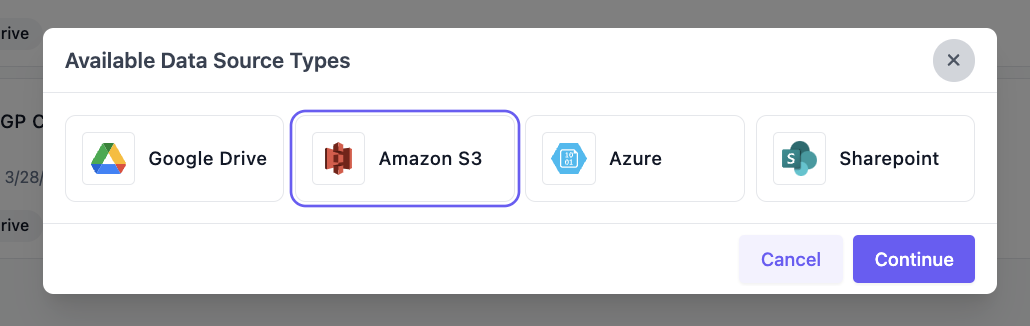
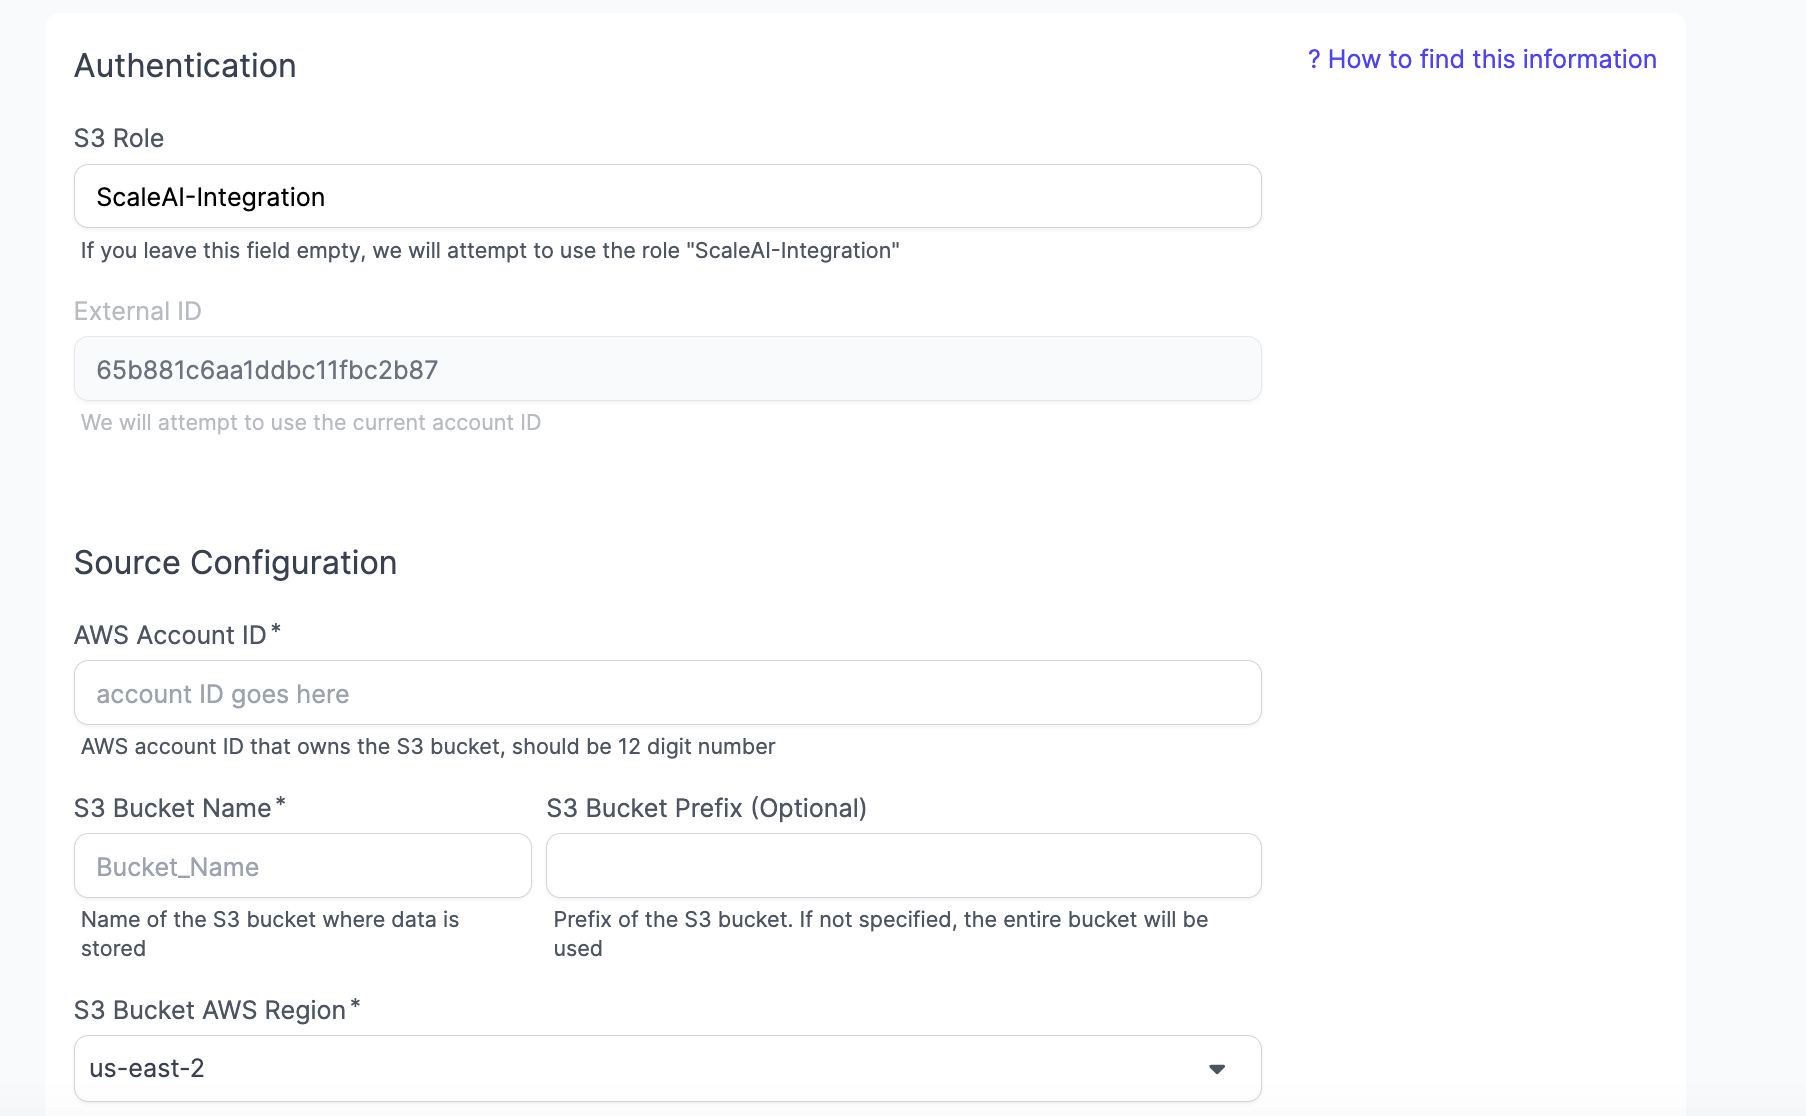
- Fill out the following:
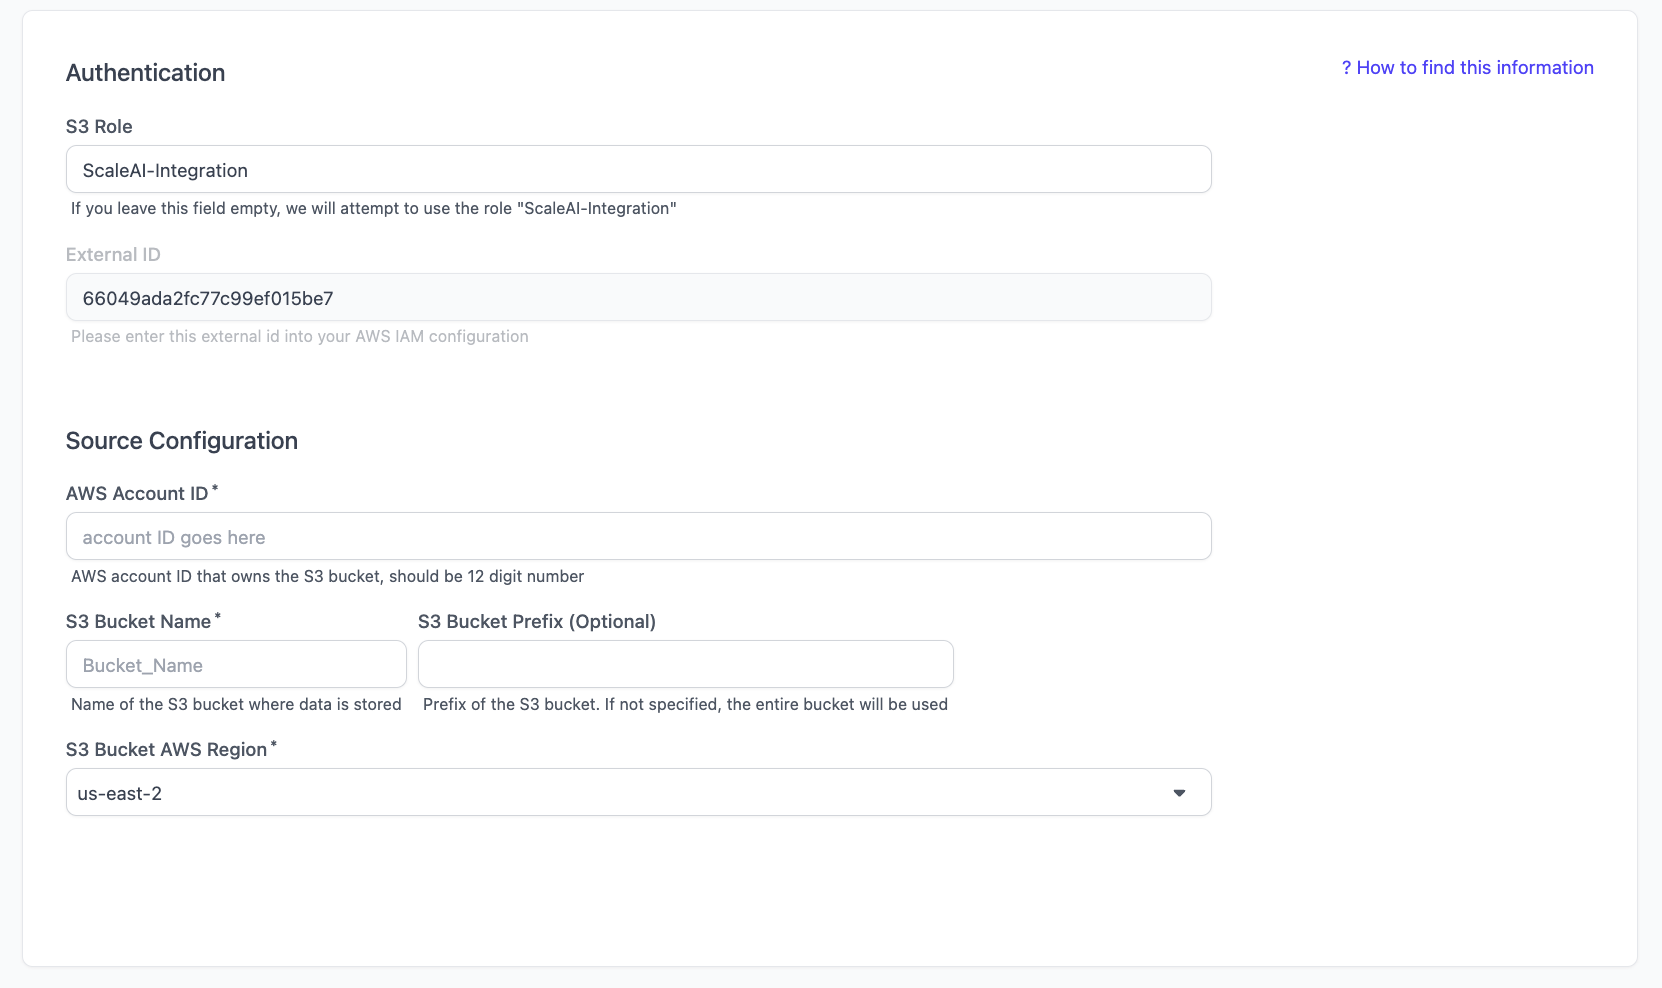
- AWS Account ID: Your AWS Account ID
- S3 Bucket Name: The name of the S3 Bucket where the dats is stored
- Note: If you have multiple S3 Buckets, you’ll have to connect them as separate data sources.
- S3 Bucket AWS Region: The region your bucket is configured to
- Connect your data source. This can take a while, so be patient while the screen is loading.
Google Drive
In order to connect a Google Drive folder, you need to:- [In Google Cloud] Set up a service account.
- [In Google Cloud] Enable the Google Drive API.
- [In Google Cloud] Create a Key.
- [In Google Drive] Share the Drive folder with the service account.
- [In SGP] Connect your data source.
Set up a service account
- Navigate to the Google Cloud Console.
- Create a new project. Or select an existing project.
- Enable API access for this project.
- Navigate to Service Account on the left side menu. Click Create Service Account.
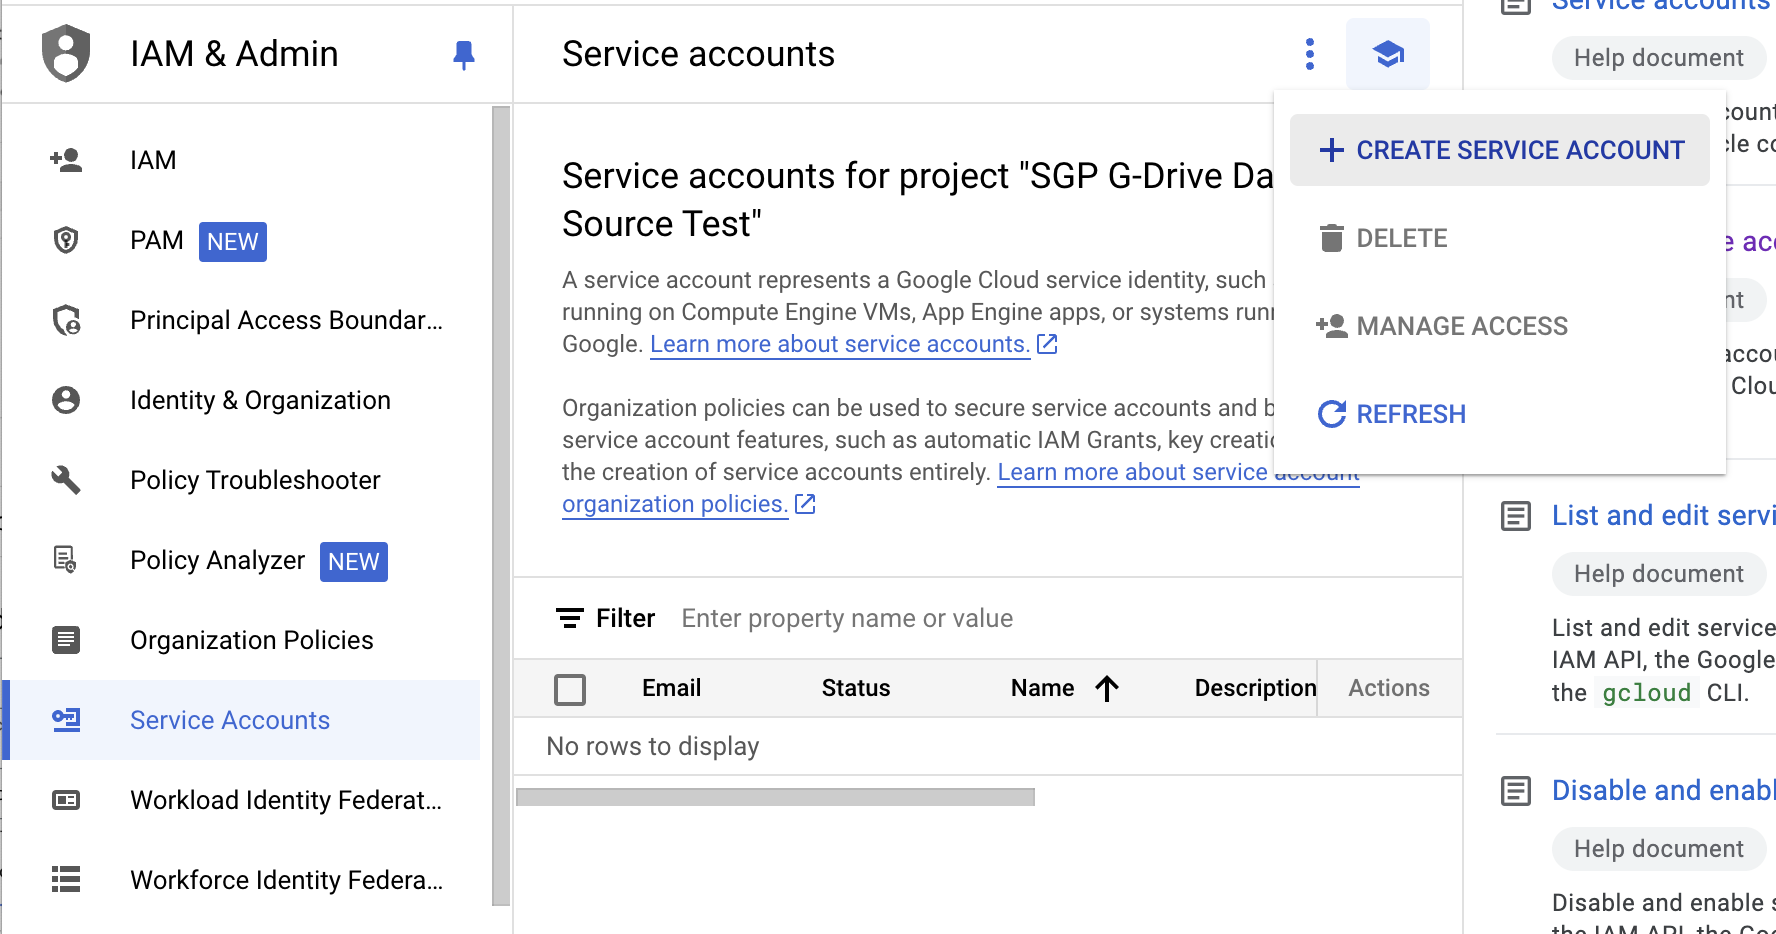
-
Create the Service account
- Fill in the service account details (up to you).
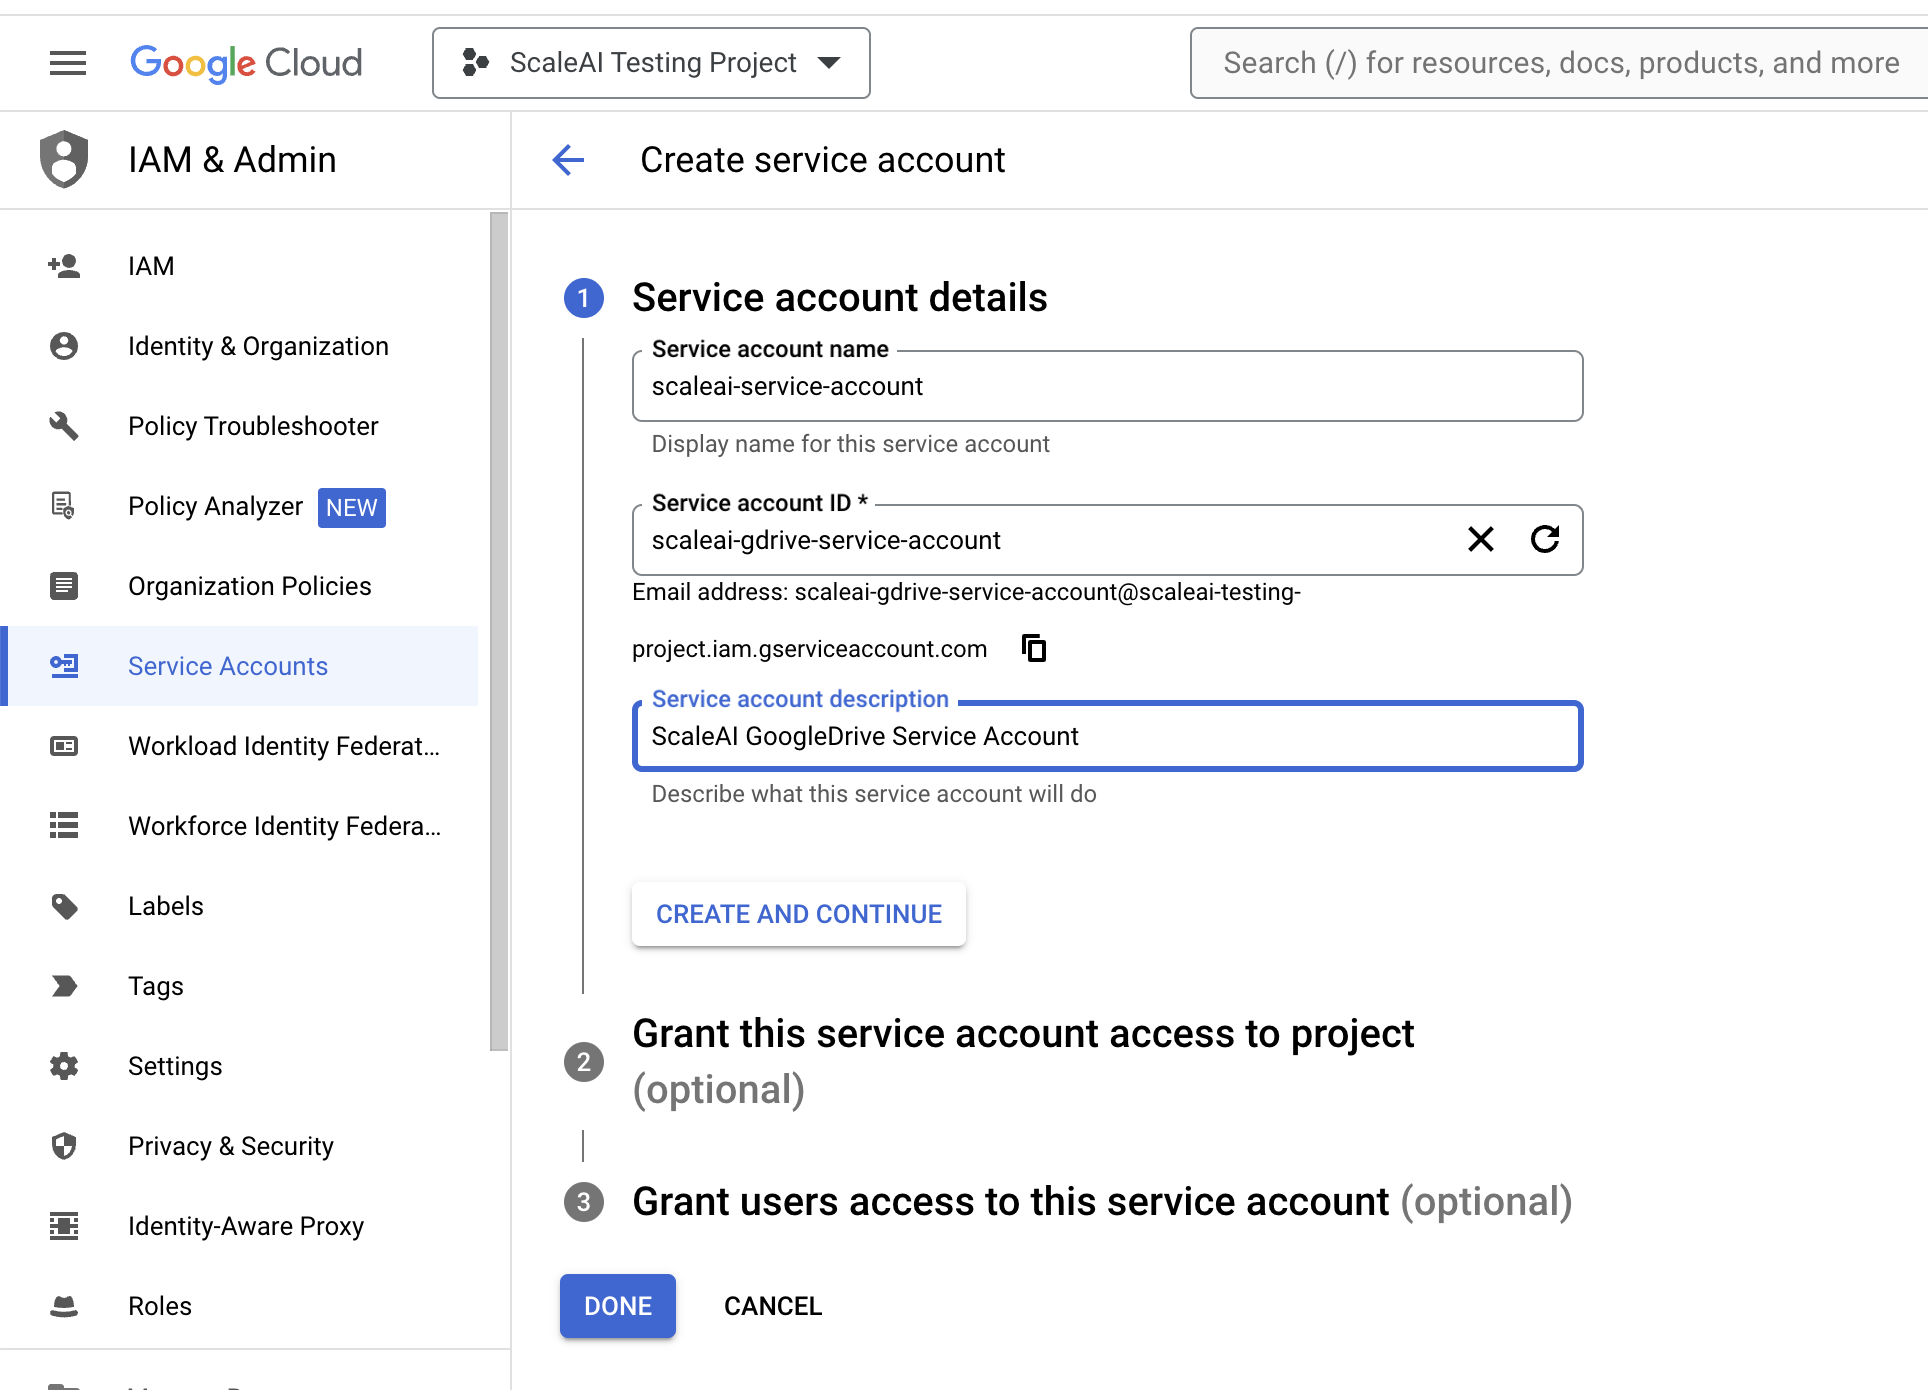
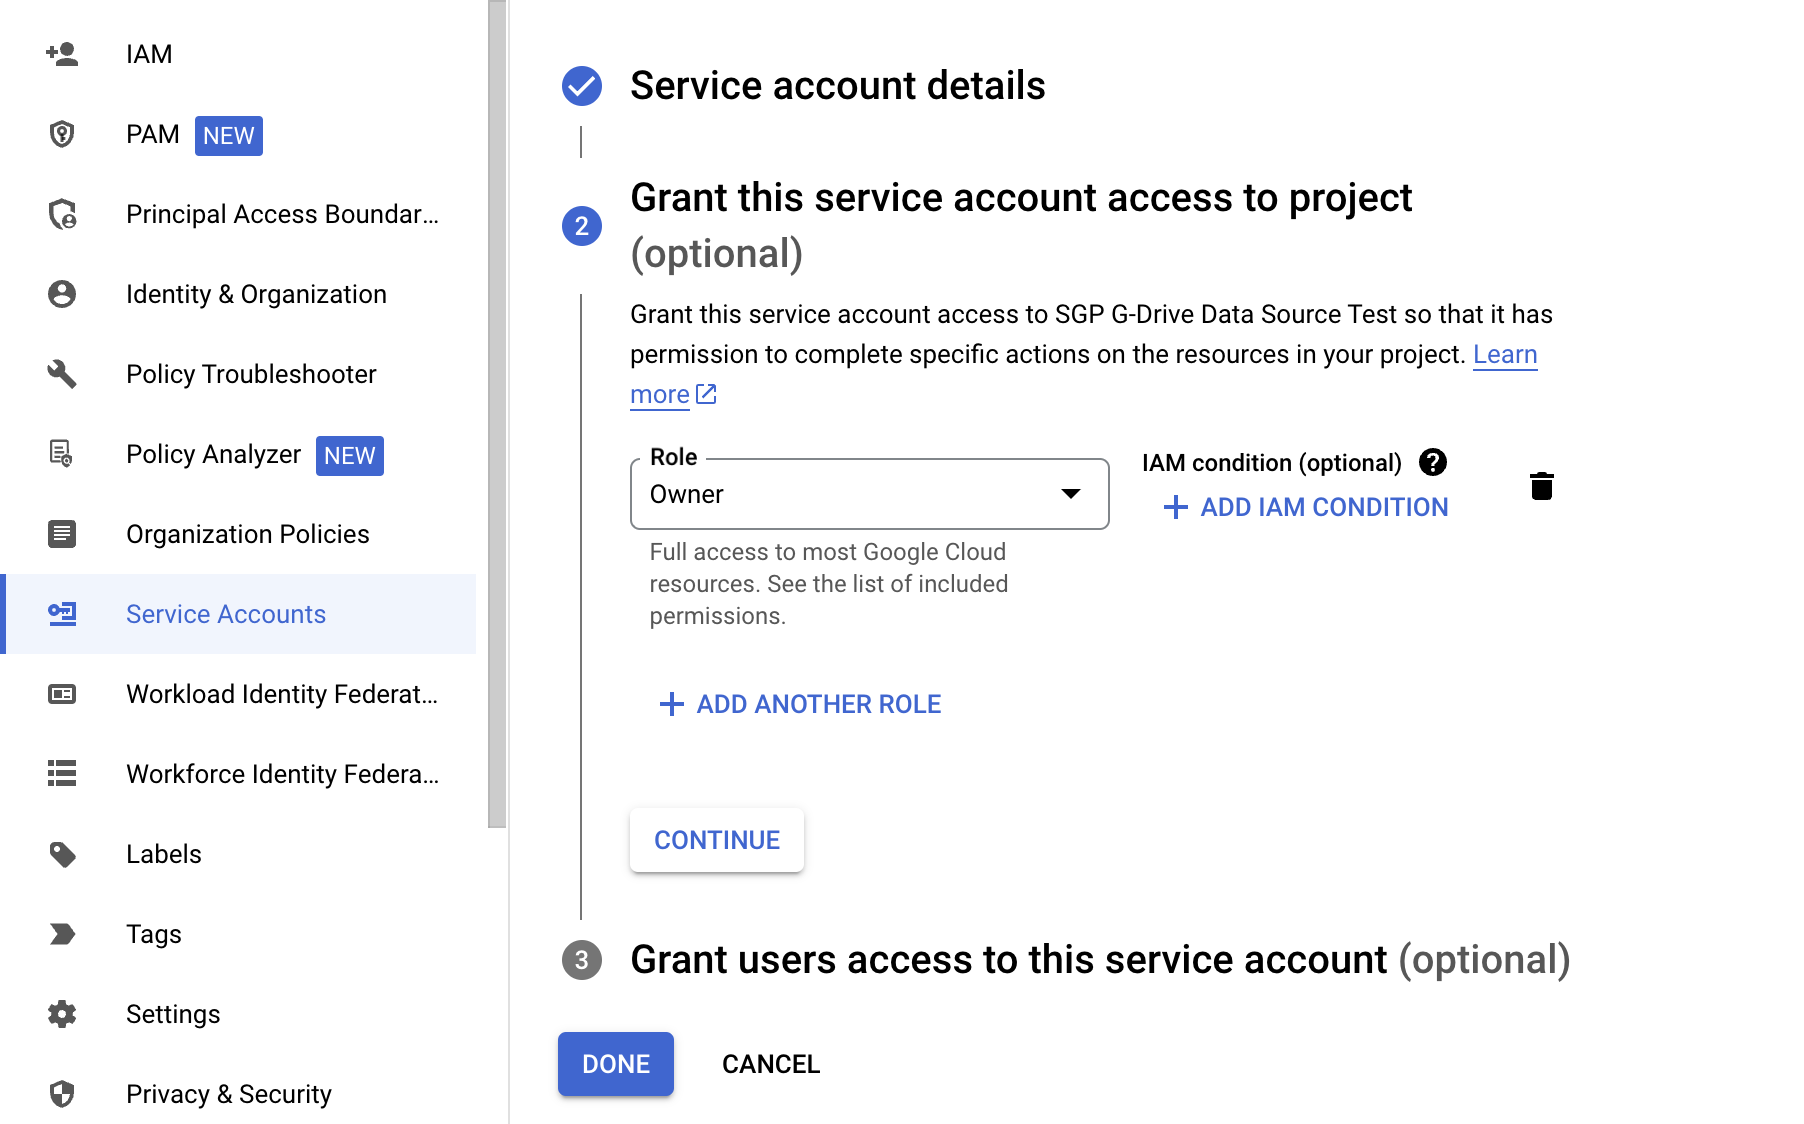
- Grant service account roles and access (up to you). We recommend the Owner role.
Enable the Google Drive API
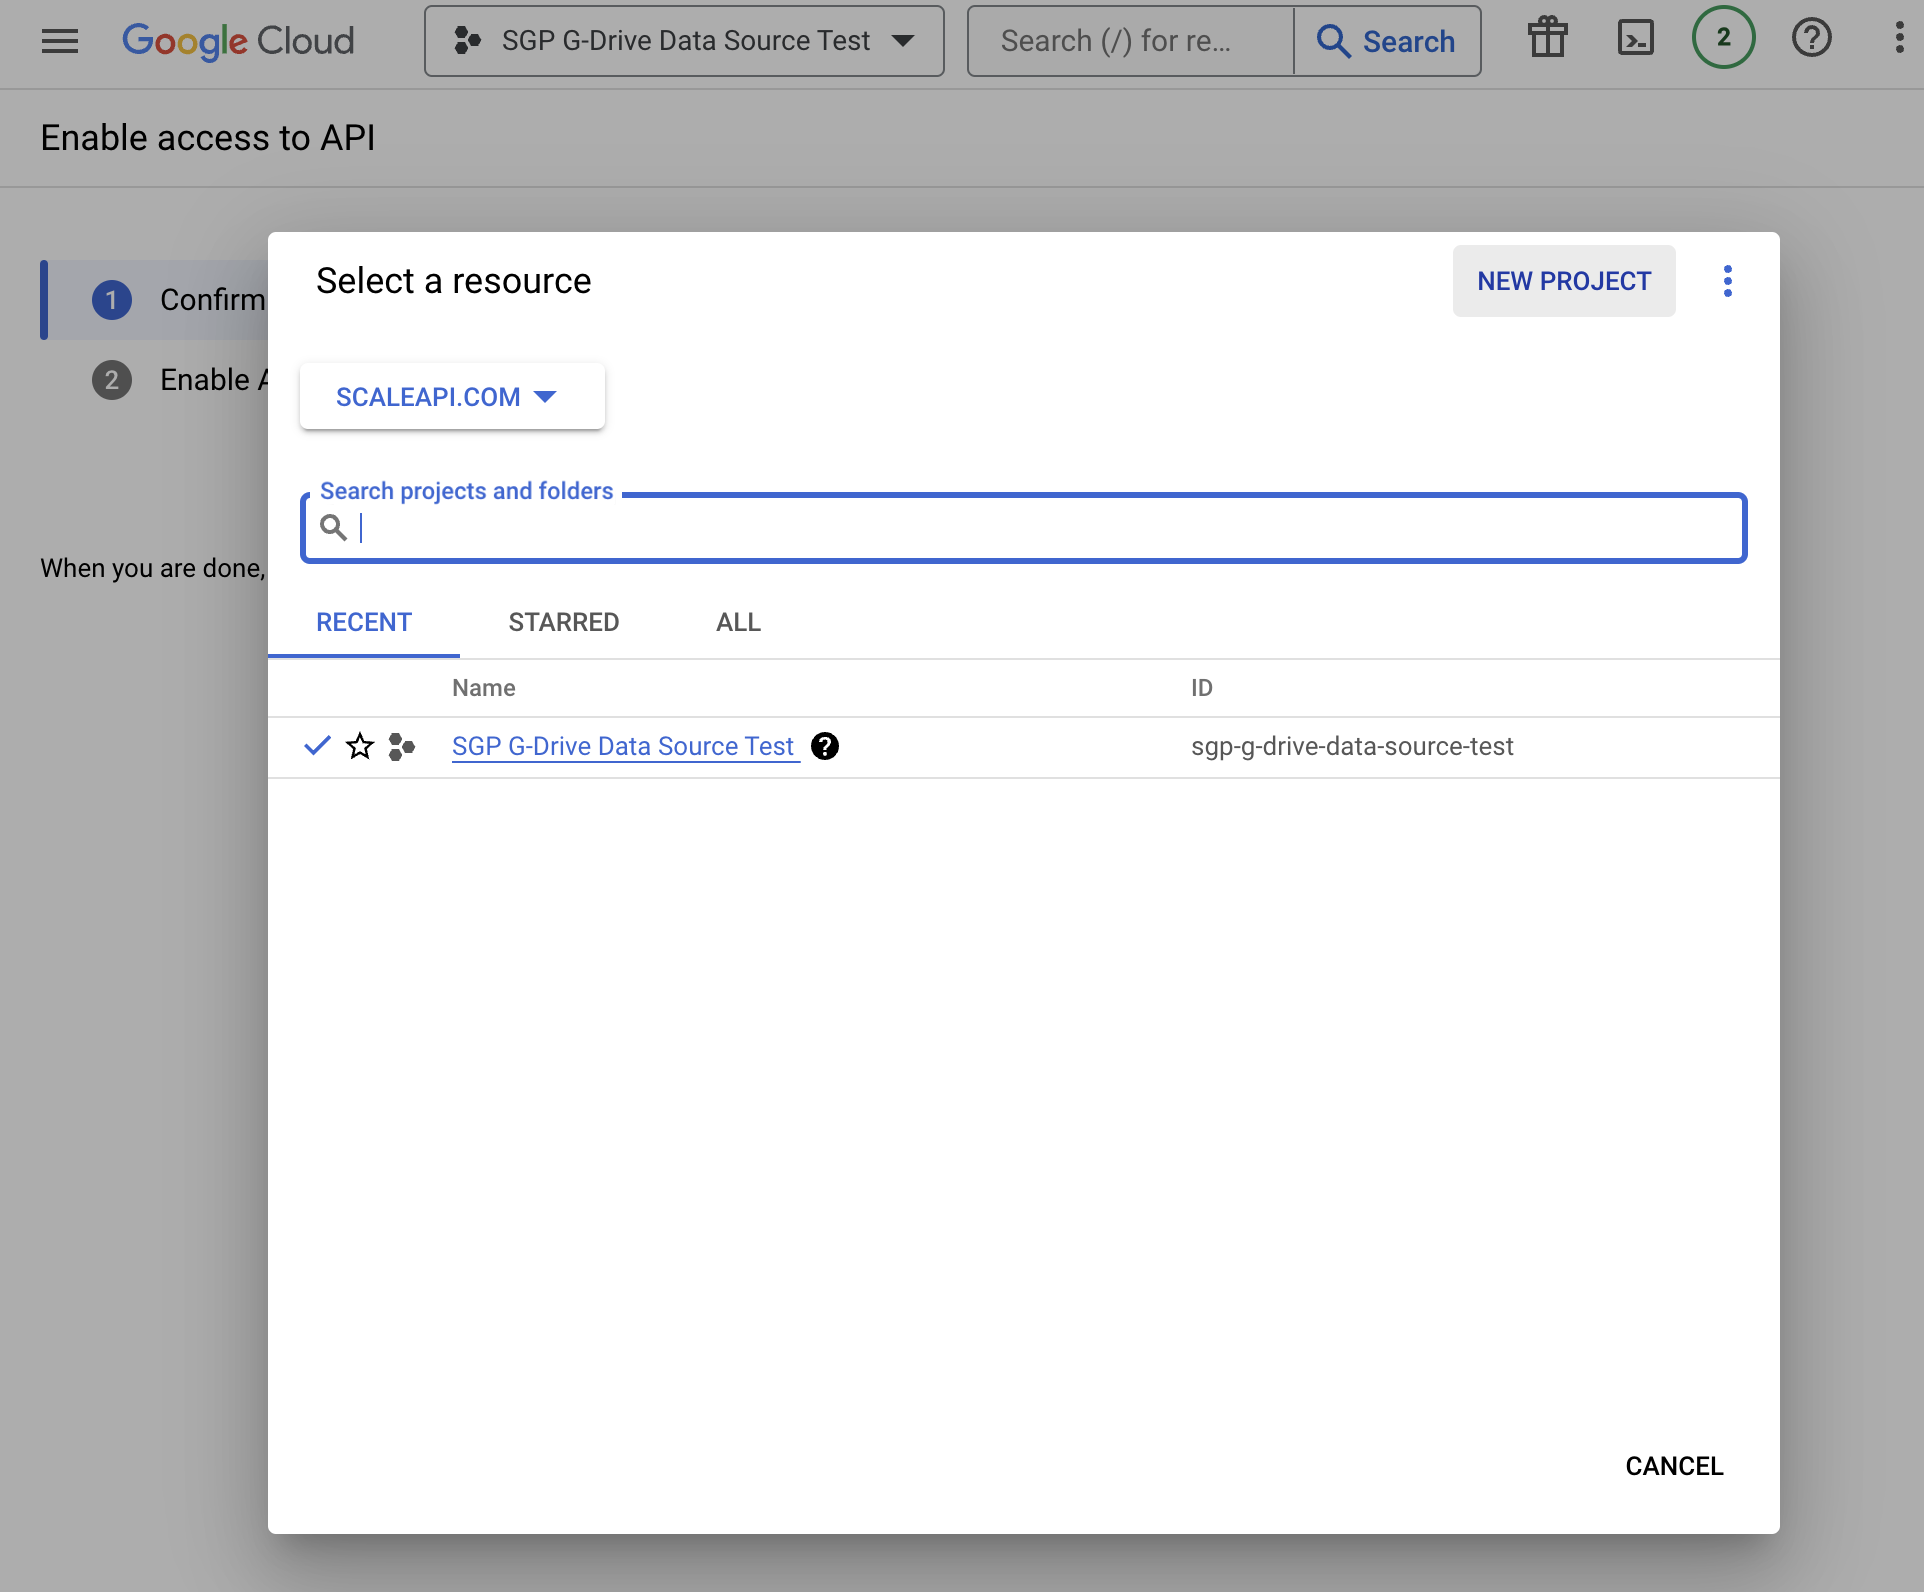
- Navigate to the API Console.
- Select the project you created earlier.
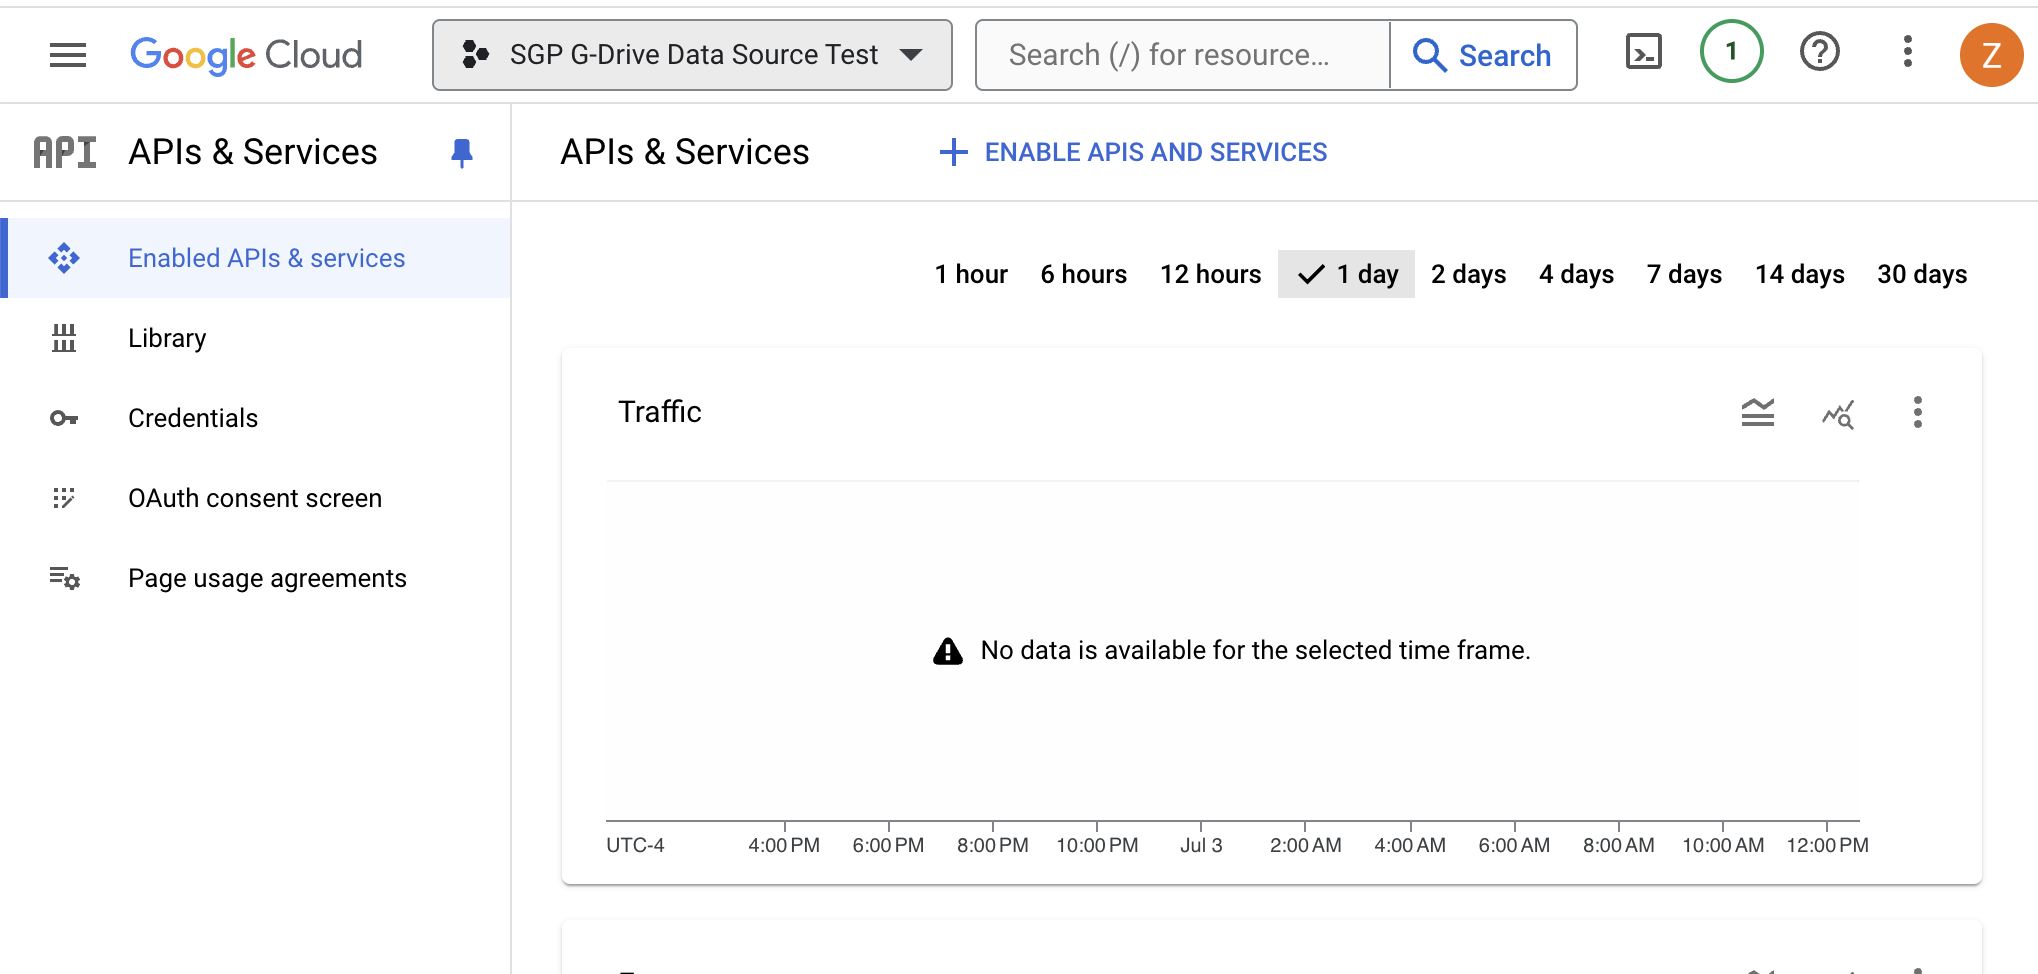
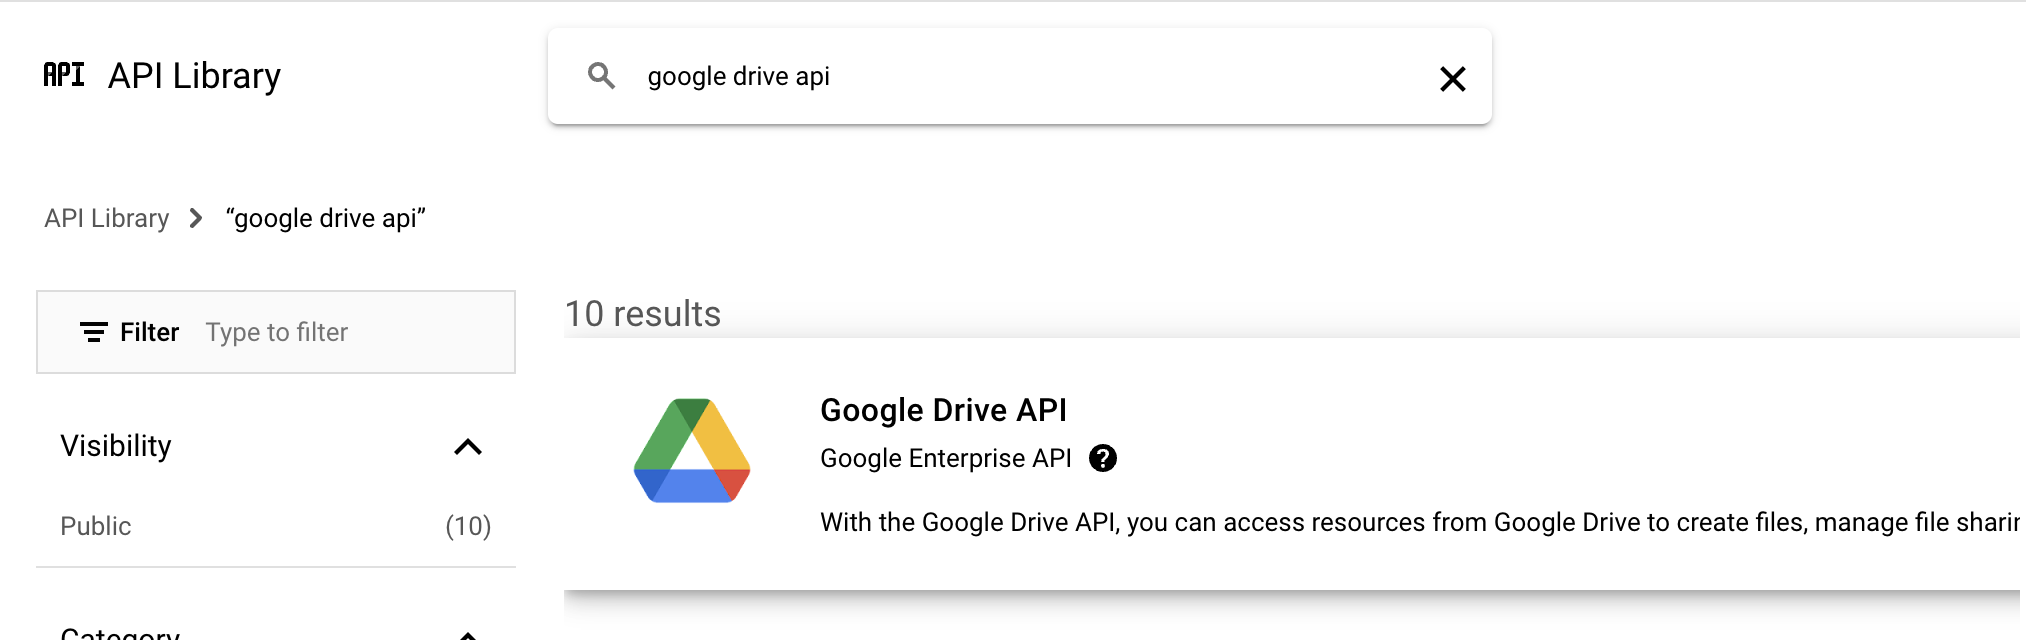
- Open side menu and select APIs & services, and then select Library.
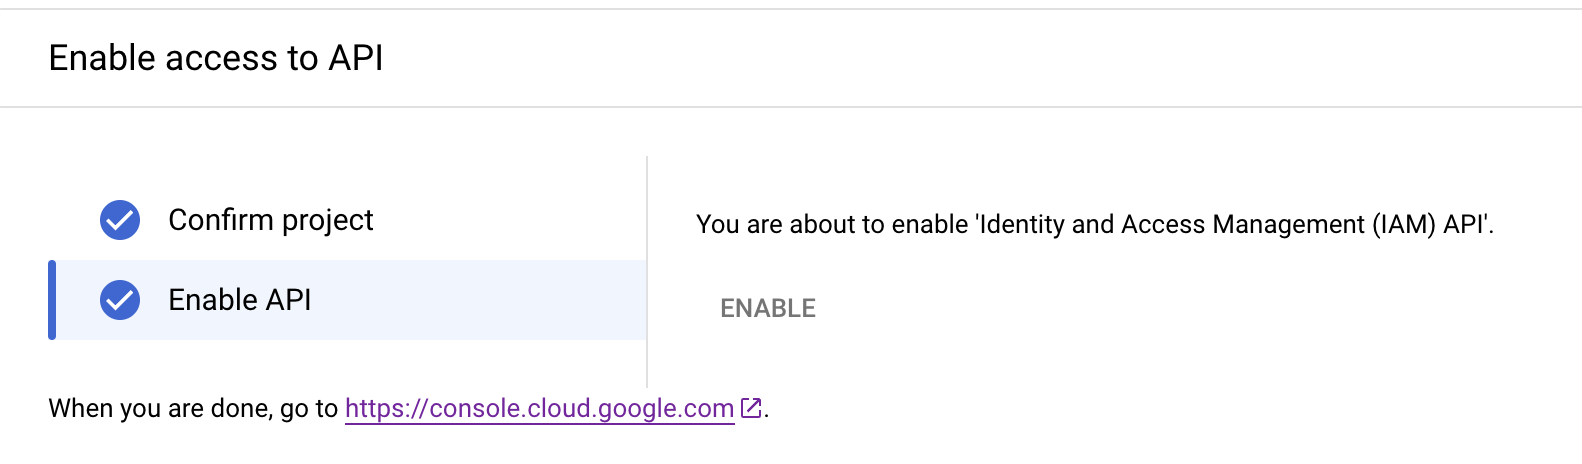
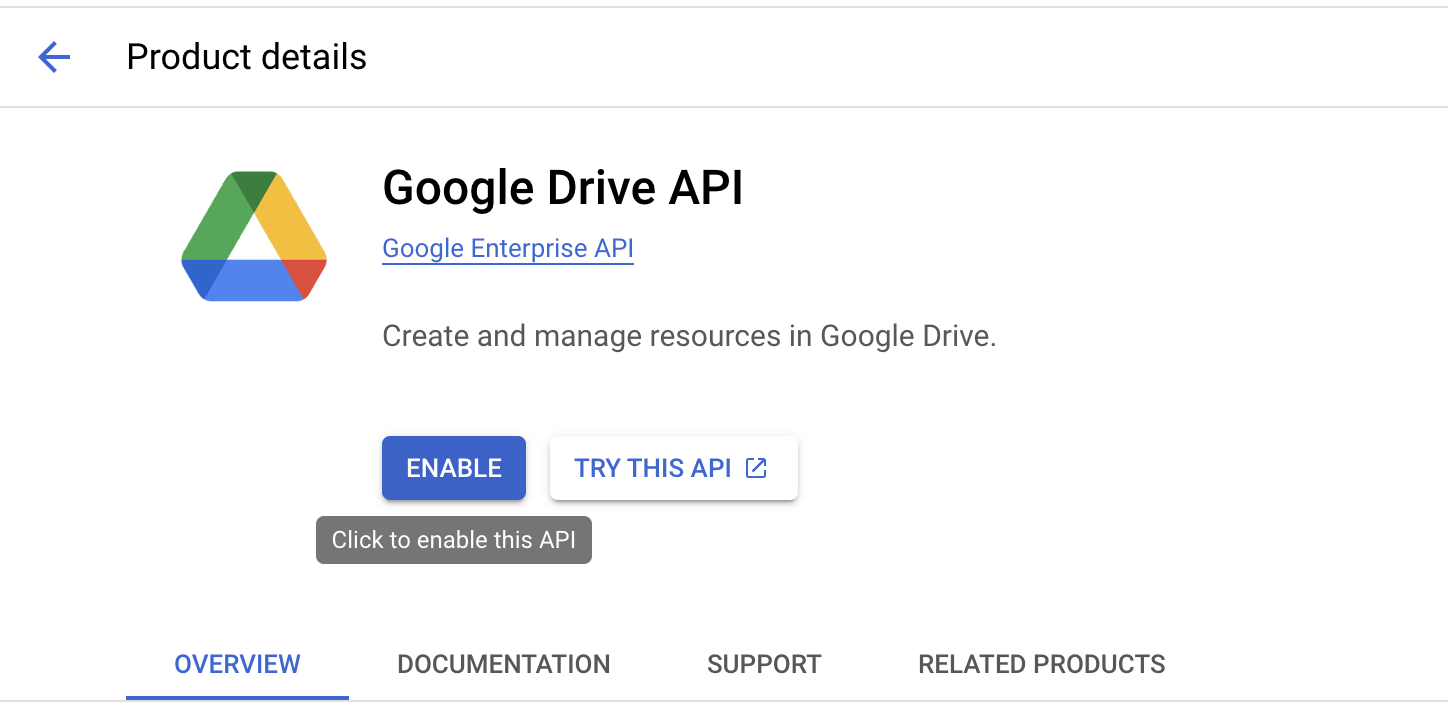
- Search for the Google Drive Api in the Library.
- Click ENABLE.
Create a Key
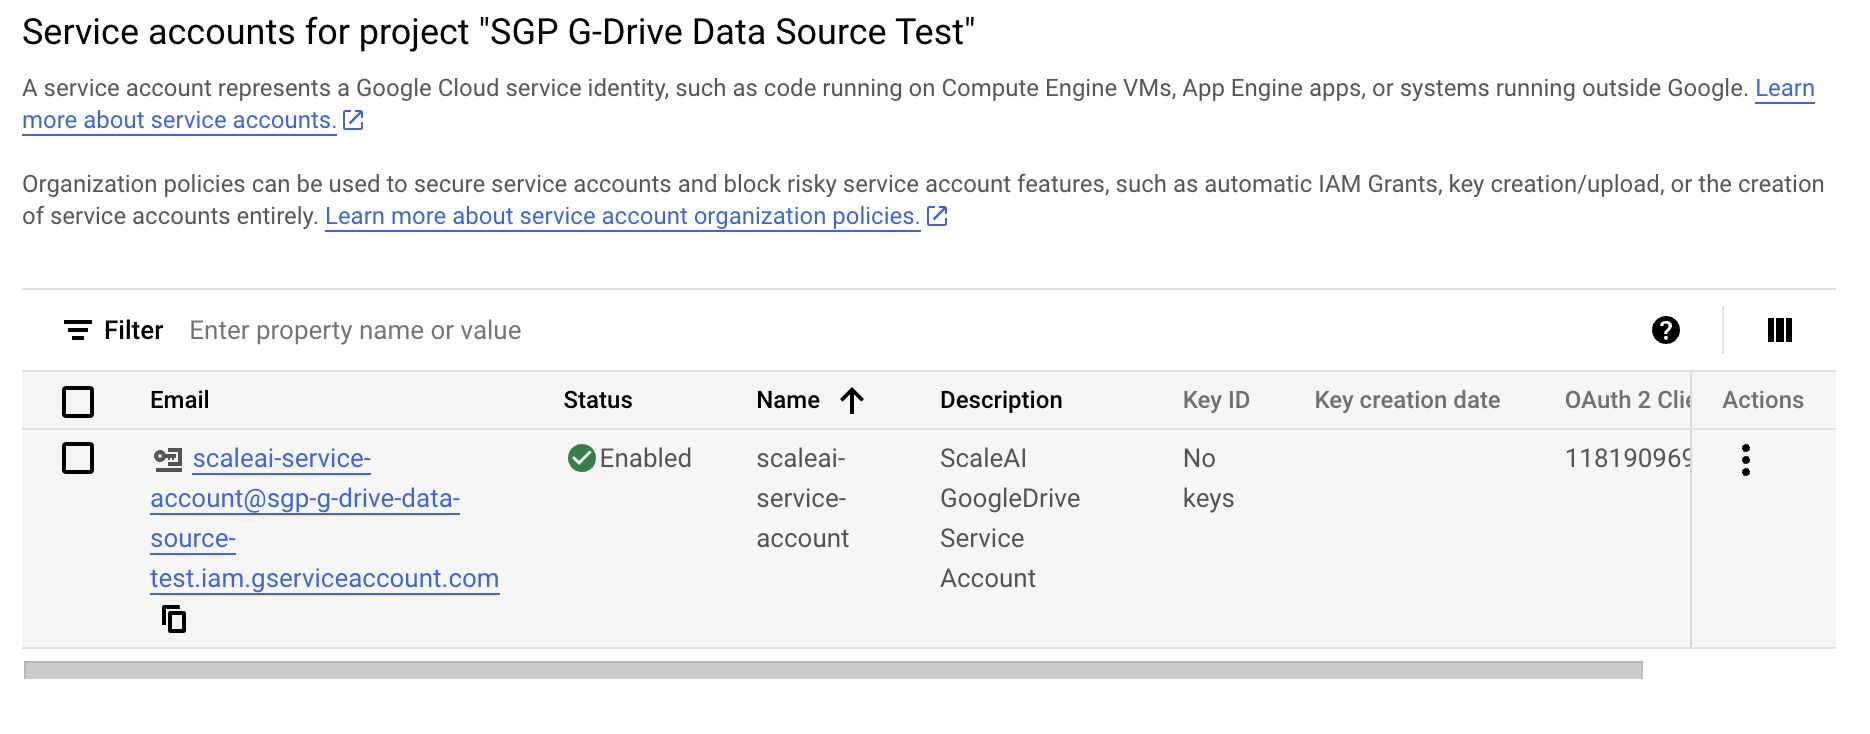
- Select the created service account.
- Navigate to the KEYS tab.
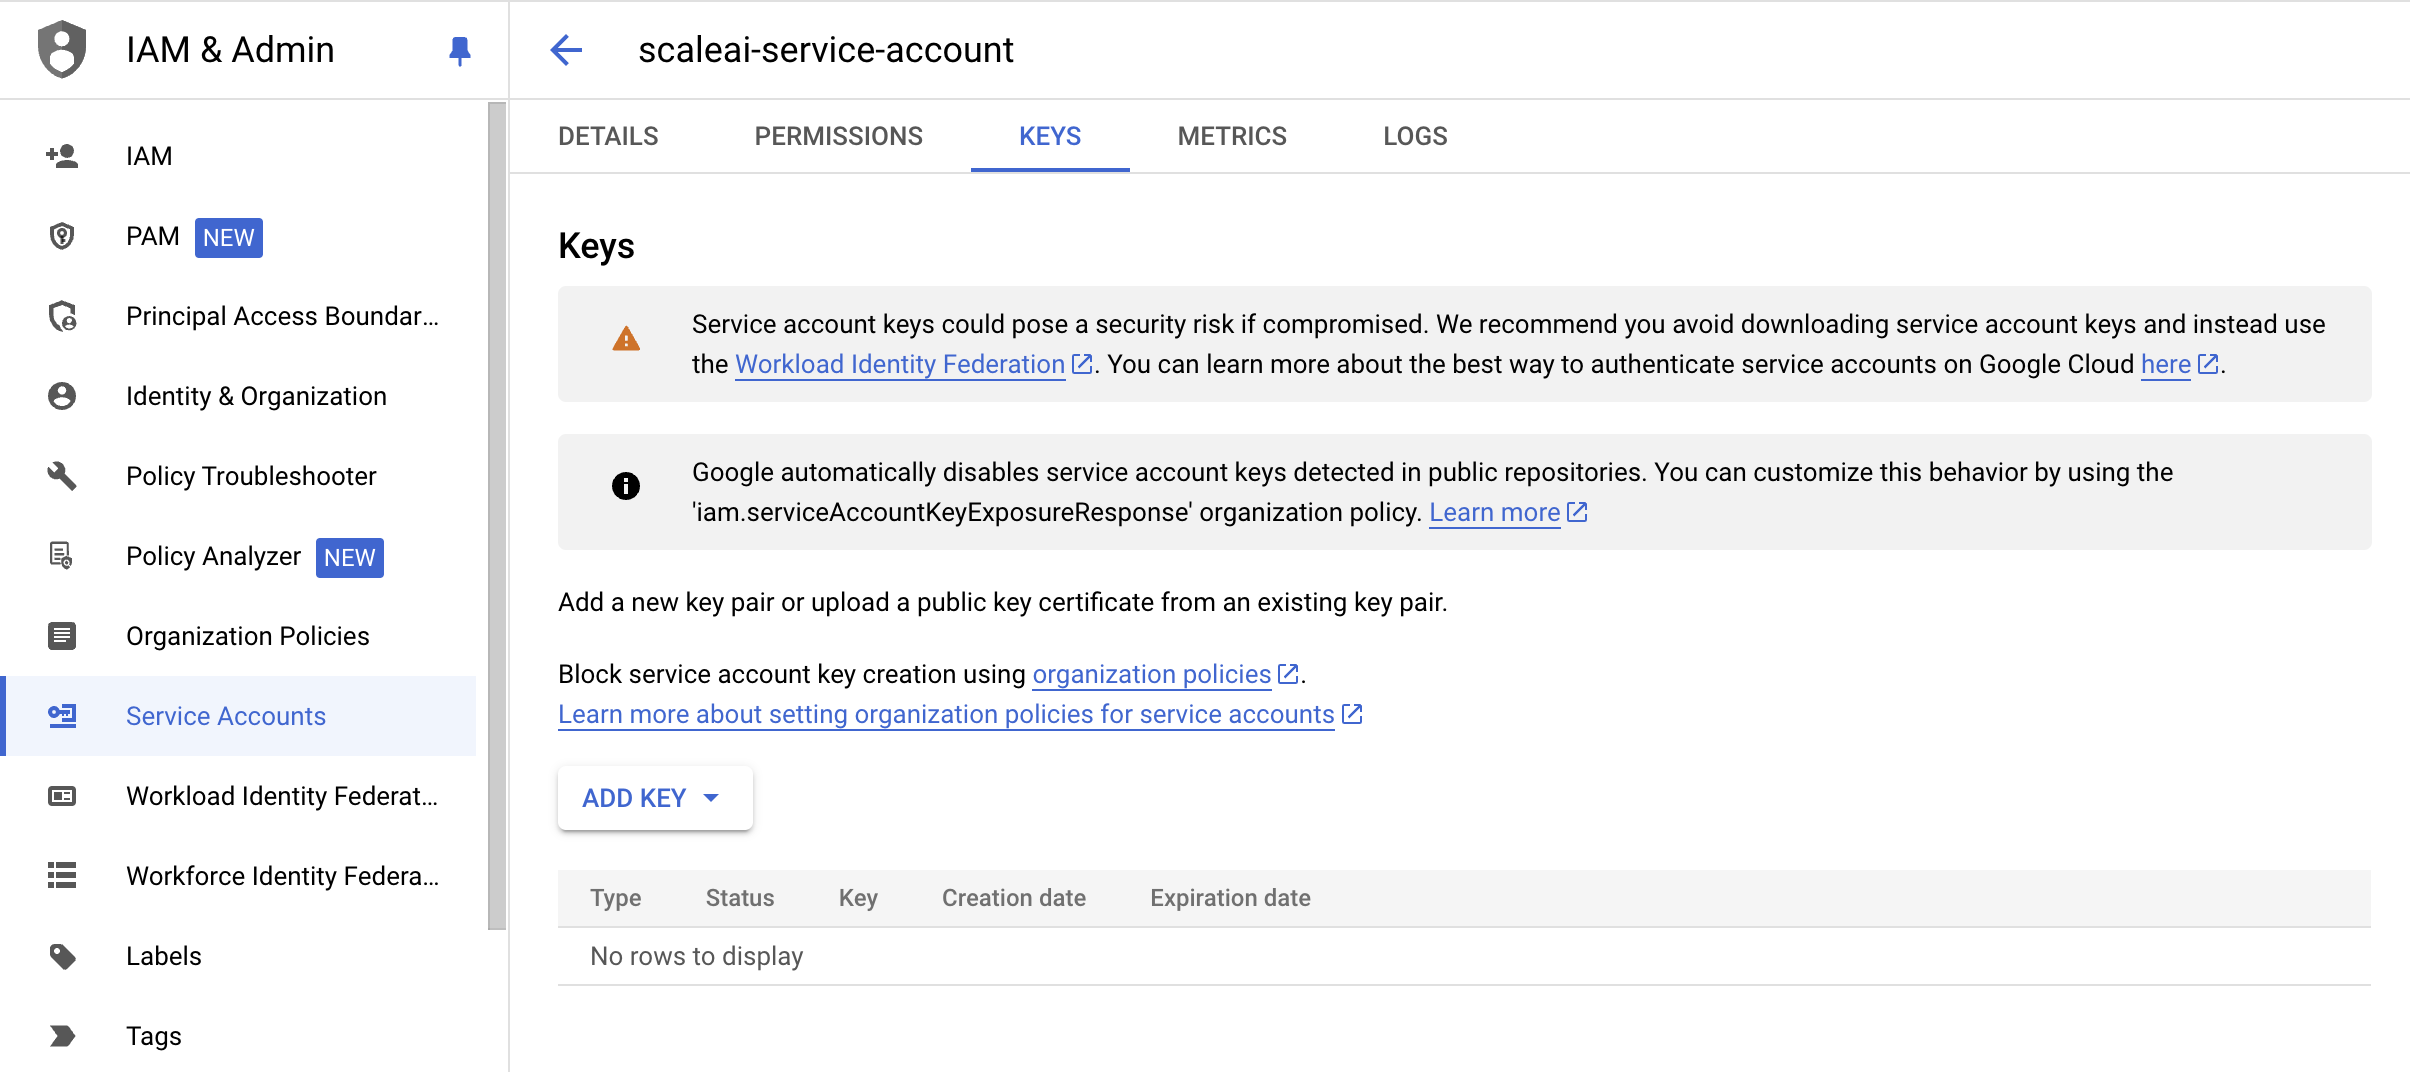
- Select ADD KEY, and Create a new JSON Key.
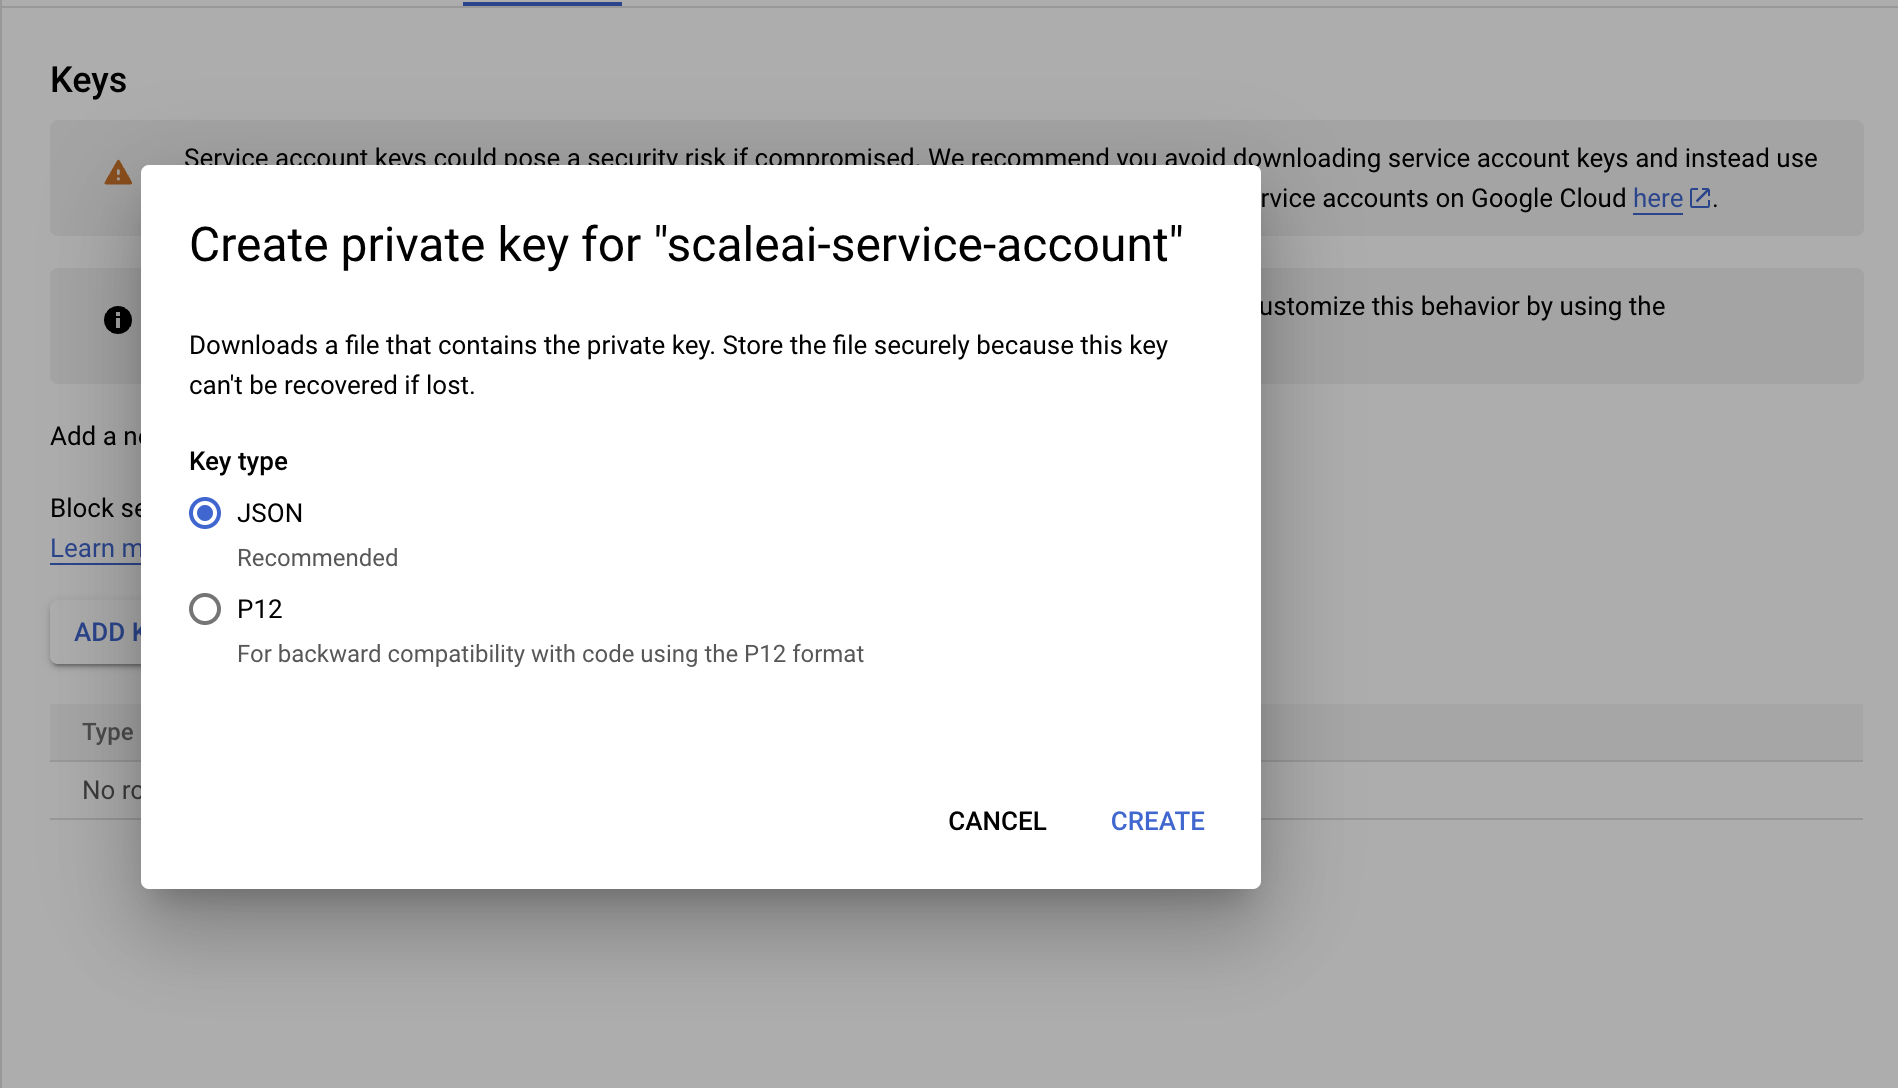
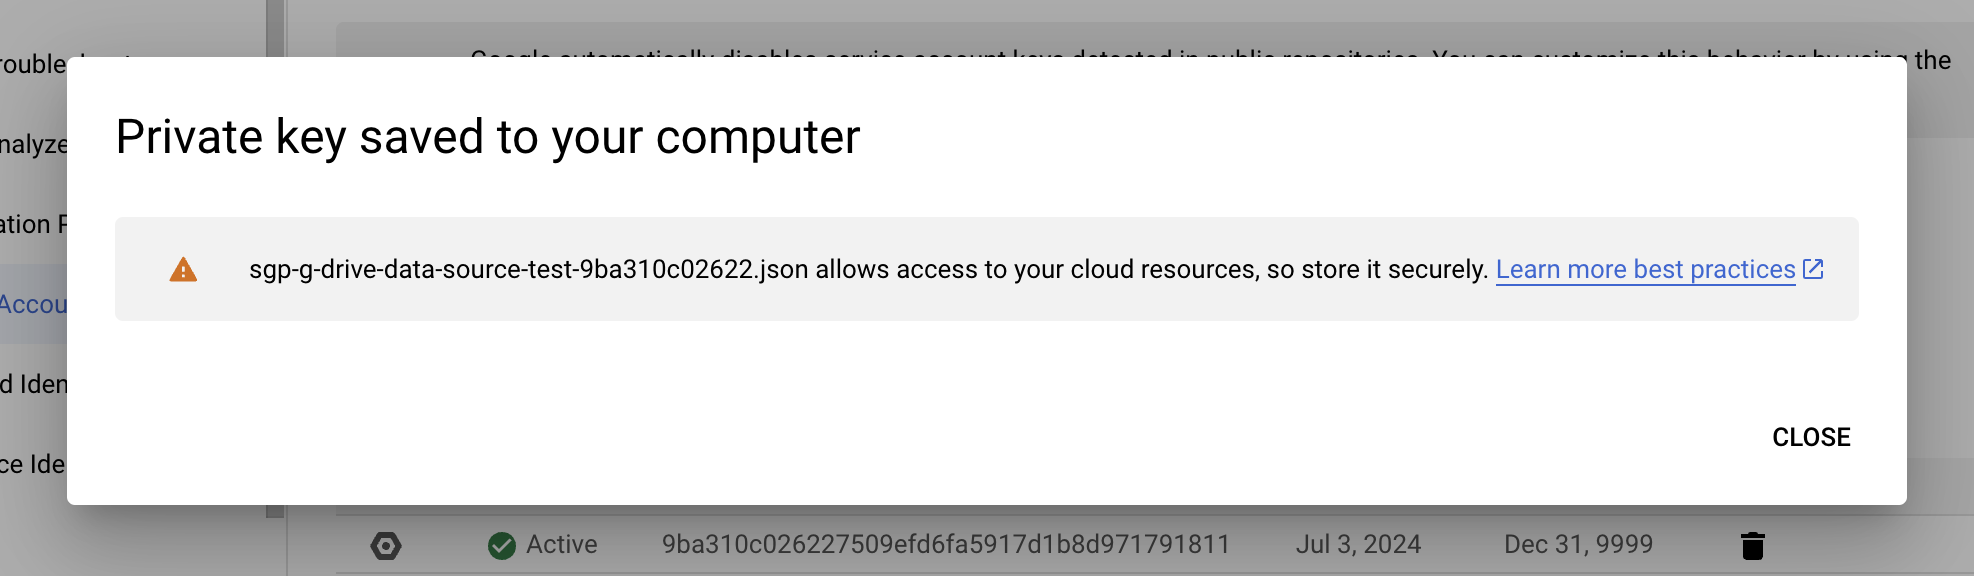
- The Private Key will be saved to your computer. The credentials will be used later when we connect our data source.
Share the Drive folder with the service account
Share the drive folder you want to connect with the service account you just created.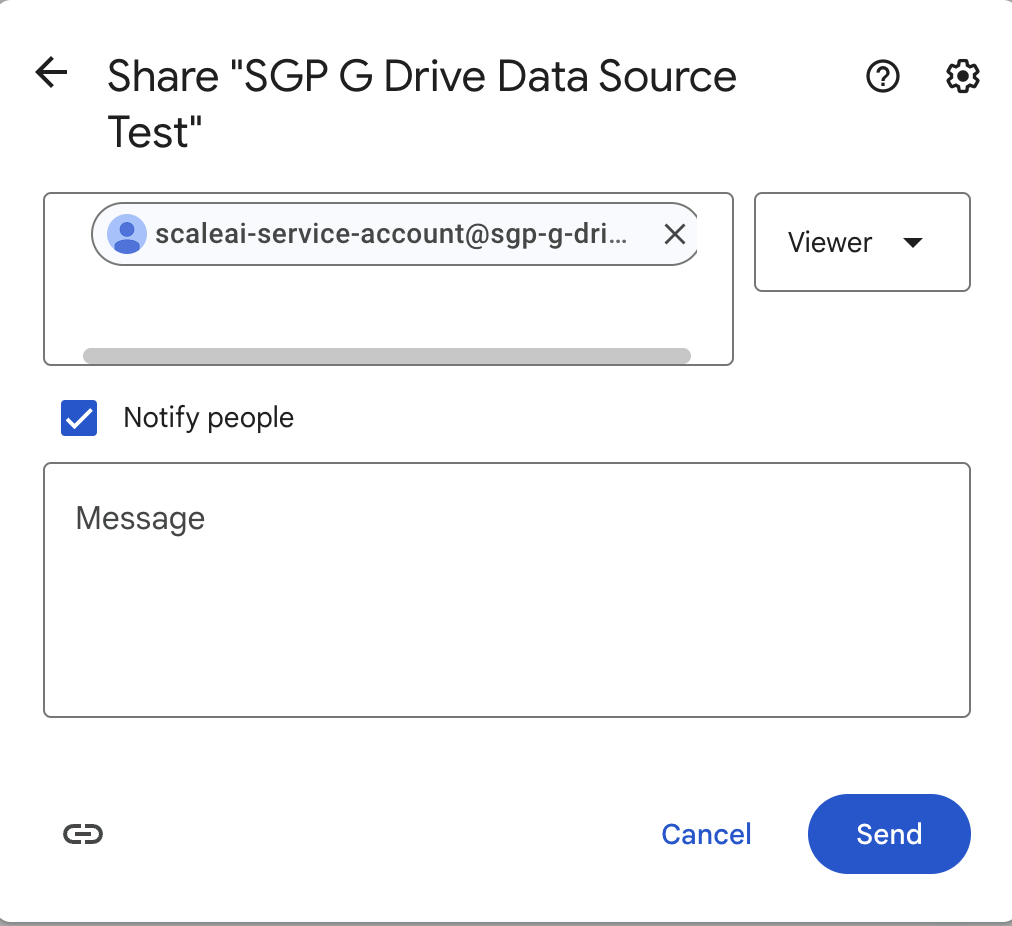
Connect your data source
Information from the Key created
We will need the following fields from the JSON Below:client_email, client_id , private_key , token_uri
For the private key, be sure to copy and paste the entire string in the file, inclusive of the sections “BEGIN PRIVATE KEY” and “END PRIVATE KEY”.
Google Drive Folder ID

Connecting Data Source
With the information above, you can connect your data source.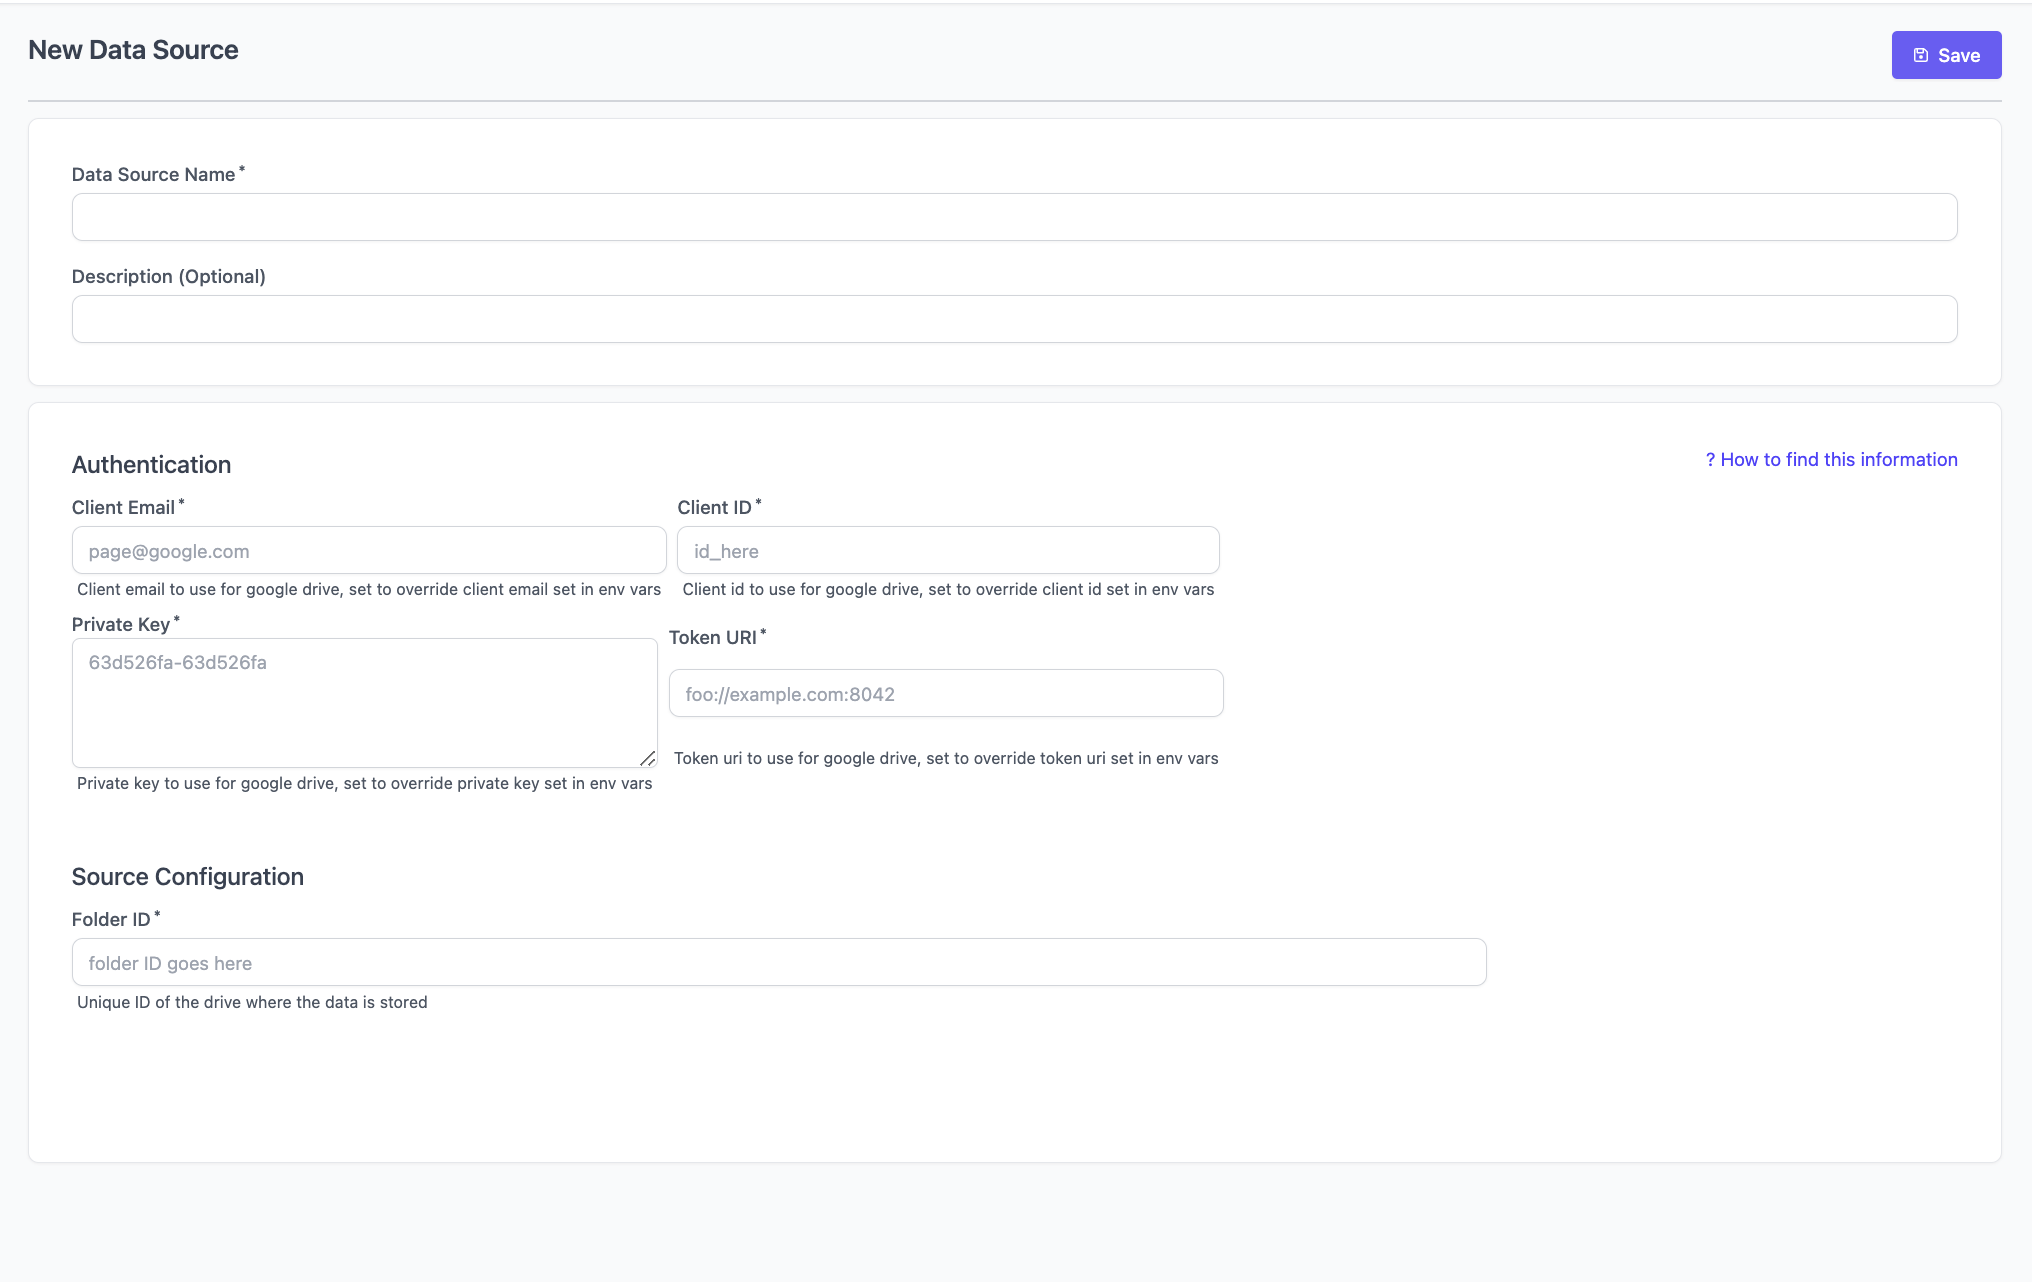
ScaleAI will only store an encrypted version of your credentials to be used to scrape from the folders
Azure Blob Storage
In order to connect an Azure Storage Container, you need to- Identify the Container URL.
- Generate a shared access signature (SAS) and grant SGP restricted access to the Azure Storage container.
- Connect your data source.
Locate the Container URL
- Go to Microsoft Azure and locate the containers you have.
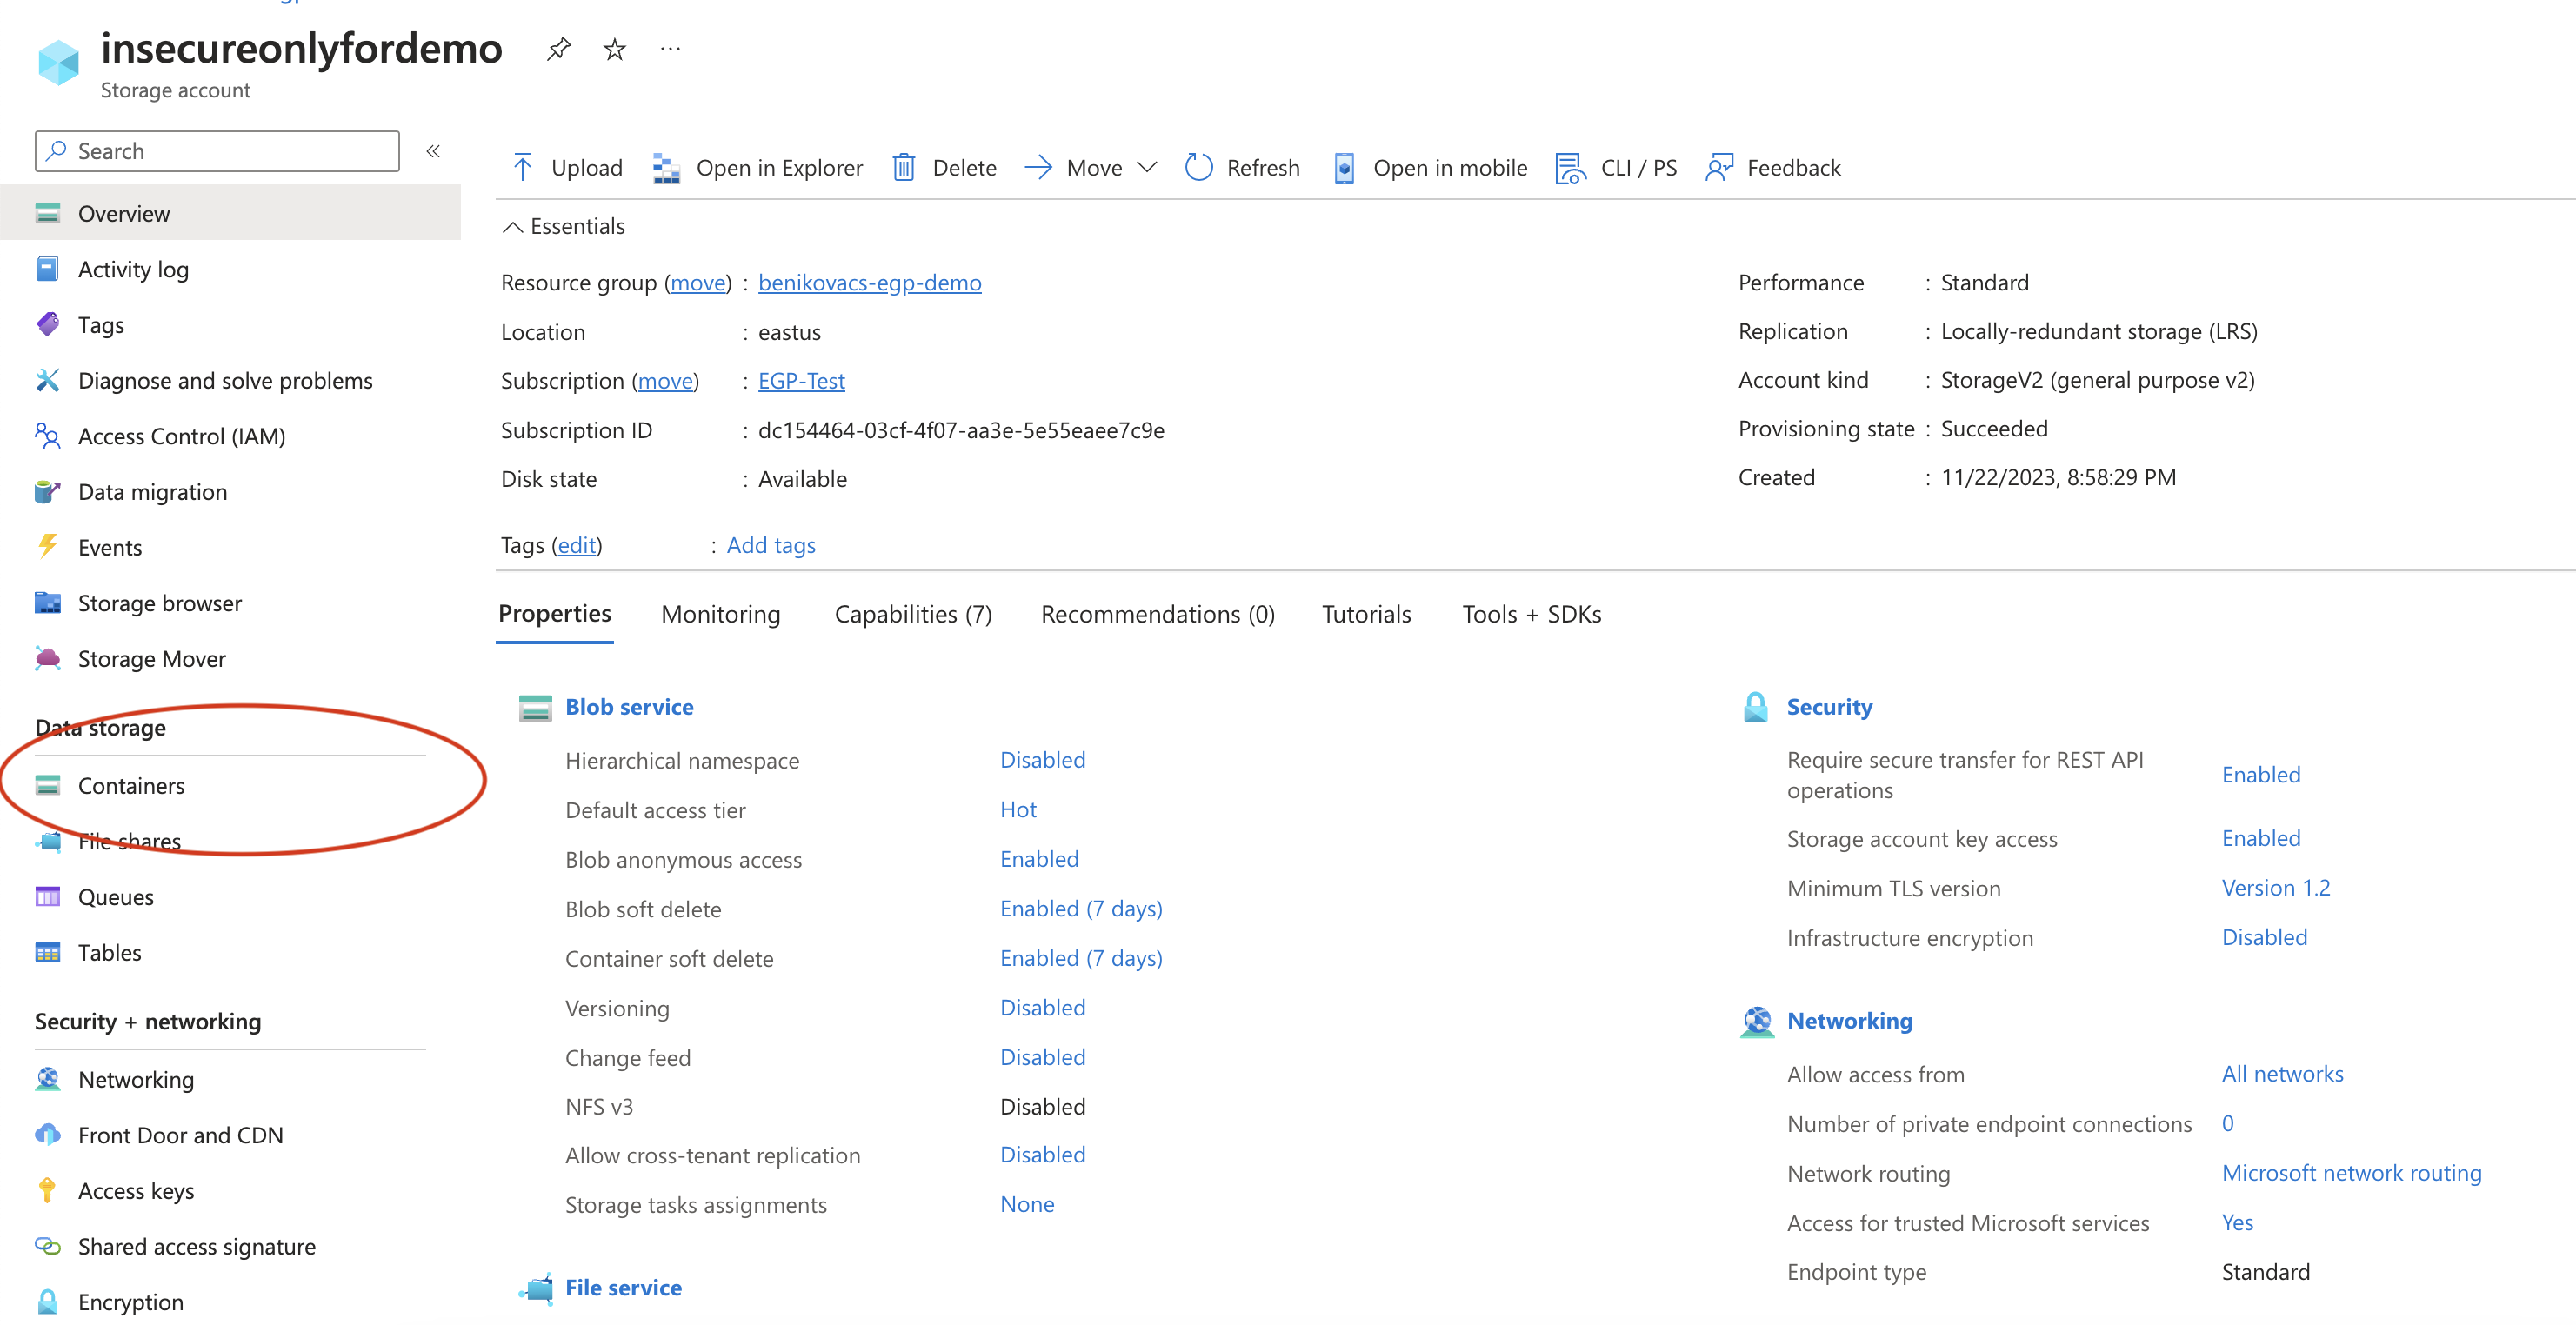
- Select the container you have access to. If you don’t have a container yet, create a container and upload data into that container. Click on the three dots on the right-hand side and select Container Properties.

- Locate the container_url on this screen.

Generate SAS
- Navigate back to the list of containers.
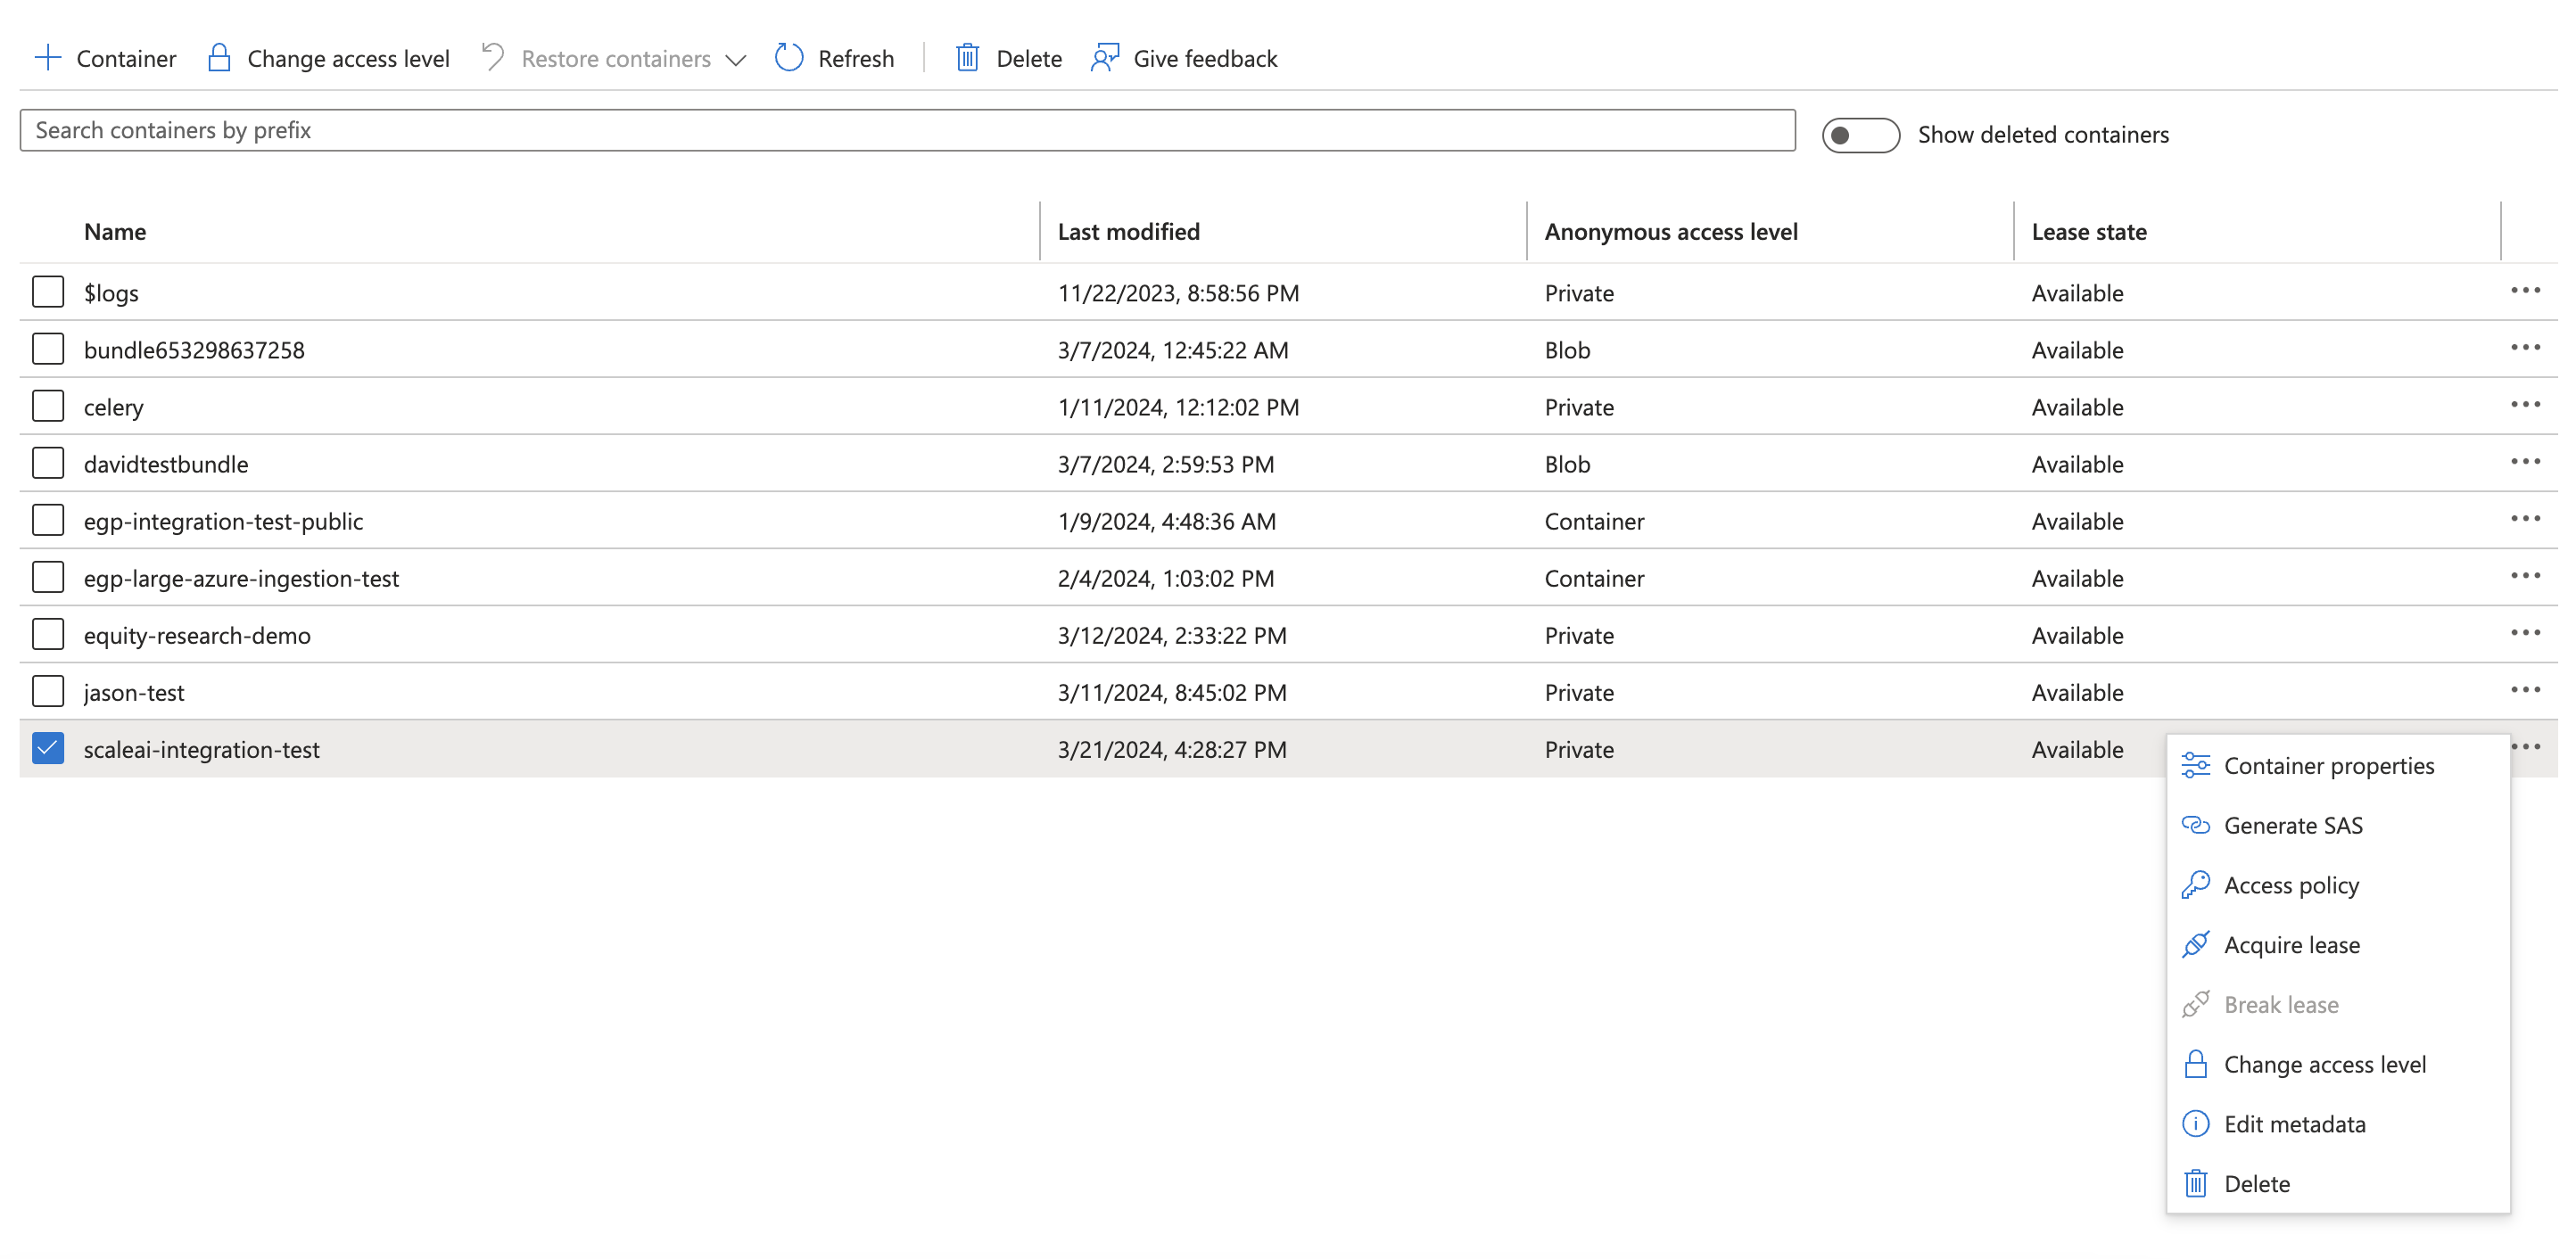
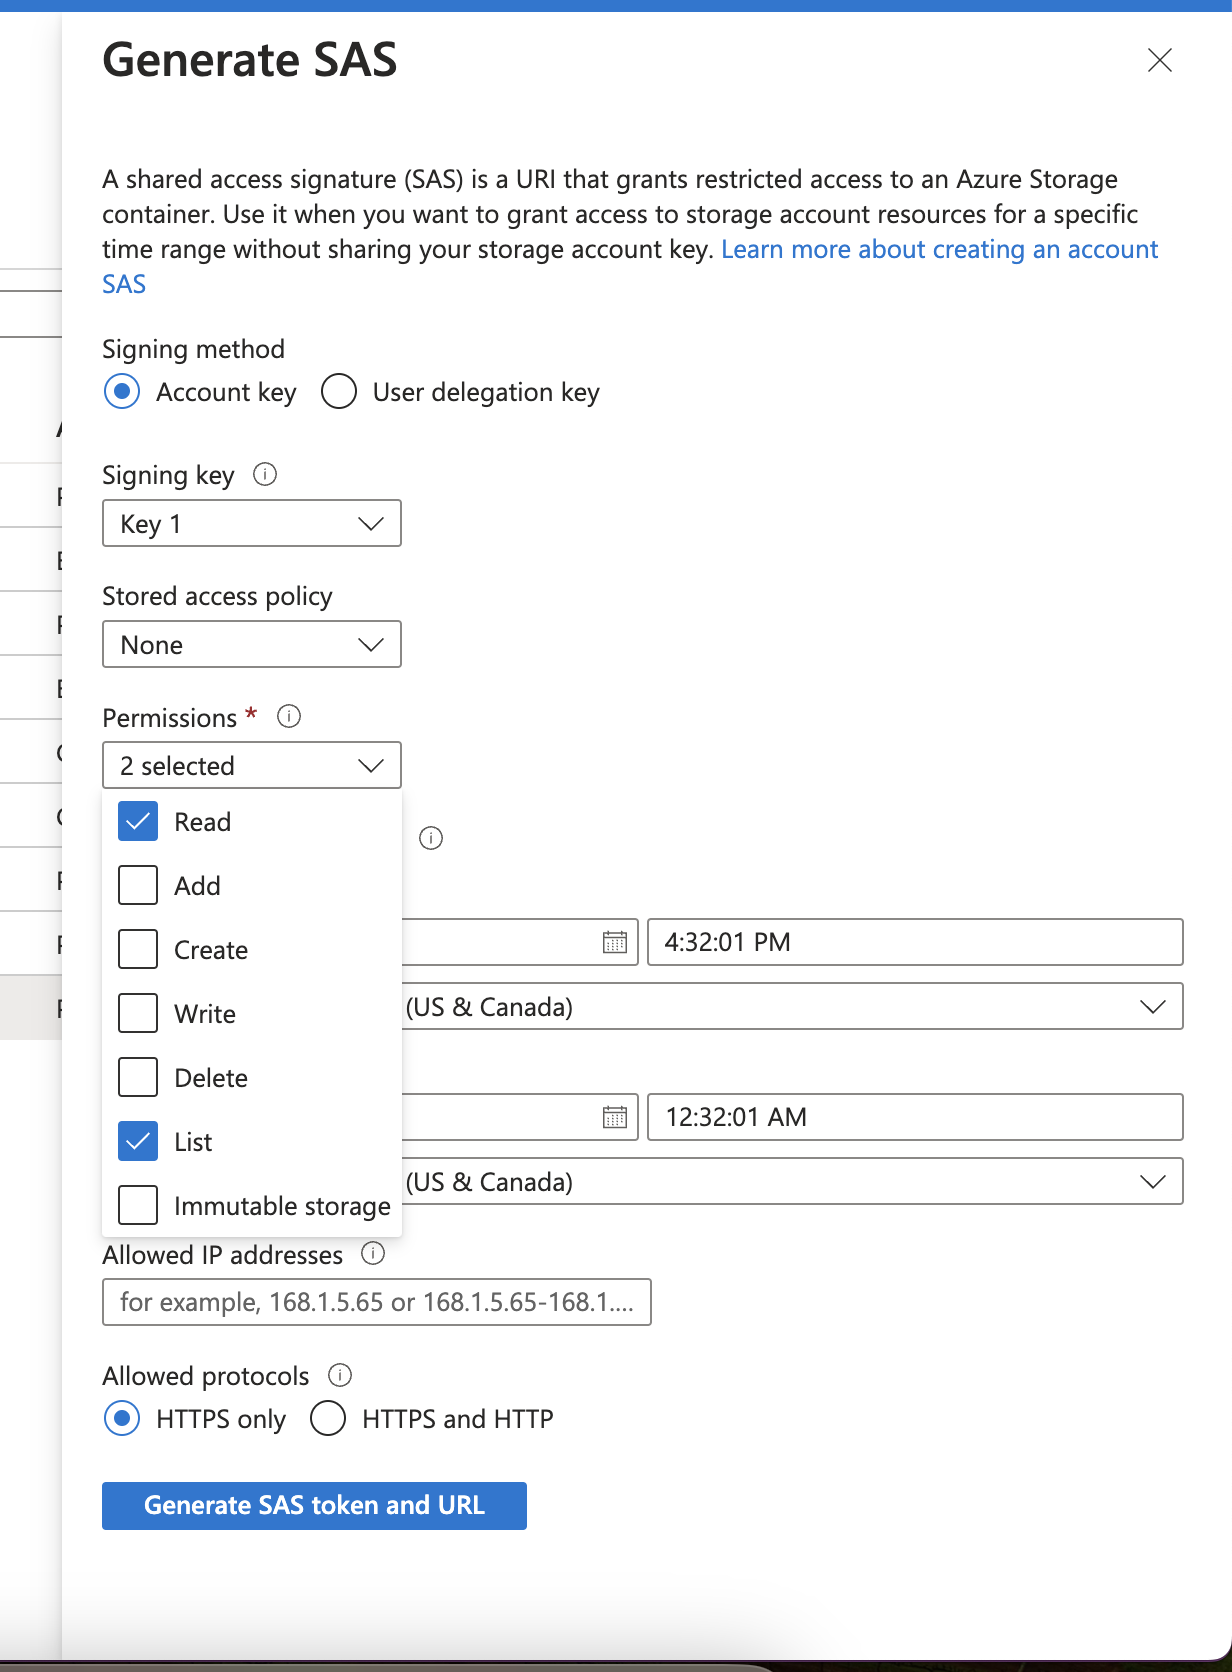
- Click on Generate SAS. This is a URI that grants Scale Generative Platform restricted Access to the selected Azure Storage container. In order to access the data in this container, we will need Read and List privileges.
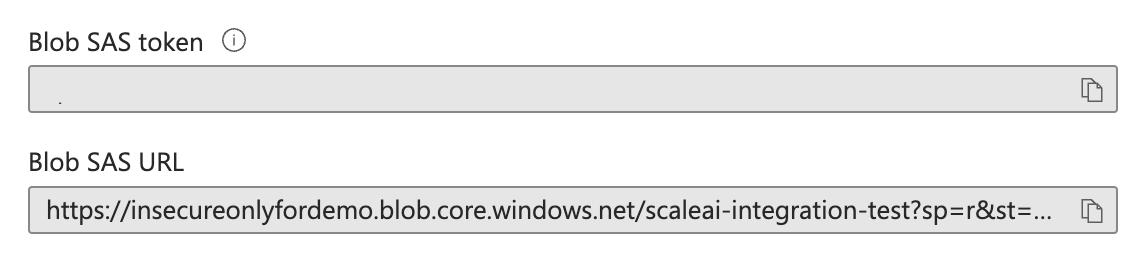
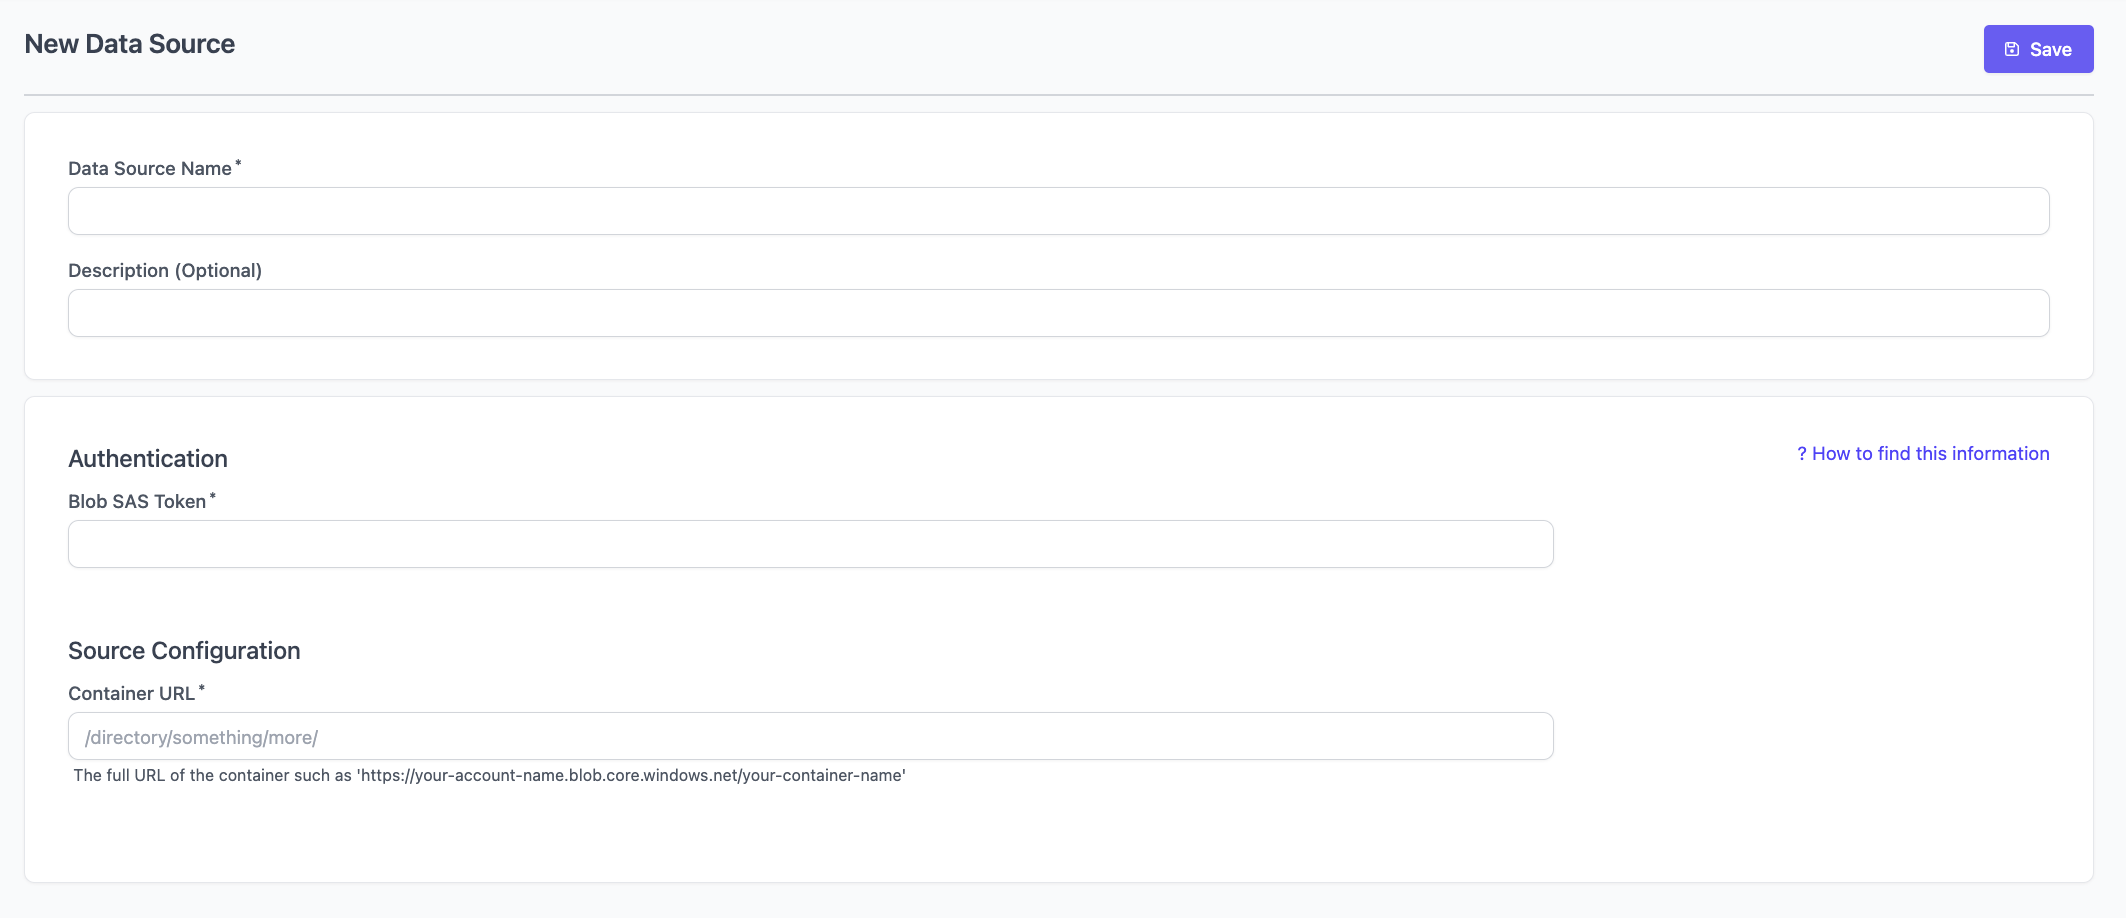
- After generation, you will see a Blob SAS Token and Blob SAS URL. To connect a data source, you will need the Blob SAS Token.
Connect your data source
MS SharePoint
In order to connect a SharePoint data source, you need to:- Create a new App Registration.
- Grant Sharepoint read access to the App Registration.
- Create a Client Secret for the App Registration.
- Obtain the SharePoint site Id.
- Connect the Data Source.
Create a new App Registration
- Navigate to Microsoft Entra ID in the Azure Portal under the organization that owns the SharePoint site you would like to use as a data source.
- Go to App registrations in the lefthand sidebar and click New registration.

- Enter a name for the application and select Accounts in any organizational directory for Supported account types.
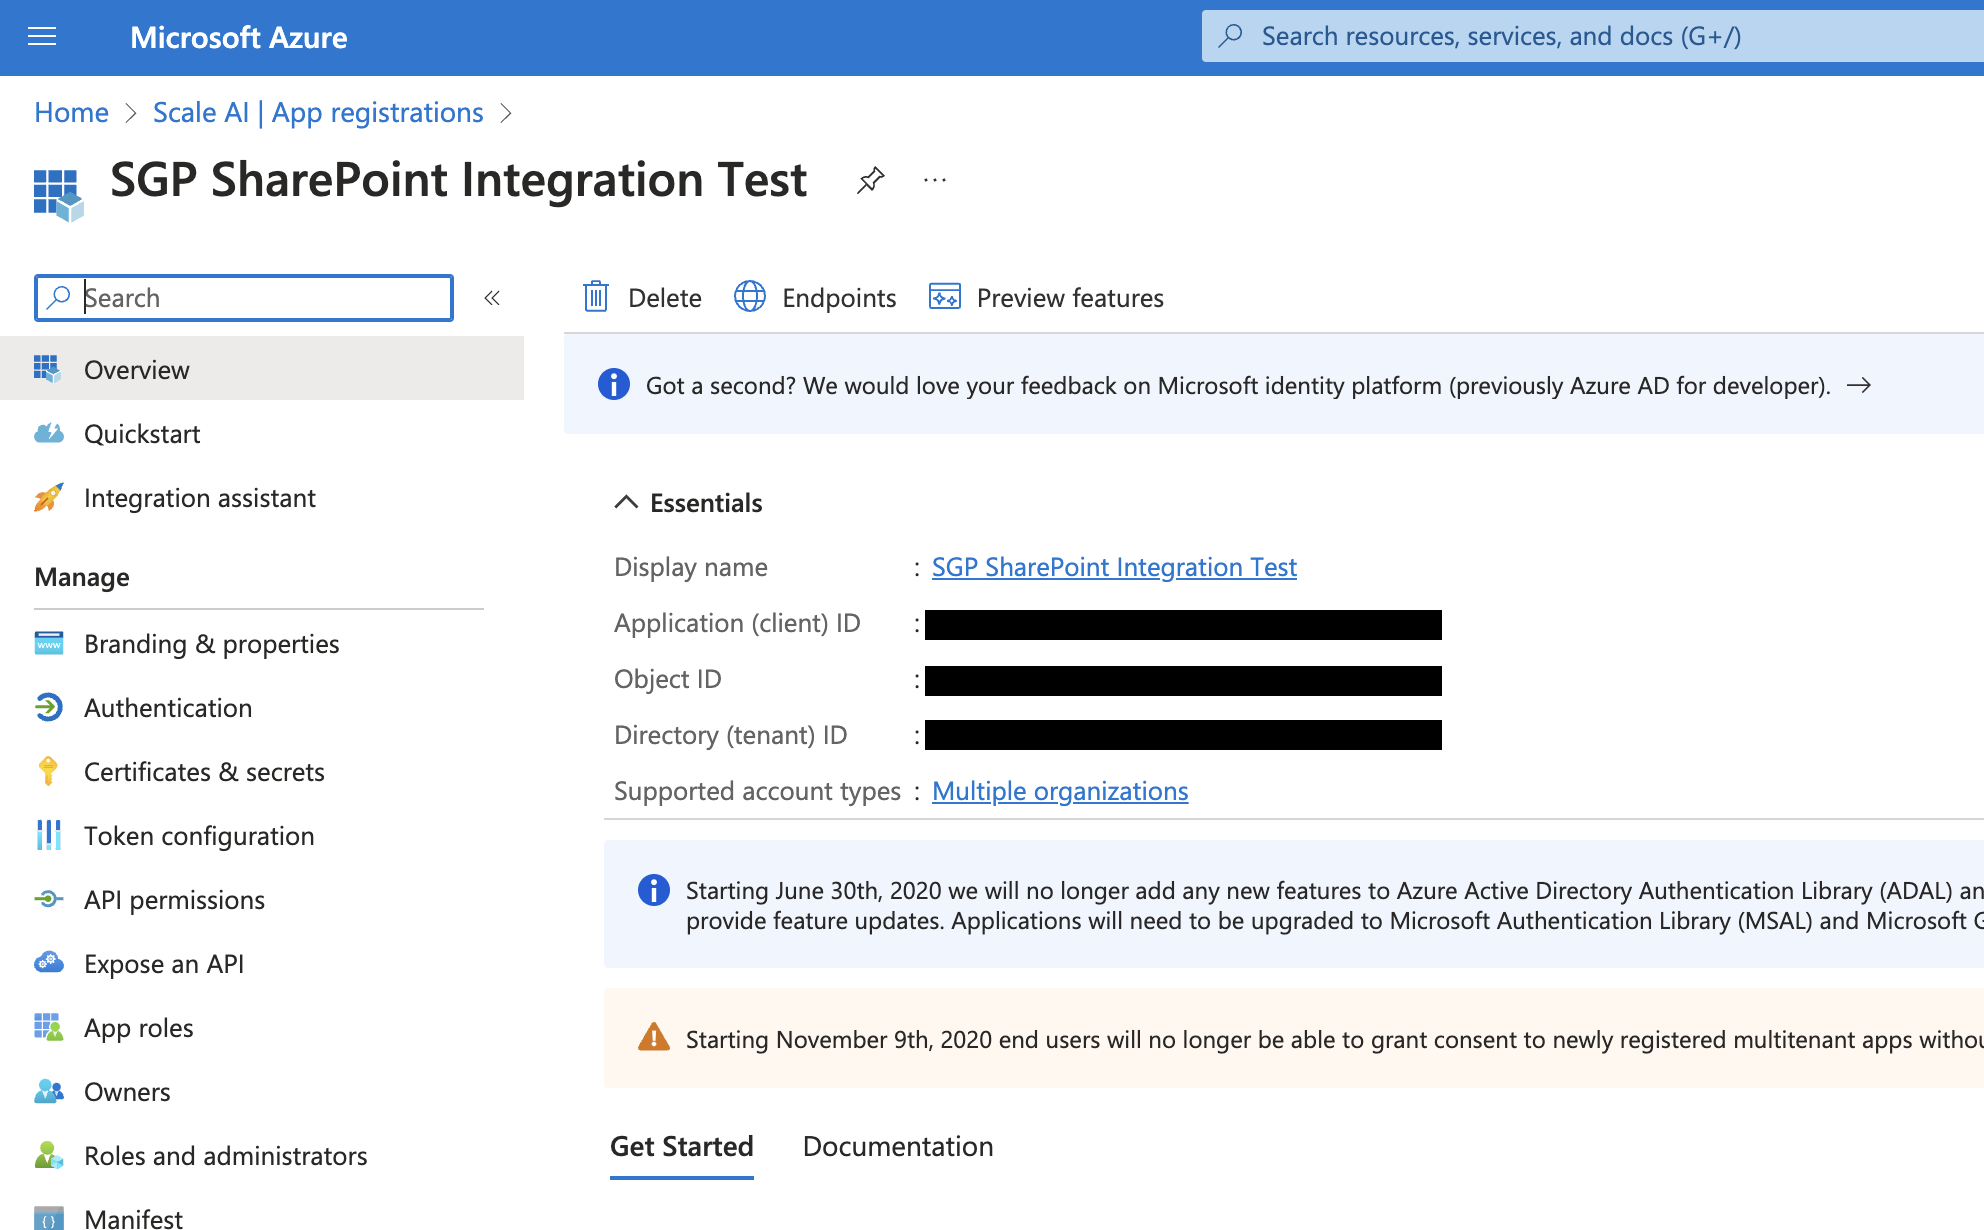
- After creating the new registration, navigate to the registration’s Overview page to find the respective
client_idandtenant_id.
Grant SharePoint read access to the App Registration
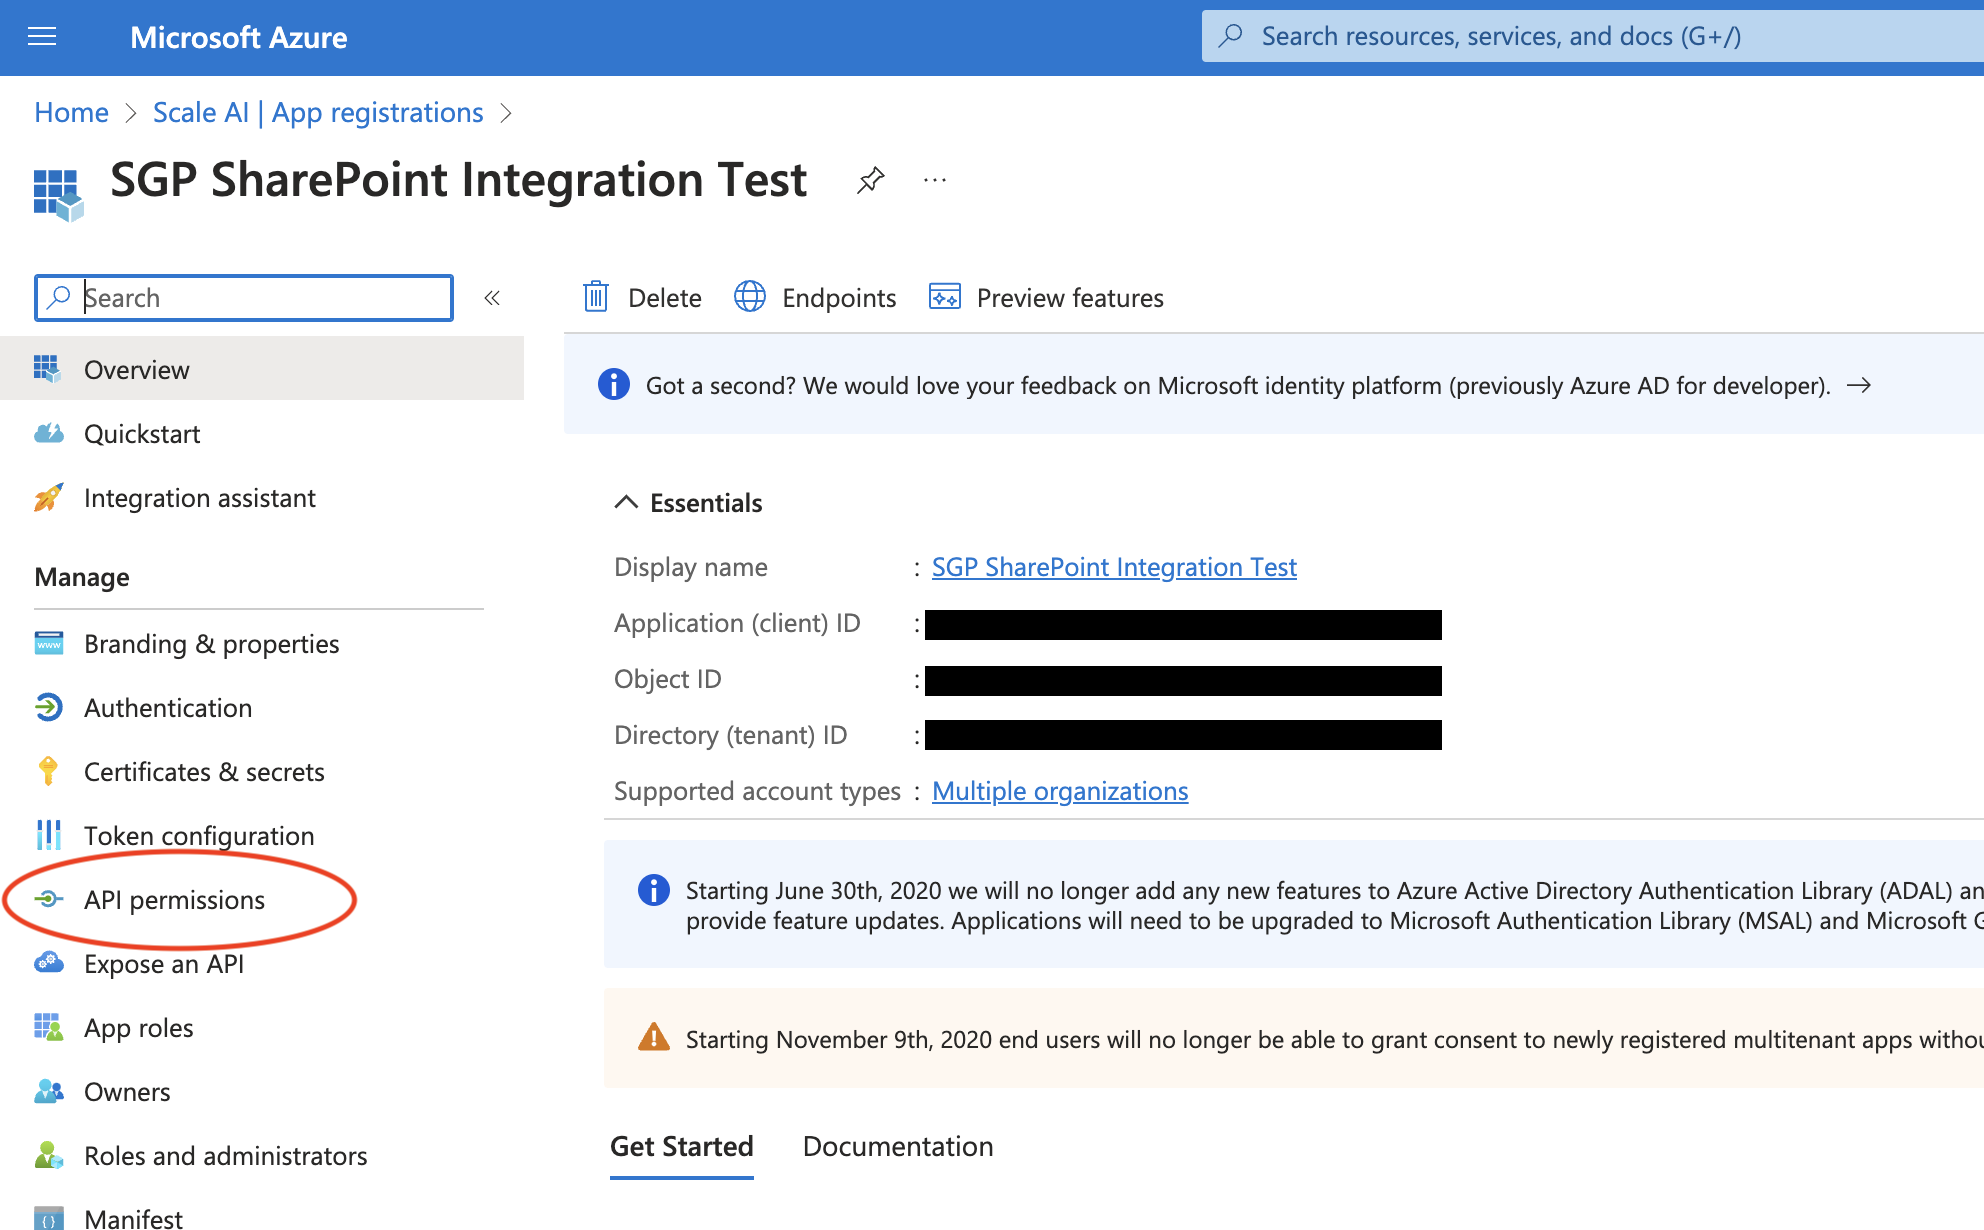
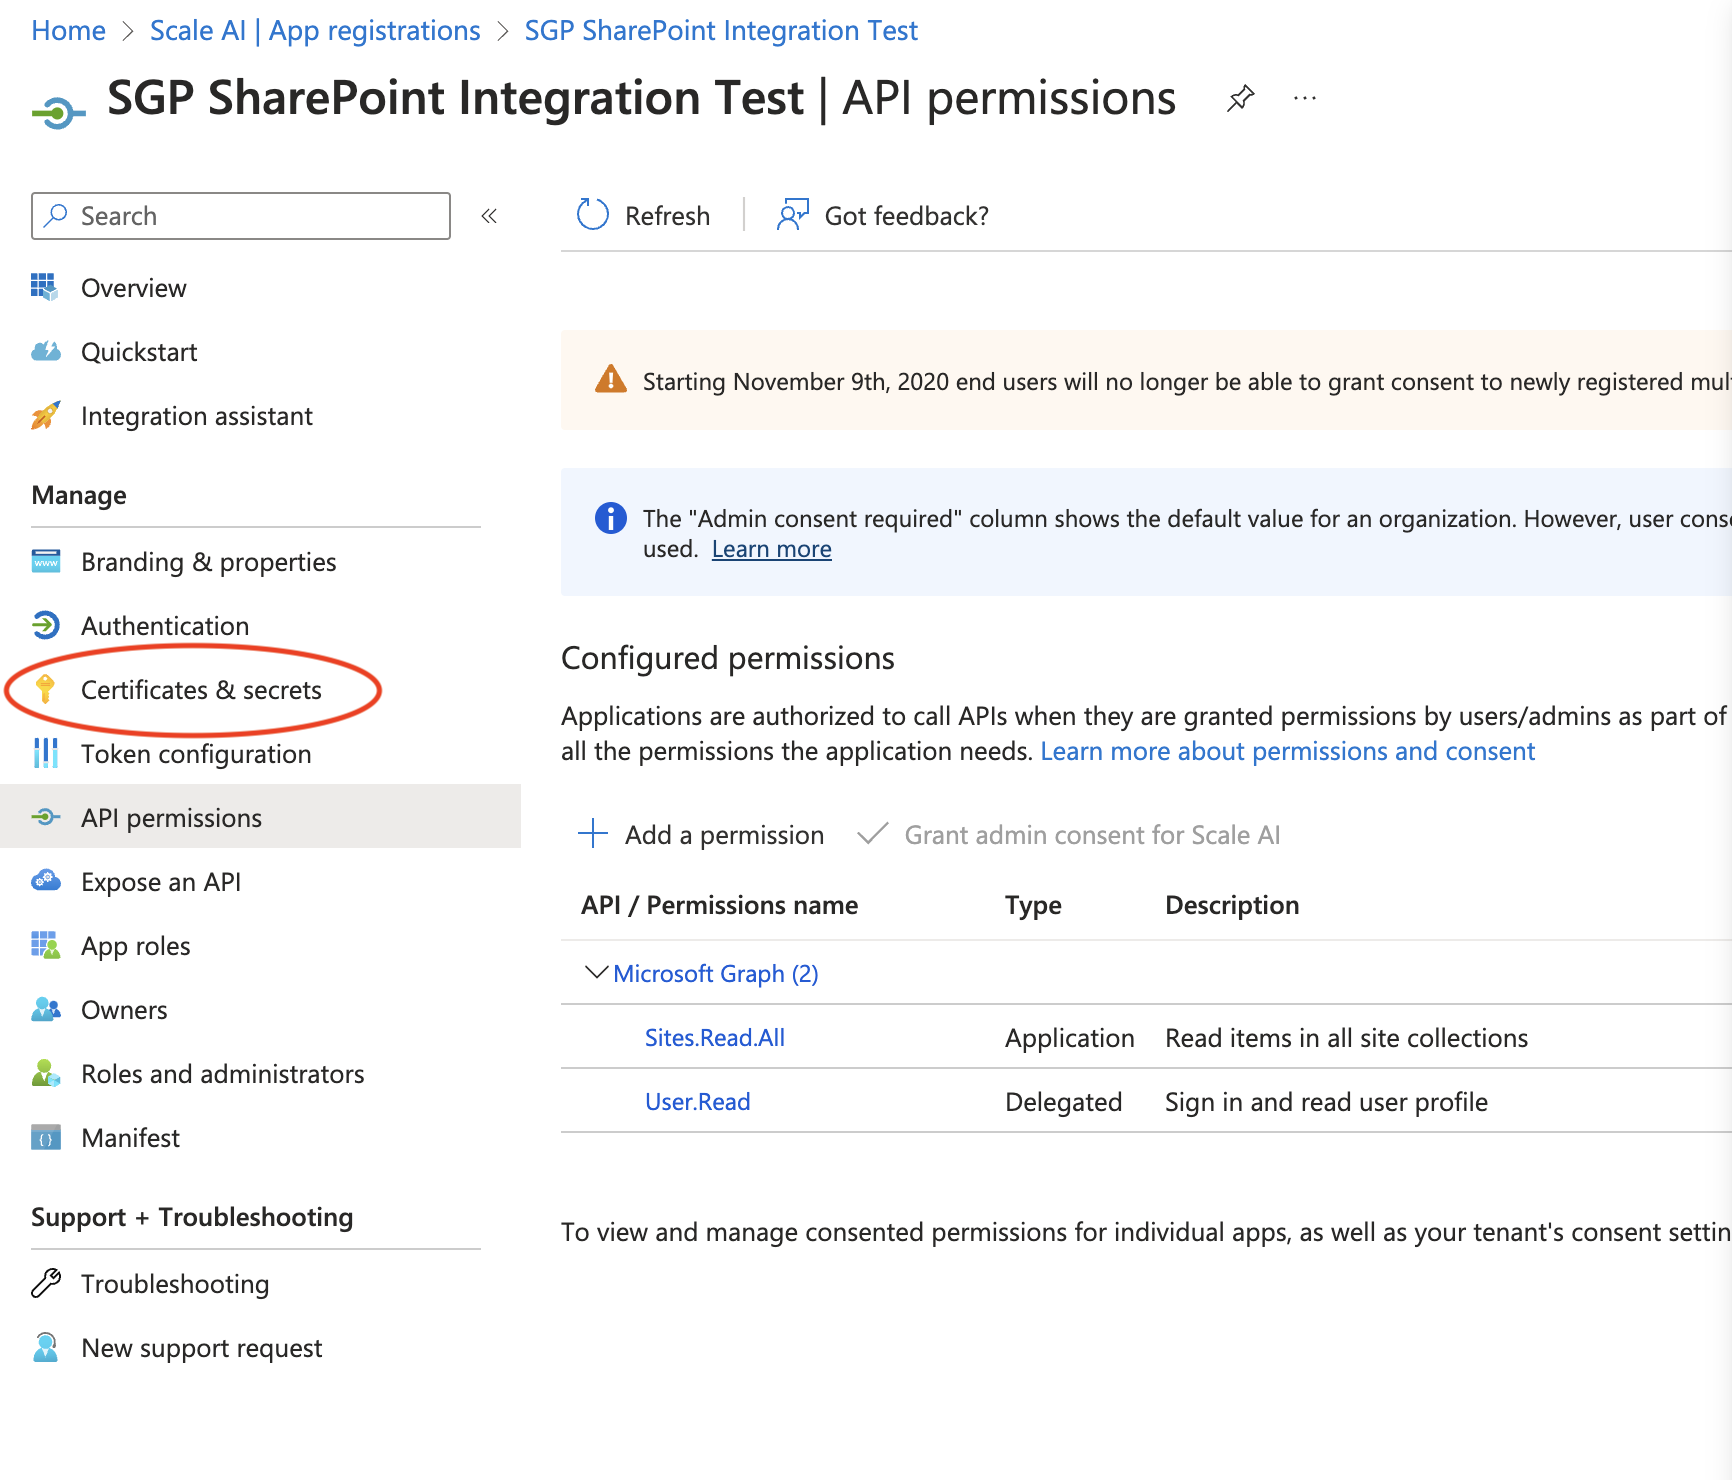
- Navigate to API Permissions in the sidebar.
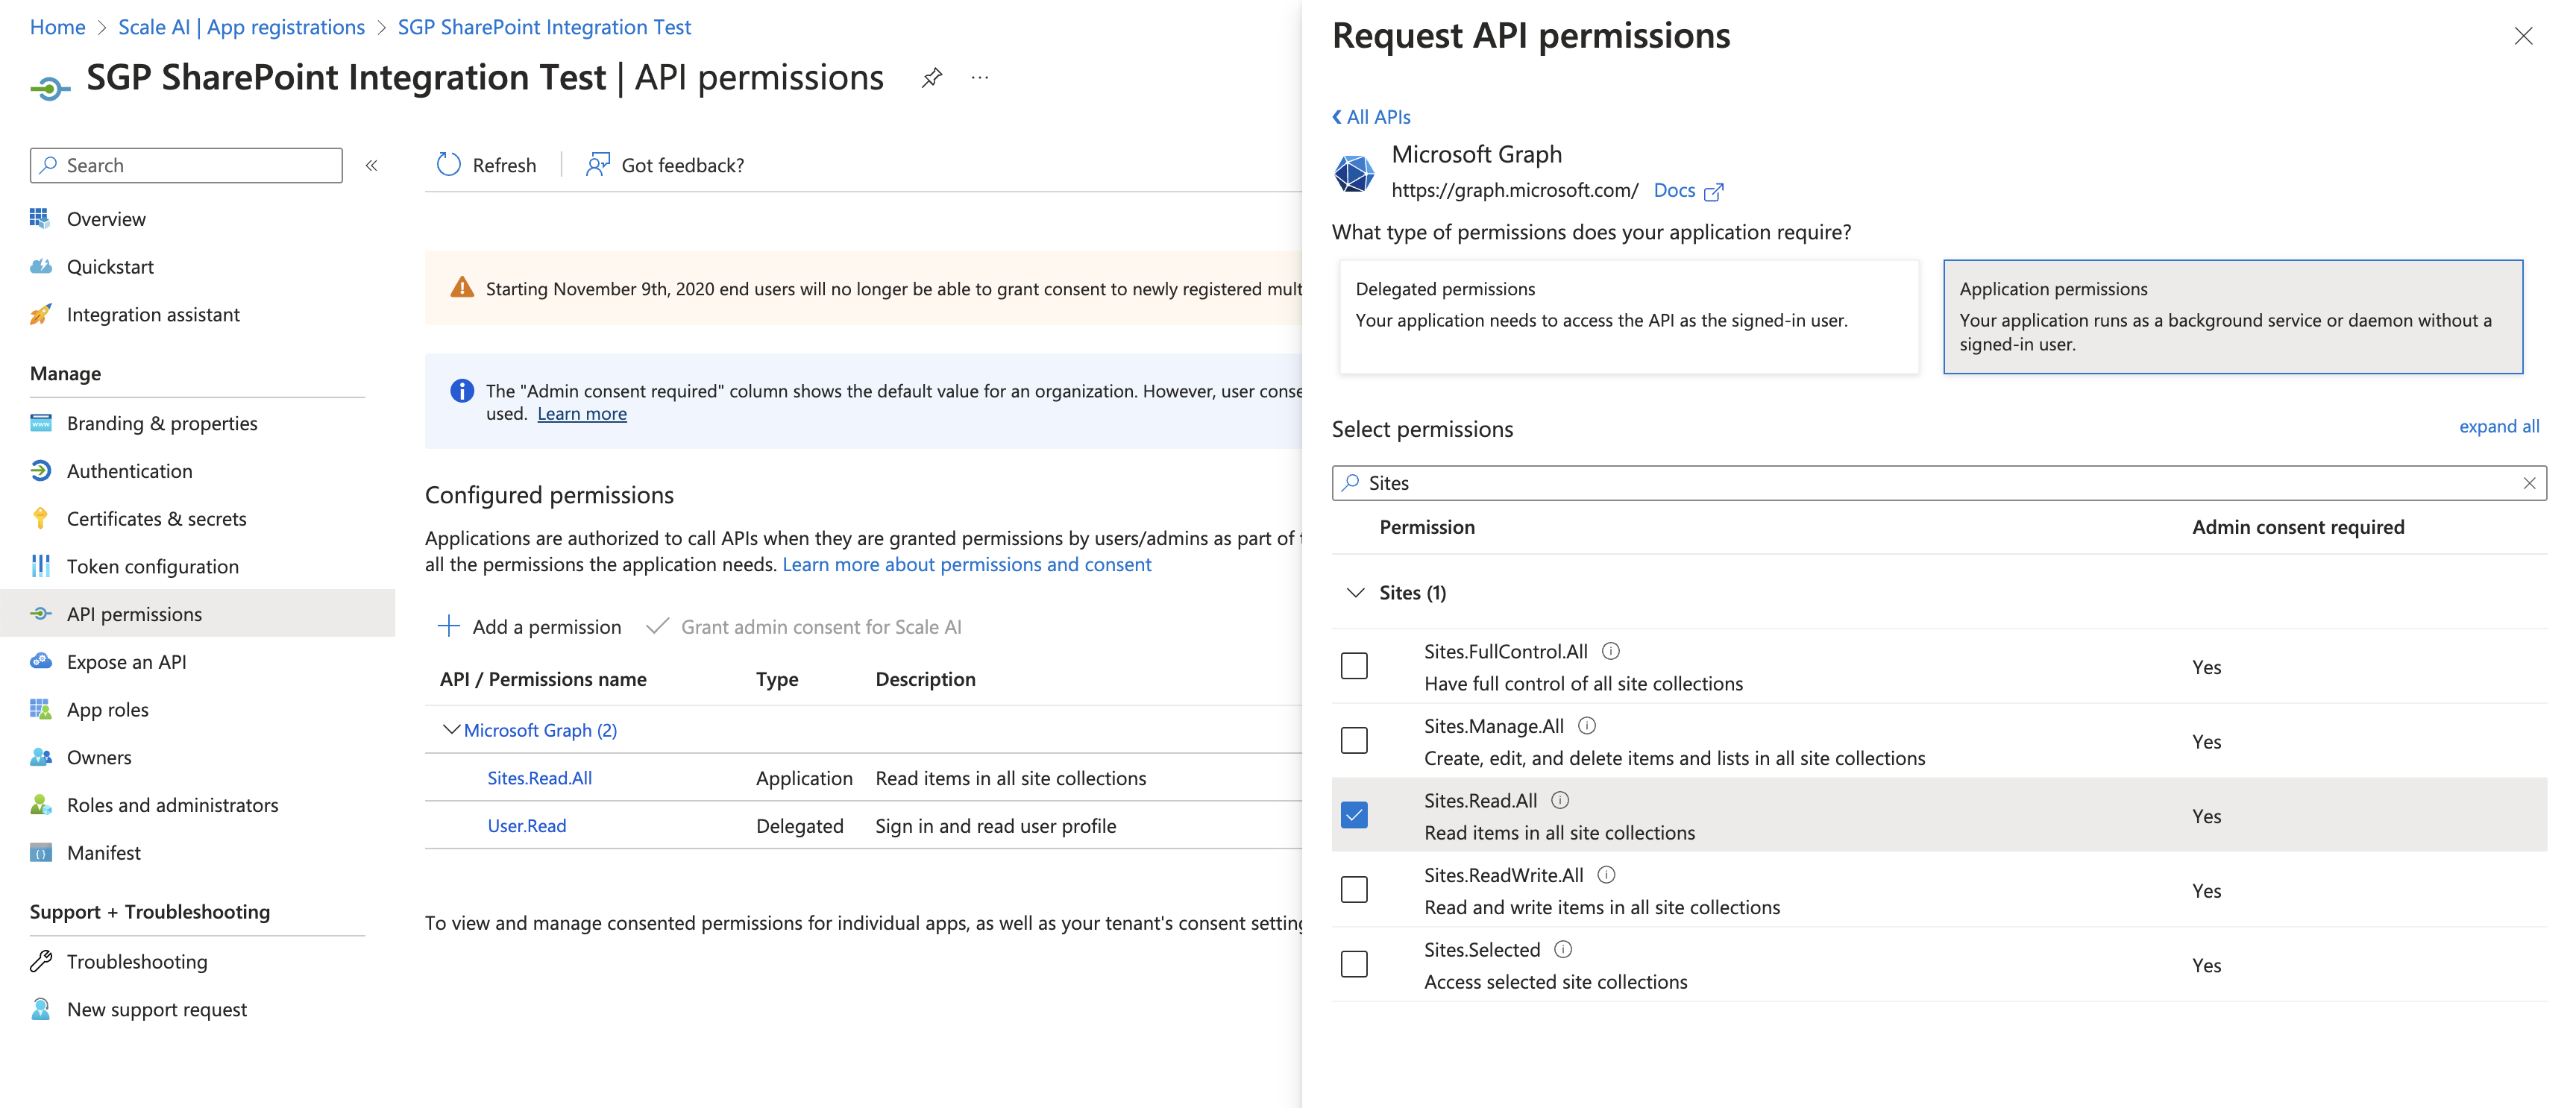
- Click Add permission.
- Under Select an API choose Microsoft Graph.
- Select Application permissions for permissions type.
- Check Sites.Read.All under Sites.
Note: You may need to reach out to an organization admin to have this permission request approved.
Create a Client Secret for the App Registration
- Navigate to Certificates and Secrets in the sidebar.
- Click New client secret and choose a name and expiration date.
Note: you will need to update the client_secret for the data source after the expiration date
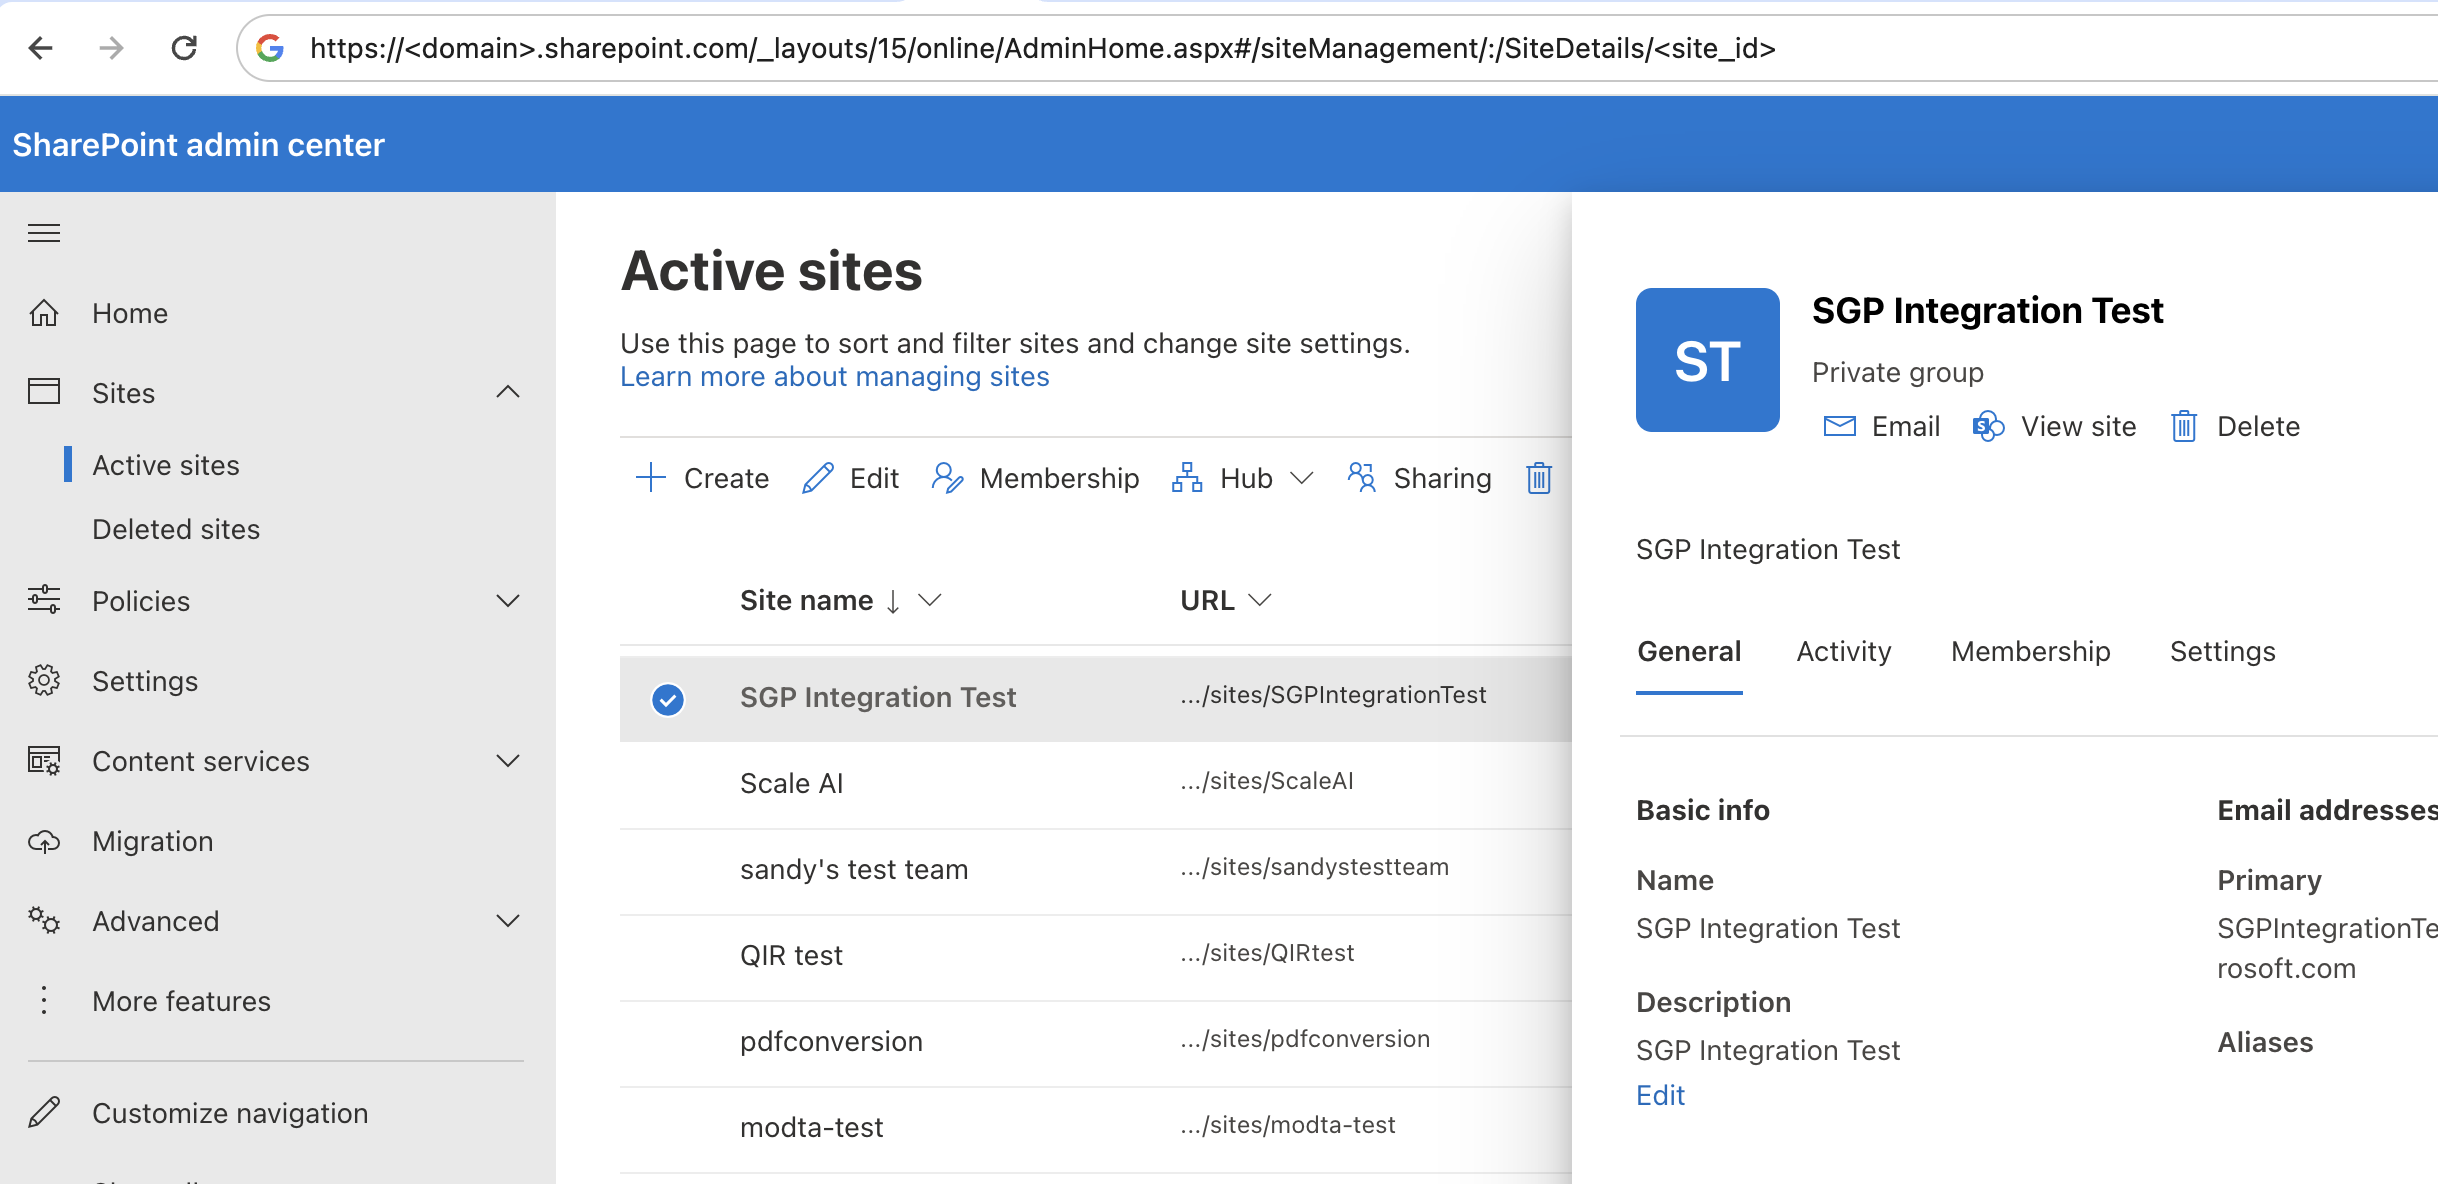
Obtain the SharePoint site ID
- Navigate to the SharePoint admin control center and find the site that you want to use as a data source.
- Select the site, extract the
**site_id**from the URL. This will appear at the end of the URL path after**/SiteDetails**.
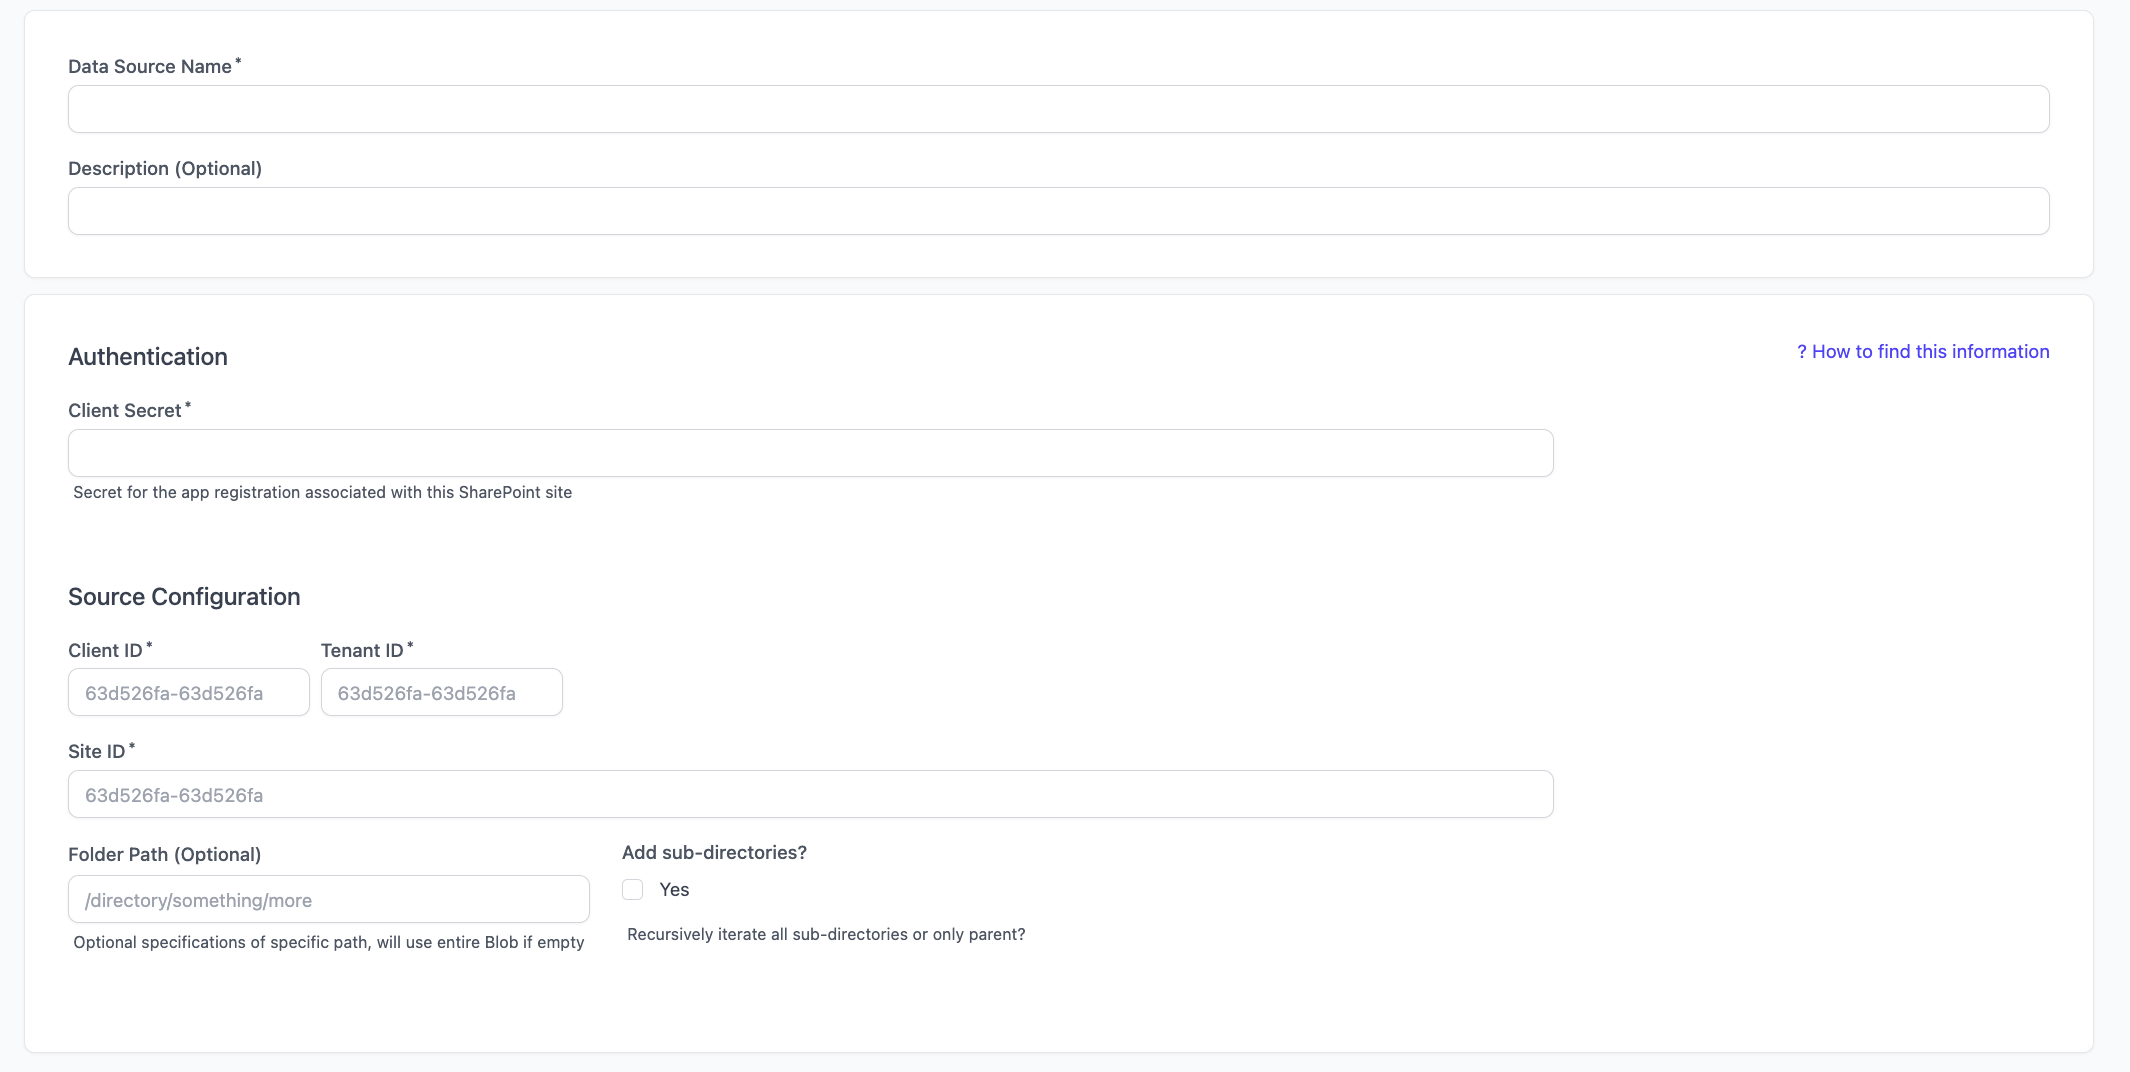
Connect the Data Source
Populate with the Client Secret, Client ID, Tenant ID, and Site ID from previous steps.