Dex SDK).
You’ll learn how to connect to cloud file storage, filter and parse documents, extract structured data, store parsed data to Knowledge Base, and use the results in your workflows.
Step 1: Connect to cloud file storage
Start by navigating toWorkflows in SGP. Click on the Cloud Storage Browser card to connect to your cloud file storage.
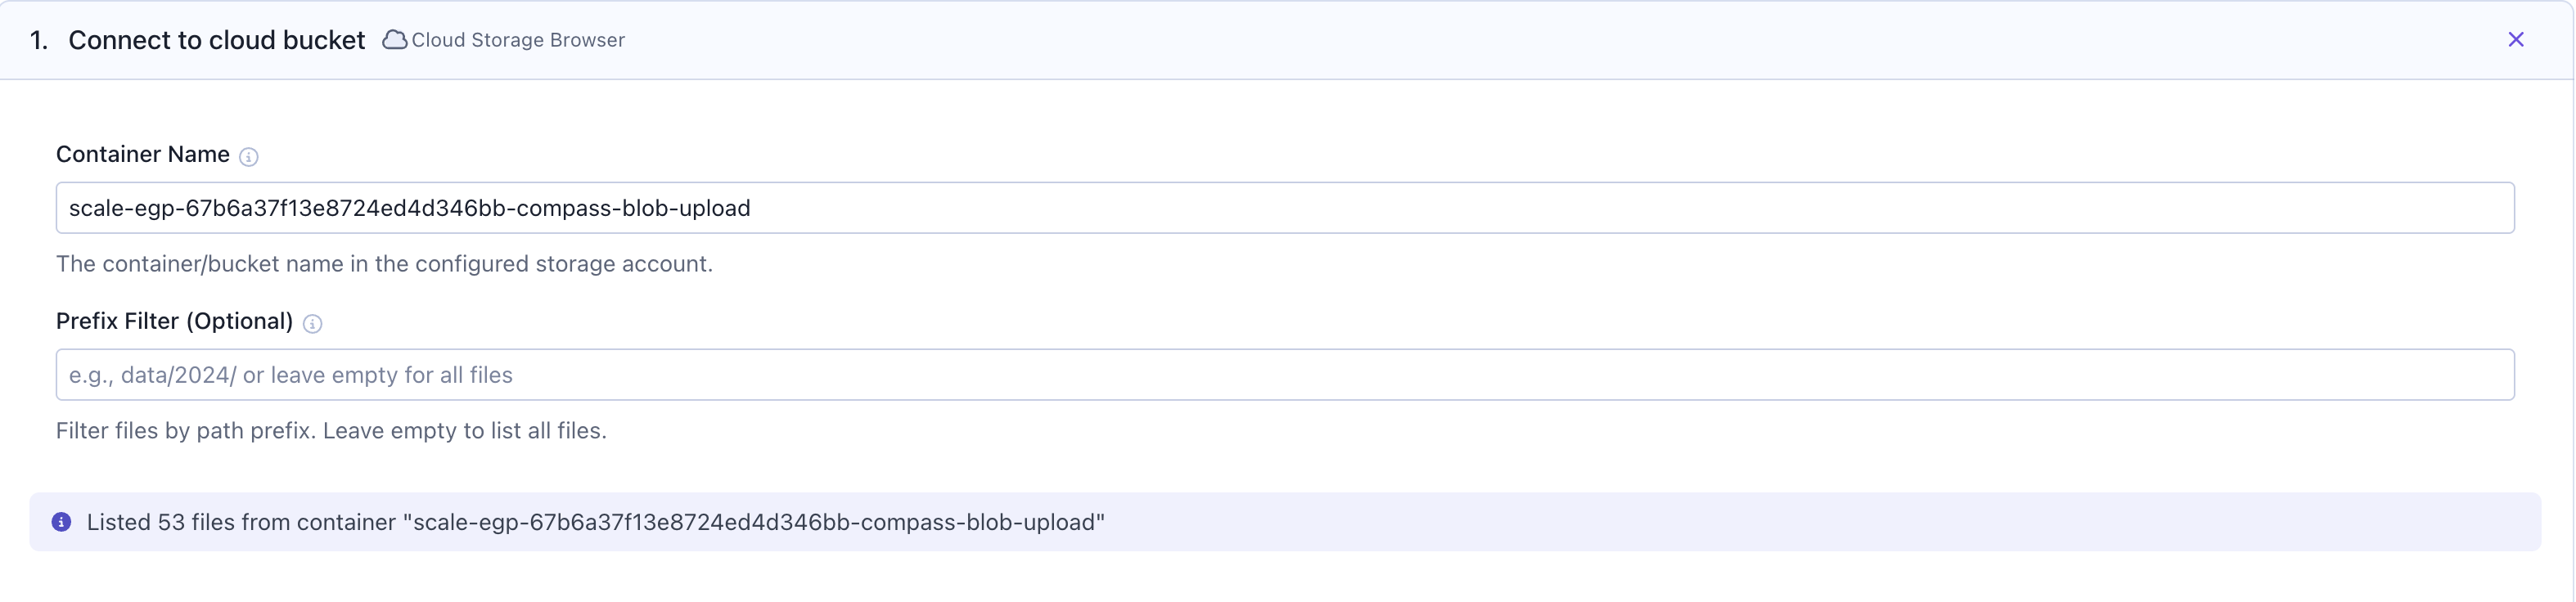
- Amazon S3
- Azure Blob Storage
- Google Cloud Storage
To add an S3 bucket for use with the Cloud Storage Browser card, you must first create a bucket using Terraform and add the bucket to the existing policy within the Compass role. Please reach out to the Compass team for example PRs that illustrate how to take those steps.
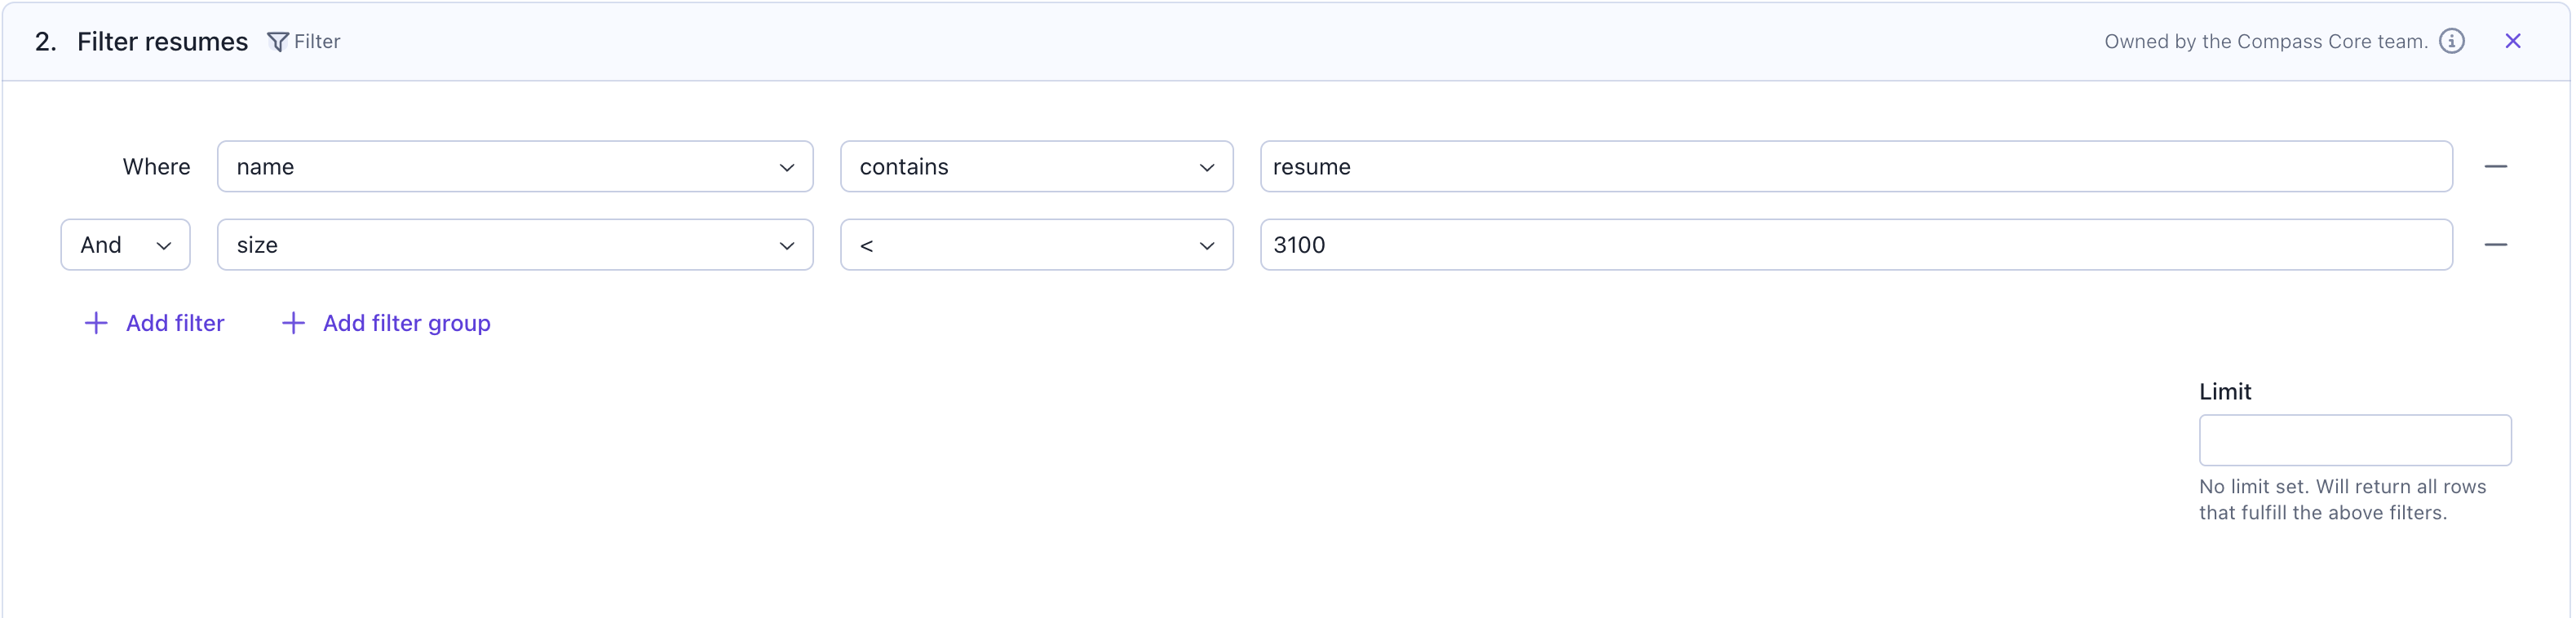
Step 2: Filter files (optional)
Before parsing, you can use aFilter card to select only the files you want to process. This helps you narrow down your dataset and avoid parsing unnecessary documents.
Step 3: Parse & Extract from documents with the Dex Card
This features utilizes our Document Understanding capability, ourDex SDK on the backend.
Add a Dex card to extract structured data from your documents. This card utilizes the Dex SDK in the backend and automatically creates a Dex project that you can reference later in the Dex UI.
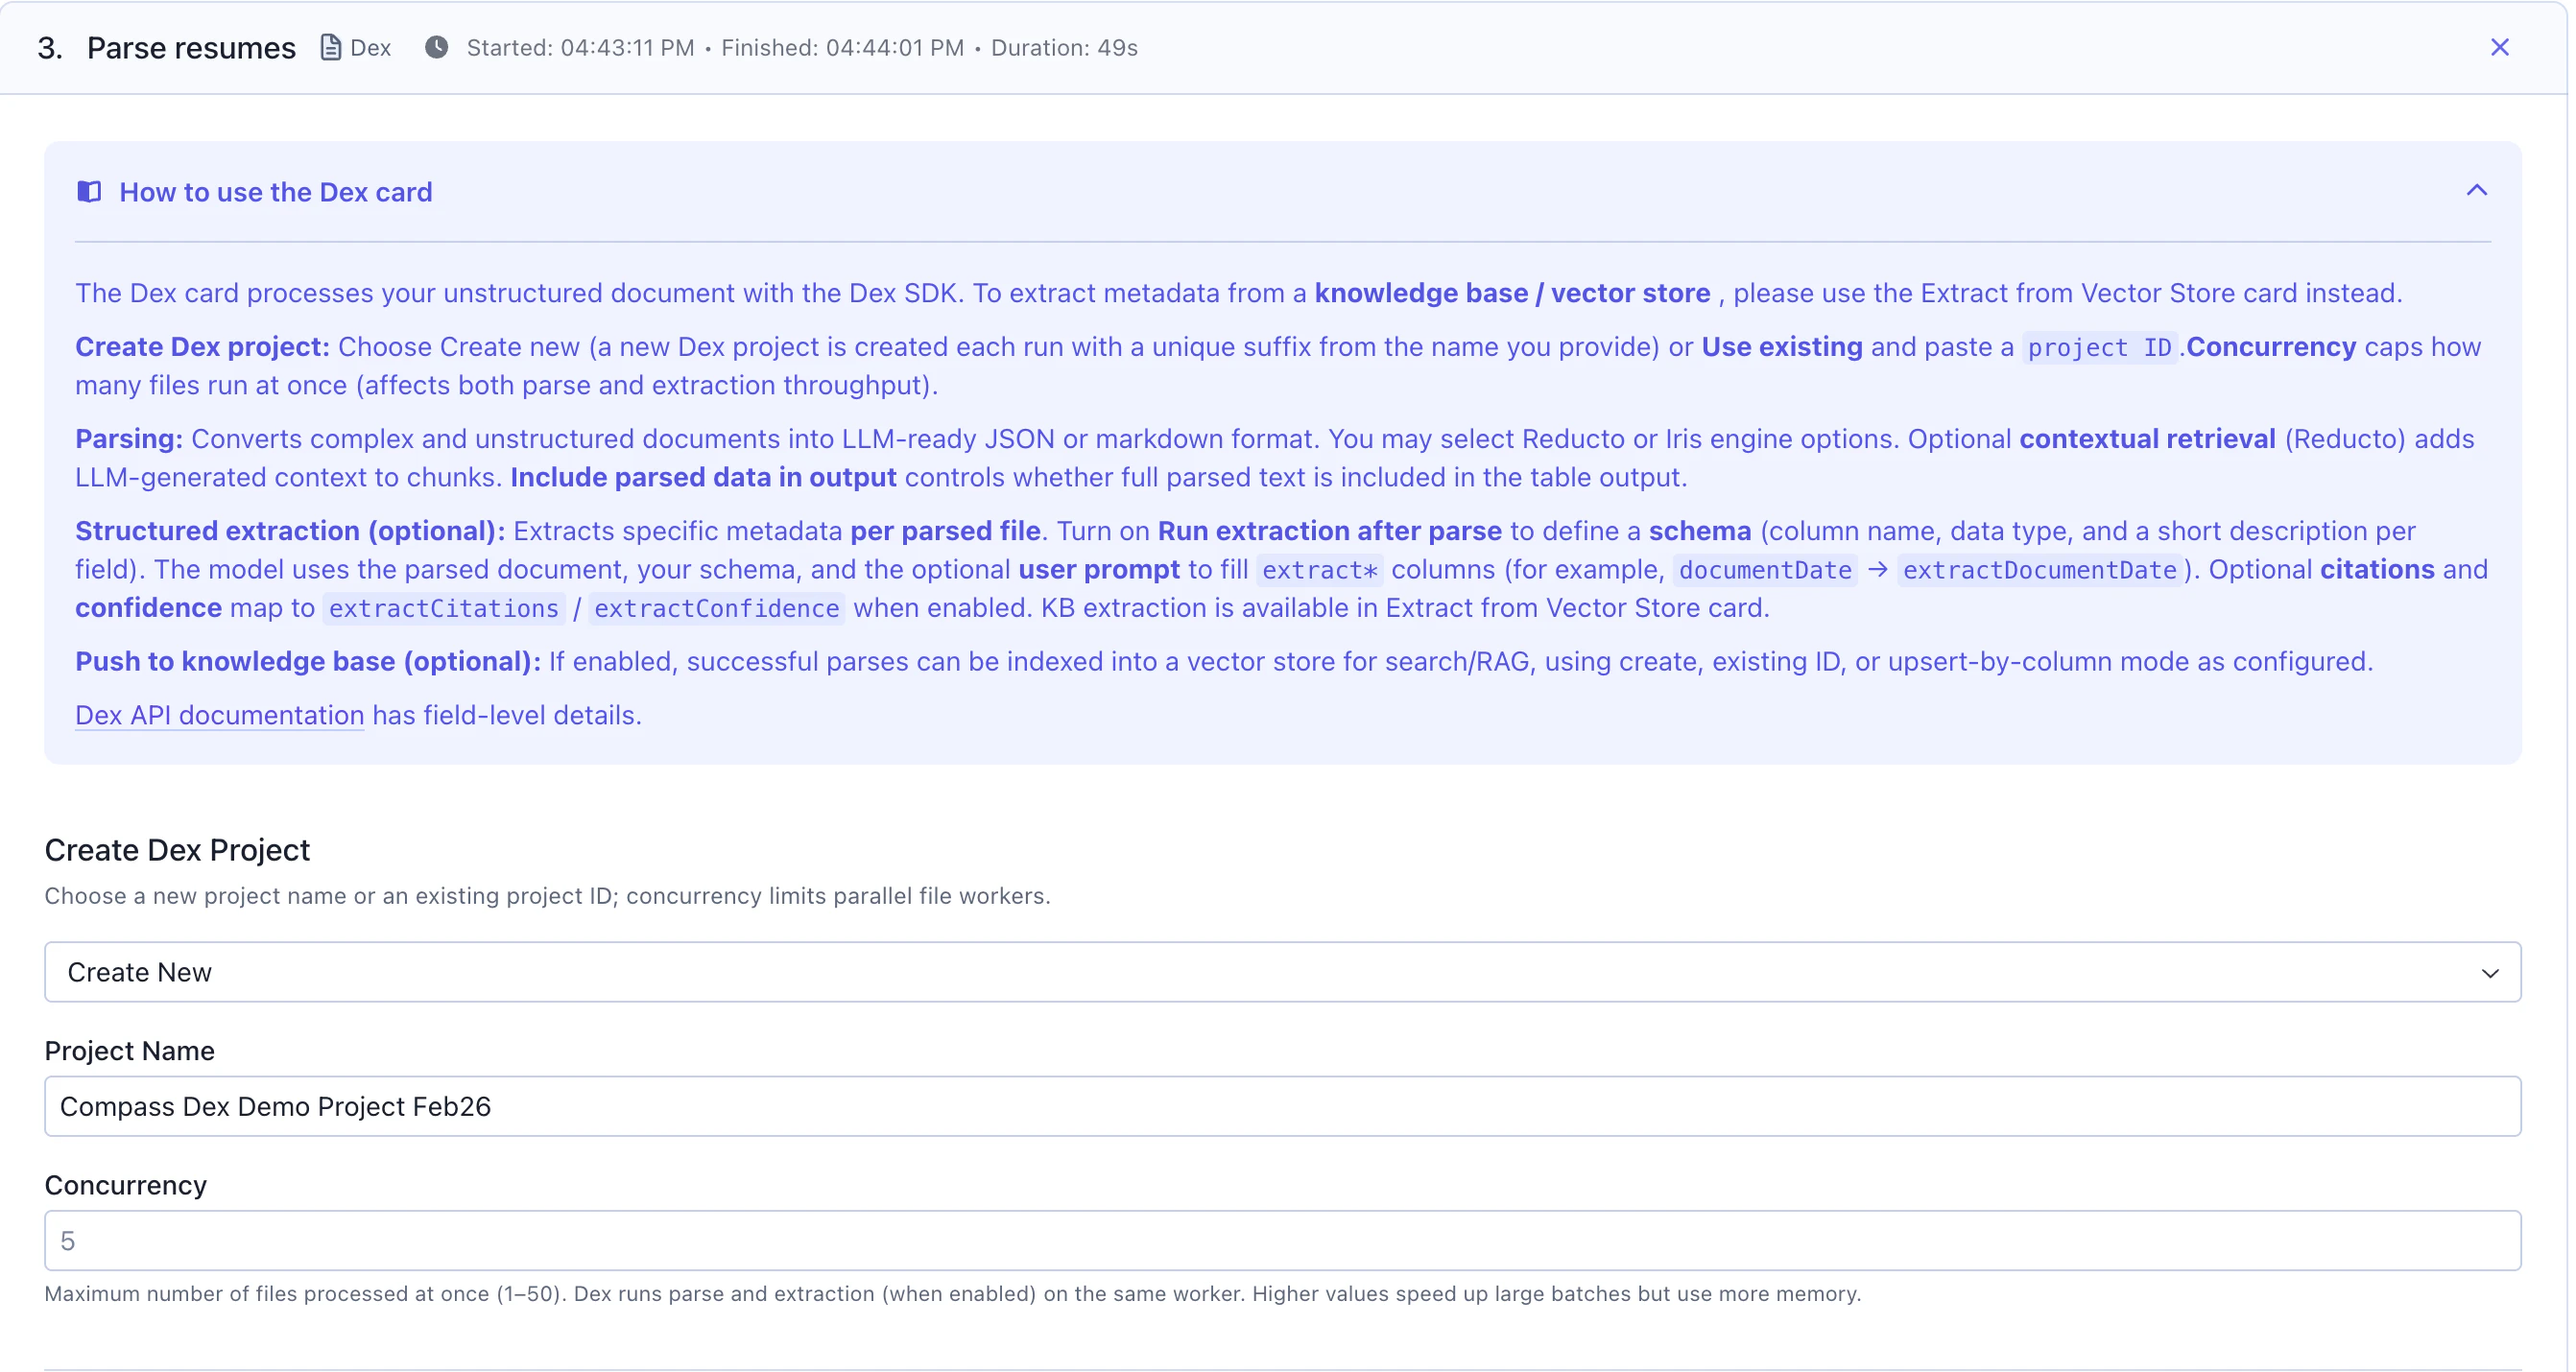
Dex Project Configuration
Project Name: Give your Dex project a descriptive name (e.g., “Resume Parsing Project”)Project ID (Optional):- Enter an existing project ID to reuse a project
- Leave empty to create a new project each time the workflow runs
Parsing
This is the step that converts complex, unstructured files into LLM-ready JSON or markdown format.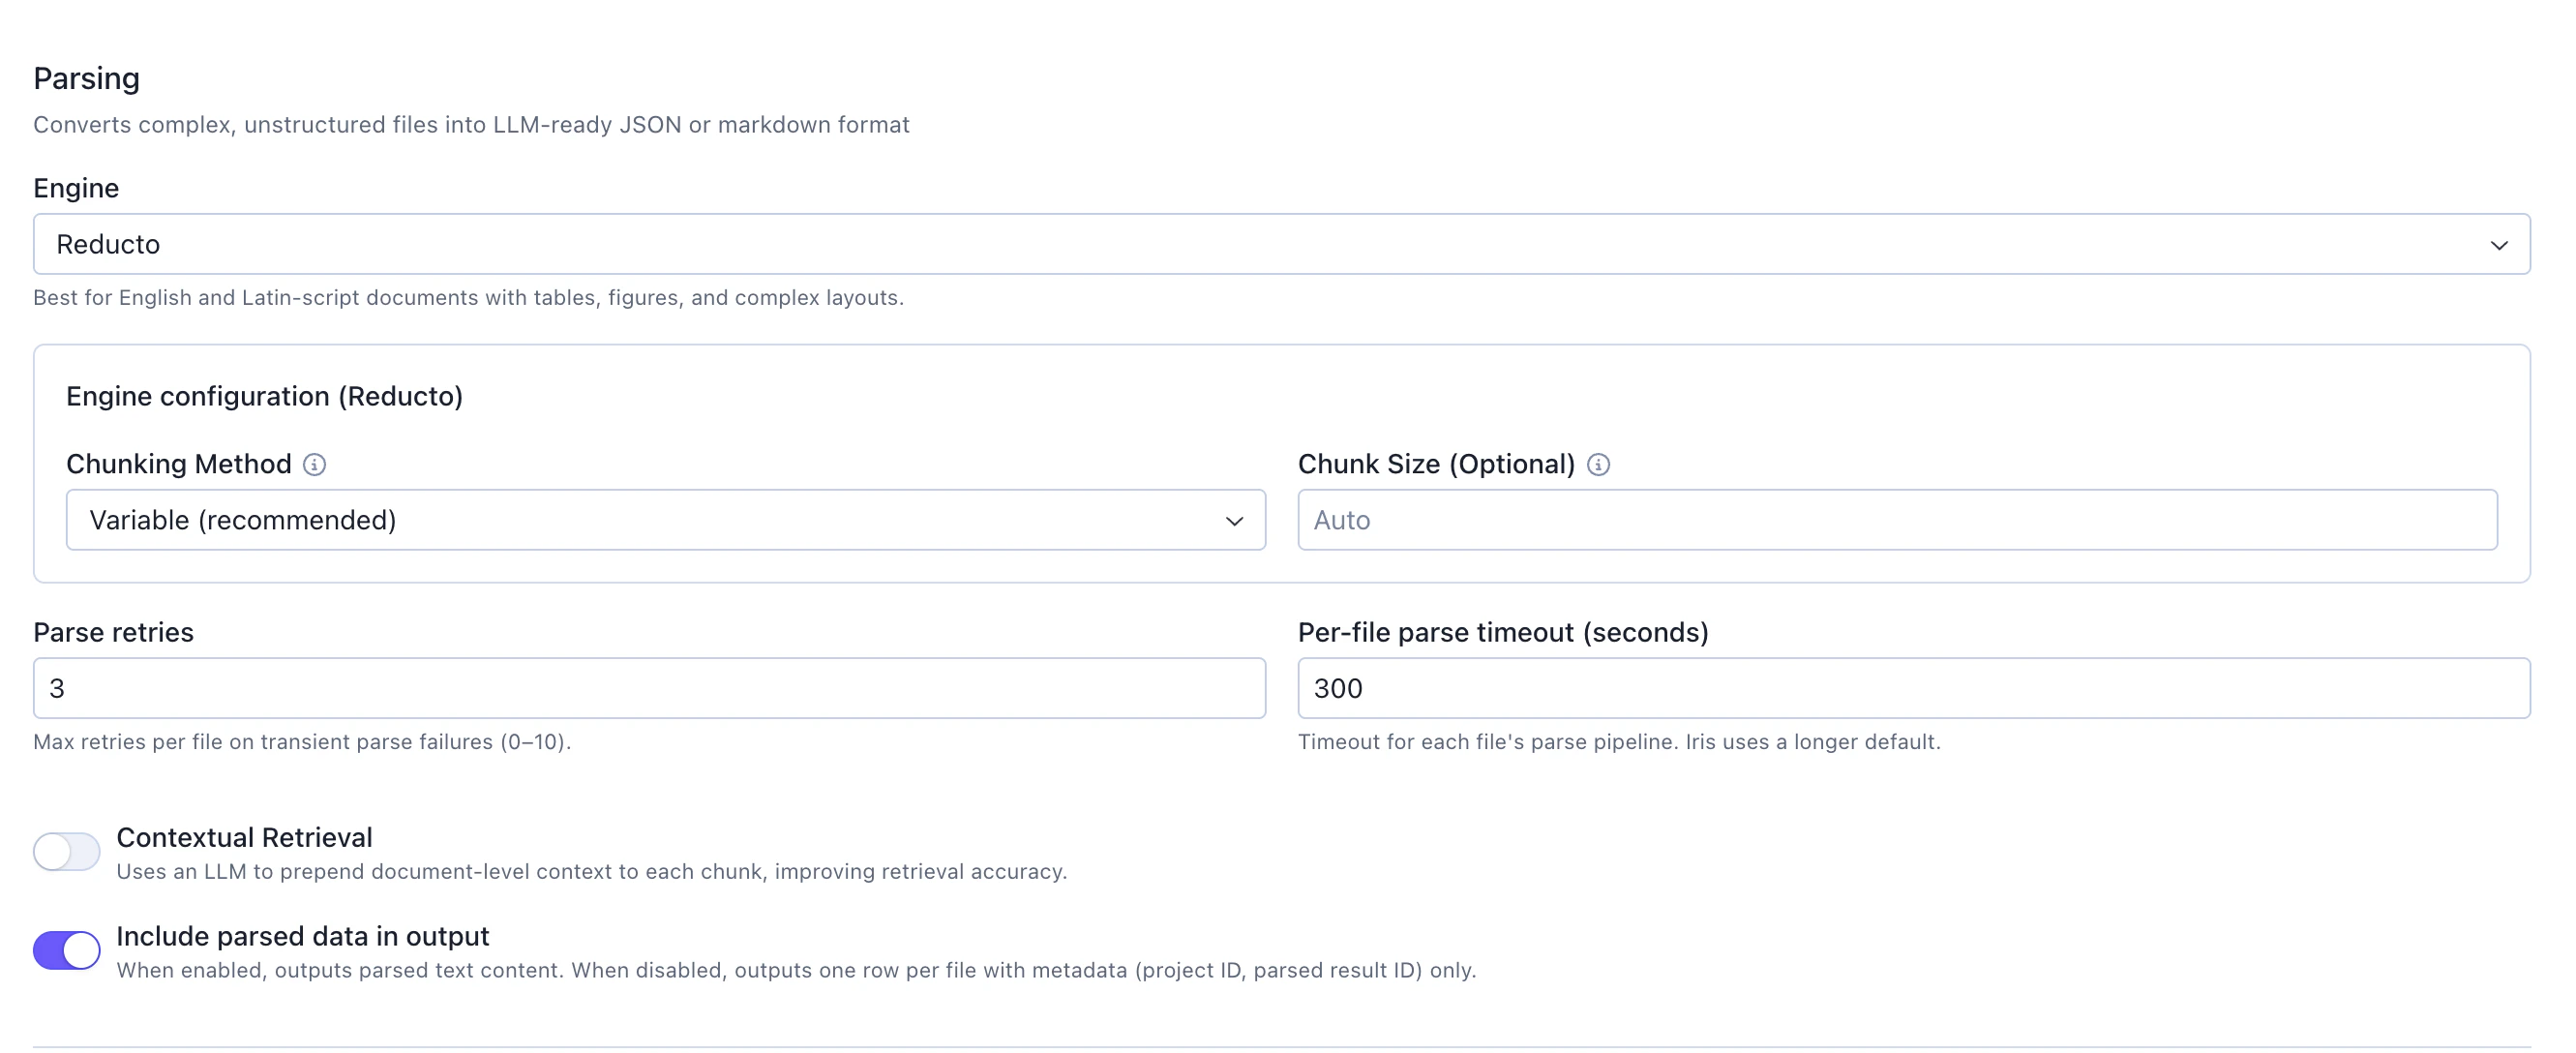
Engine: Select from available parsing engines (e.g.,Reducto). Reducto: Best for English and Latin-script documents with tables, figures, and complex layouts
Variable (recommended): Automatically determines optimal chunk boundariesChunk Size (Optional): Set toAutoto let the engine determine the best size
contextual retrieval which uses an LLM to prepend document-level context to each chunk, improving retrieval accuracy.
Control the visibility of the output data:
Include parsed data in output: Toggle on to output parsed text content for each chunk
- When enabled: Outputs parsed text content with full details
- When disabled: Outputs one row per file with metadata (project ID, parsed result ID) only
Structured Extraction
Optionally extract specific fields from parsed documents using LLM-based extraction. This feature pulls targeted data from unstructured documents into structured metadata columns.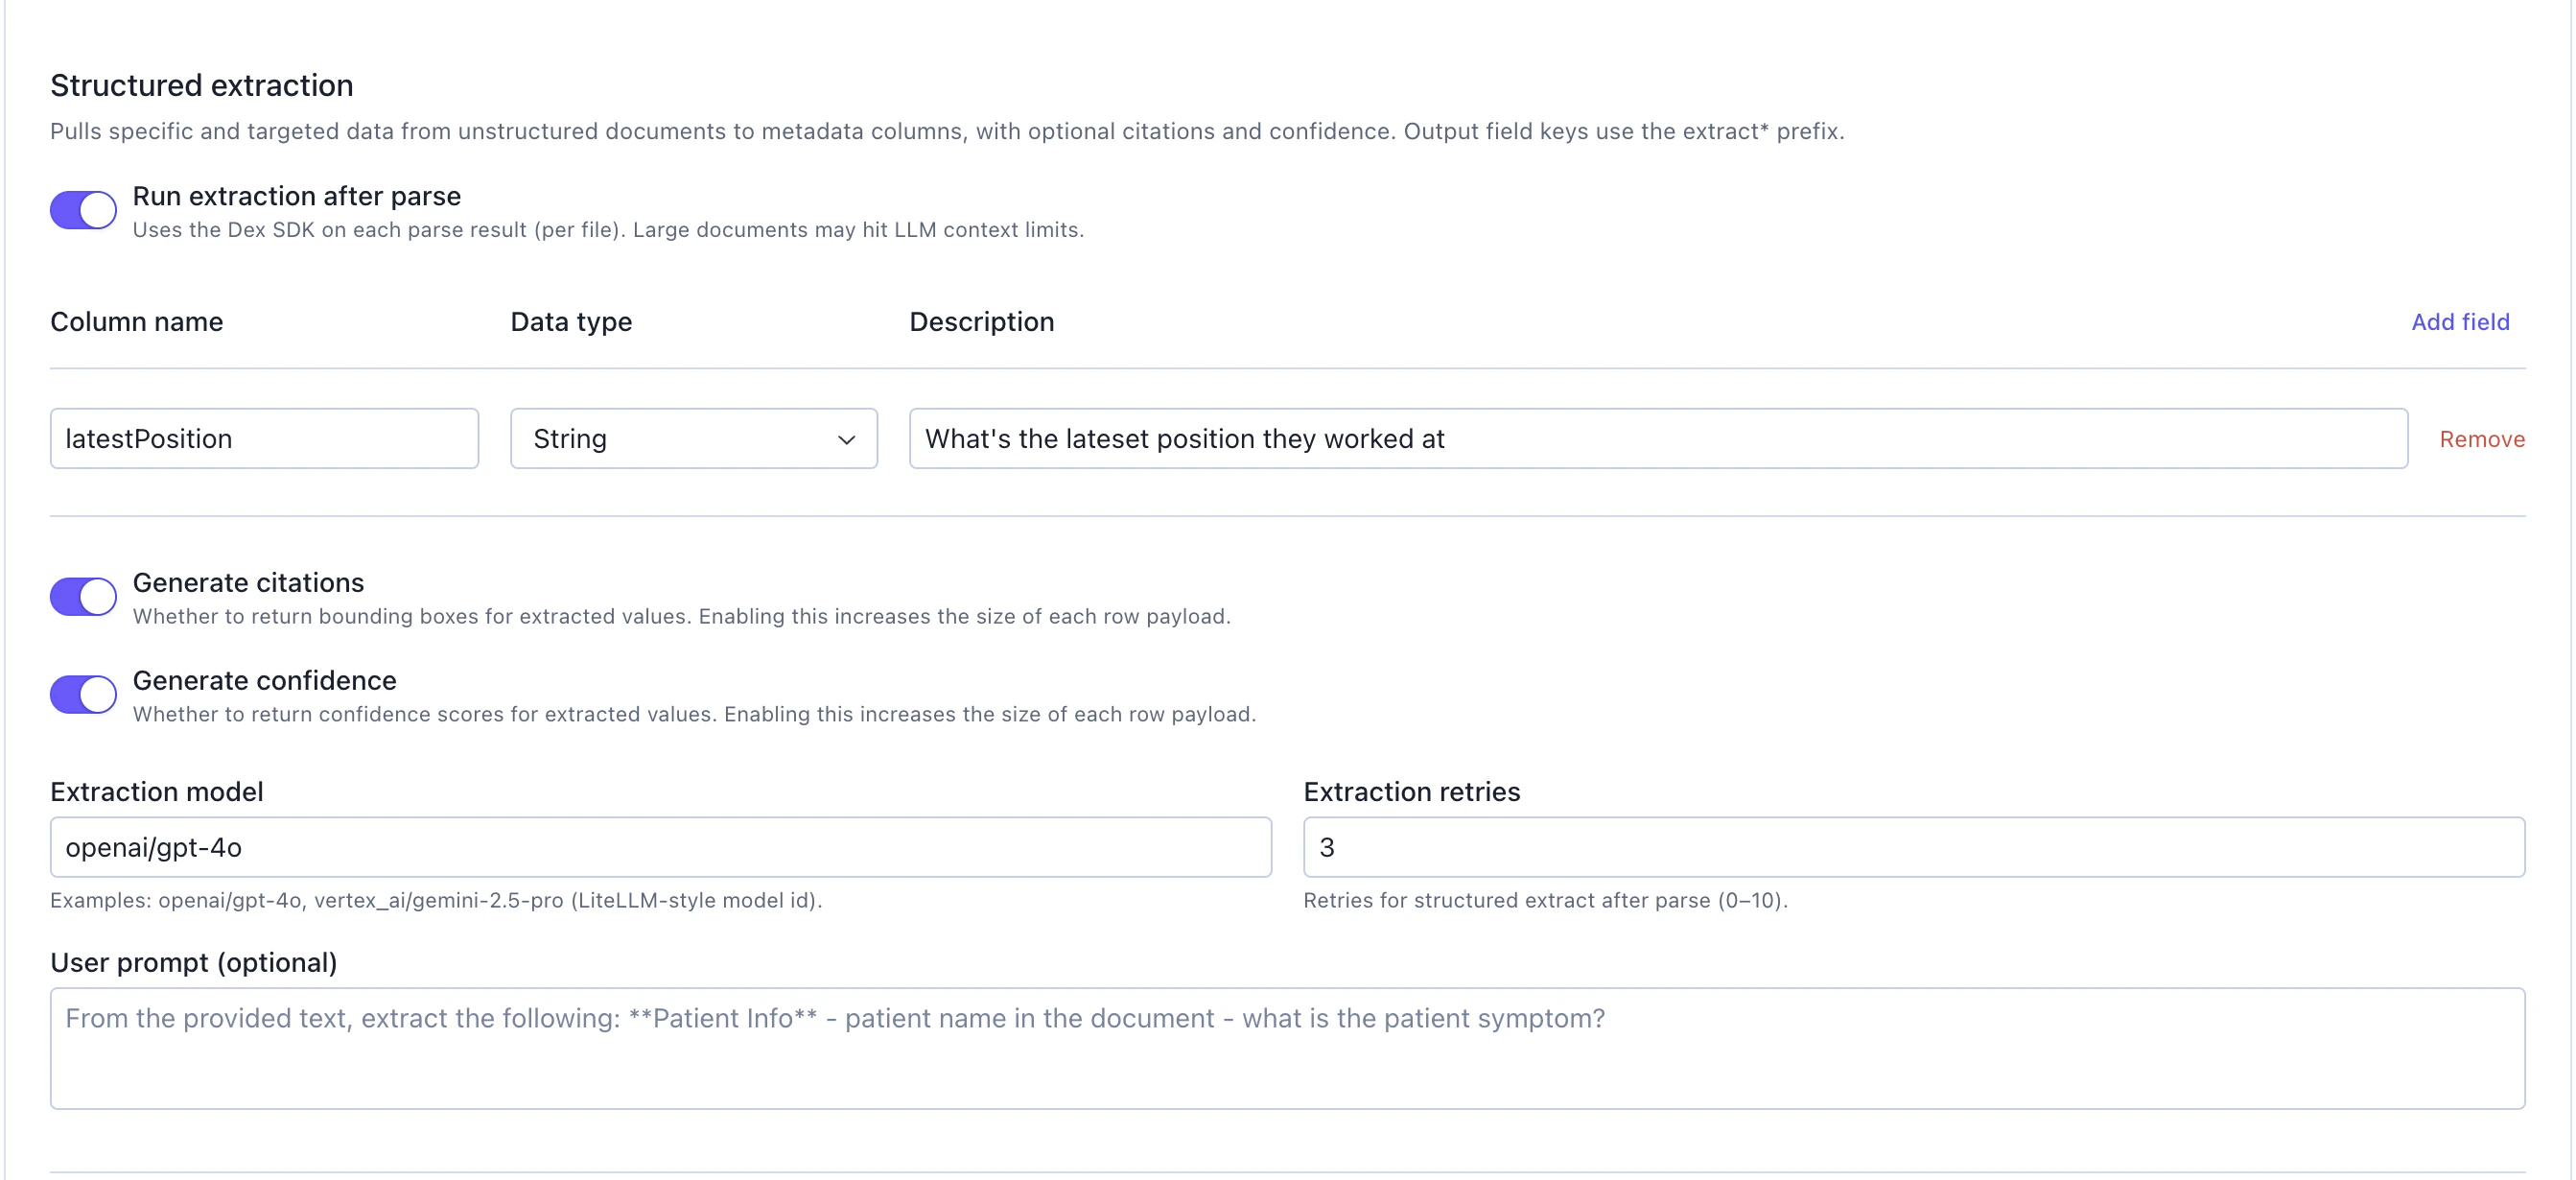
Run extraction after parse: Toggle on to enable structured extraction. This uses the Dex SDK on each parse result (per file). Note: Large documents may hit LLM context limits
When enabled, configure the following:
Schema Definition
Define the fields you want to extract. Add all the fields you need:
Column name: Name for the extracted field (e.g., “latestPosition”)Data type: Select the data type (String, Number, Boolean, etc.)Description: Describe what should be extracted (e.g., “What’s the latest position they worked at”)- Click
Add fieldto define additional extraction fields
Generate citations: Toggle on to return bounding boxes for extracted values. Enabling this increases the size of each row payloadGenerate confidence: Toggle on to return confidence scores for extracted values. Enabling this increases the size of each row payload
Extraction model: Specify the LLM to use for extraction (e.g., “openai/gpt-4o”, “vertex_ai/gemini-2.5-pro”). This uses LiteLLM-style model IDsExtraction retries: Number of retries for structured extraction (0-10). Default: 3 retries
Extracted field keys in the output will use the
extract_ prefix to distinguish them from standard parse output columns.Knowledge Base
Optionally push parsed results into a vector store for semantic search and RAG:Push to Vector Store: Toggle on to enable Knowledge Base integrationVector Store Name: Provide a name for your Knowledge Base (e.g., “Resume Vector Store”)Embedding Model: Specify the embedding model (e.g.,openai/text-embedding-3-large)
Step 4: View parsed & extracted output
After the Dex card processes your documents, the output is a dataframe with the following columns: Standard Parse ColumnsparseResultId: Unique identifier for the parsing resultprojectId: The Dex project ID where results are storedengine: The parsing engine used (e.g., “Reducto”)pagesProcessed: Number of pages processed in the documentchunkCount: Number of chunks created from the documentstatus: Parsing status (e.g., “completed”, “failed”)parsedContent: The extracted text content from the documentvectorStoreId: ID of the Knowledge Base vector store (if enabled)
extract* prefix:
extract_<fieldName>: The extracted value for each defined field (e.g.,extract_latestPosition)extract_<fieldName>_citations: Bounding box coordinates for the extracted value (if citations enabled)extract_<fieldName>_confidence: Confidence score for the extraction (if confidence enabled)
Step 5: Access Dex project and SGP Knowledge Base
The Dex Parse card automatically creates a Dex project that you can access later for review and management. If you enabled the “Push to Vector Store” option, navigate to theKnowledge Base section in SGP to access your vector store:
- Search parsed documents semantically
- Test retrieval quality
- Use for RAG applications
- Manage embeddings and vector store settings
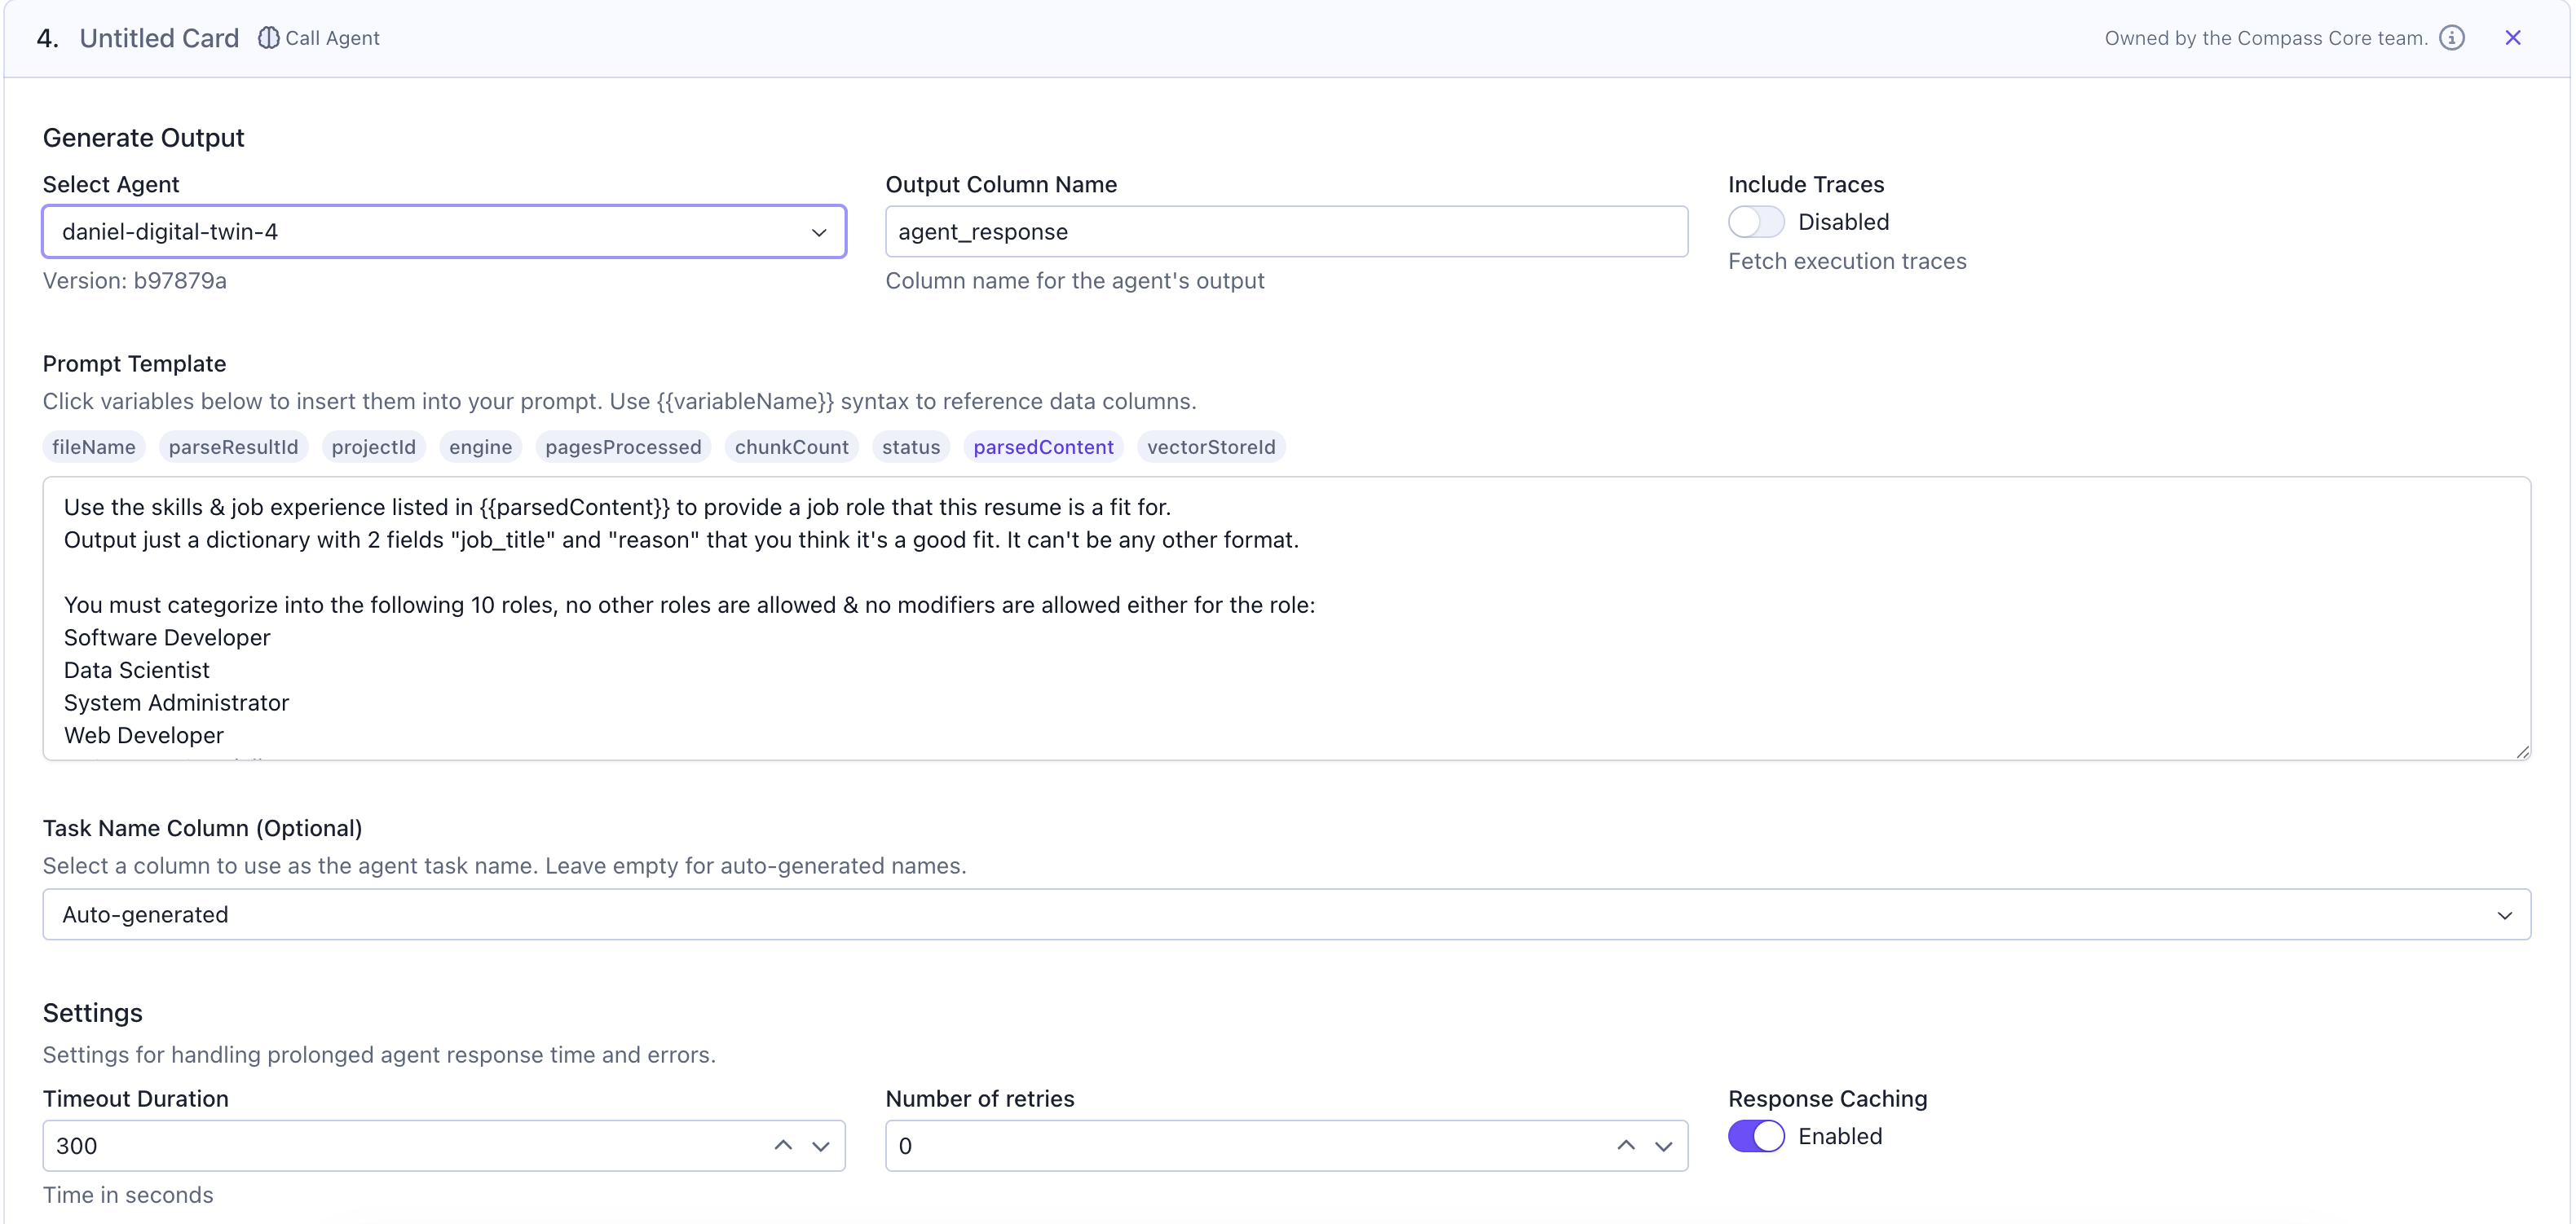
Step 6: Use parsed / extracted data in your workflow
Now you can use the parsed content in subsequent workflow cards. For this example, we’ll call an agent to categorize resume content into suitable job roles.Call Agent for Analysis
Add aCall Agent card to process the parsed content:
Select Agent: Choose your agent from the dropdownOutput Column Name: Specify where agent responses will be stored (e.g.,job_categories)Prompt Template: Write your prompt using{{parsedContent}}to reference the parsed text
Additional Processing
You can add more cards to:- Filter or transform the categorized results
- Join with job posting data
- Run evaluations on categorization quality
- Generate reports or summaries
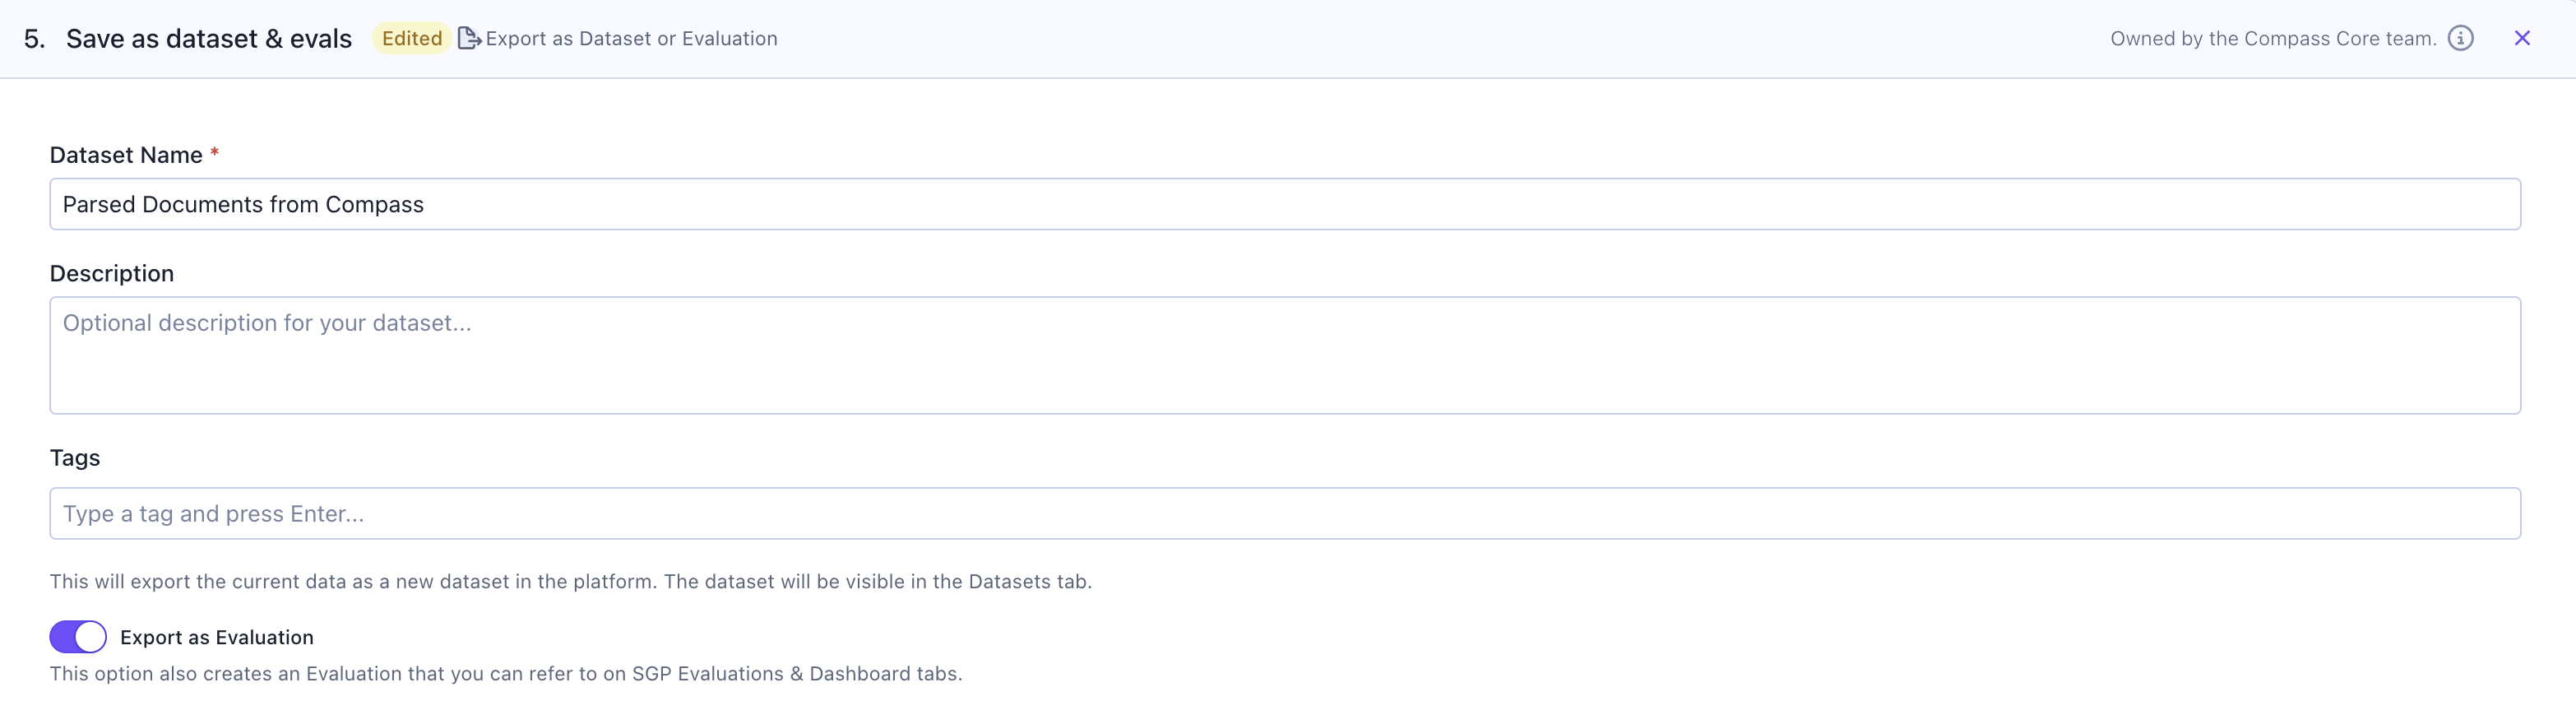
Step 7: Save your results
Finally, save the workflow output for future reference and analysis. You can save the results as:- SGP Dataset: Store the categorized resumes as a dataset for future use in training, evaluation, or analysis
- SGP Evaluation: Create an evaluation to track the quality of resume categorization over time