> ## Documentation Index
> Fetch the complete documentation index at: https://docs.gp.scale.com/llms.txt
> Use this file to discover all available pages before exploring further.
# Creating a Multimodal Evaluation
> How to evaluate an application with multimodal inputs
Many use cases for GenAI applications benefit from multimodal interactions, where users engage with the application using various types of input—such as text, images, or audio. This diversity of input requires multimodal evaluations, which assess the application’s ability to interpret and respond effectively across different modes.
Evaluating multimodal applications is supported with Flexible Evaluation runs. Creating a multimodal evaluation is the same process as a flexible evaluation. Simply add the `file_id` to the image for inputs, outputs, and traces, and these images will be rendered on the platform's UI. This guide will walk through an example of an external application and flexible evaluation that has multimodal inputs and outputs.
This tutorial assumes that you already have a file hosted in either a publicly available server or in the SGP platform.
If you have an image that is hosted in a publicly available server, enter the path to that image under `file_id`.
If you need a place to host the images, follow [these instructions](/docs/multimodal-evaluation-file-upload) to upload your file to the SGP platform and obtain the `file_id`.
Steps:
1. Initialize the SGP Client.
2. Application Setup.
3. Define Multimodal Test Cases.
4. Create Multimodal Dataset from Test Cases.
5. Generate Outputs for the Application based on the Dataset.
6. Create Question Set.
7. Create Evaluation Run.
8. Annotate Evaluation Run.
## Initialize the SGP client
Follow the instructions in the [Quickstart Guide](/docs/getting-started) to setup the SGP Client. After installing the client, you can import and initialize the client as follows:
```python theme={null}
from scale_gp import SGPClient
client = SGPClient()
```
## Application Setup
Evaluations are tied to an external application variant. You will first need to [initialize an external application](/docs/external-applications) before you can evaluate your multimodal application.
The following example walks you through creating an external application and variant through the SDK.
```python theme={null}
# Create your application
animal_annotator_app = client.application_specs.create(
account_id=ACCOUNT_ID,
name="Animal Annotation Test 5",
description="An application that can answer what is on the image",
)
```
Once your application is created, you can add an application variant:
```python theme={null}
animalbot_with_python_variant = client.application_variants.create(
account_id=ACCOUNT_ID,
application_spec_id=animal_annotator_app.id,
name="Animal Annotator with Python, version 1",
description="A variant that can answer what animal is on the picture.",
configuration={},
version="OFFLINE", # since we're running this variant locally, we set the version to OFFLINE
)
```
## Define multimodal test cases
To evaluate your multimodal application, first create a flexible evaluation dataset with test cases. Each test case should include a `file_id` pointing to the multimedia input and optionally a query.
If you have an image that is hosted in a publicly available server, enter the path to that image under `file_id`. If you need a place to host the images, follow these instructions to upload your file to the SGP platform and obtain the `file_id`.
```python theme={null}
from scale_gp.types.evaluation_datasets import FlexibleTestCaseSchema
test_cases = [
FlexibleTestCaseSchema(
input={
"image": {
"file_id": "https://images.squarespace-cdn.com/content/v1/6319f8b275d74a4d26bbe702/a3bf9141-a9a2-44c3-95fd-c7c4598a15fc/pet+policy.jpg",
"file_type": "image",
},
"query": "What do you see in the picture?",
},
expected_output="I see a dog",
),
FlexibleTestCaseSchema(
input={
"image": {
"file_id": "https://cdn.stocksnap.io/img-thumbs/960w/cat-kitten_7GEZBBYE4Q.jpg",
"file_type": "image",
},
"query": "What do you see in the picture?",
},
expected_output="I see a cat",
),
]
```
## Create the multimodal dataset
Once you have all your test cases ready, you can upload your data via the `DatasetBuilder`.
```python theme={null}
from scale_gp.lib.dataset_builder import DatasetBuilder
multimodal_eval_dataset = DatasetBuilder(client).initialize(
account_id=ACCOUNT_ID,
name="Animal Annotator Dataset",
test_cases=test_cases,
)
print(multimodal_eval_dataset)
```
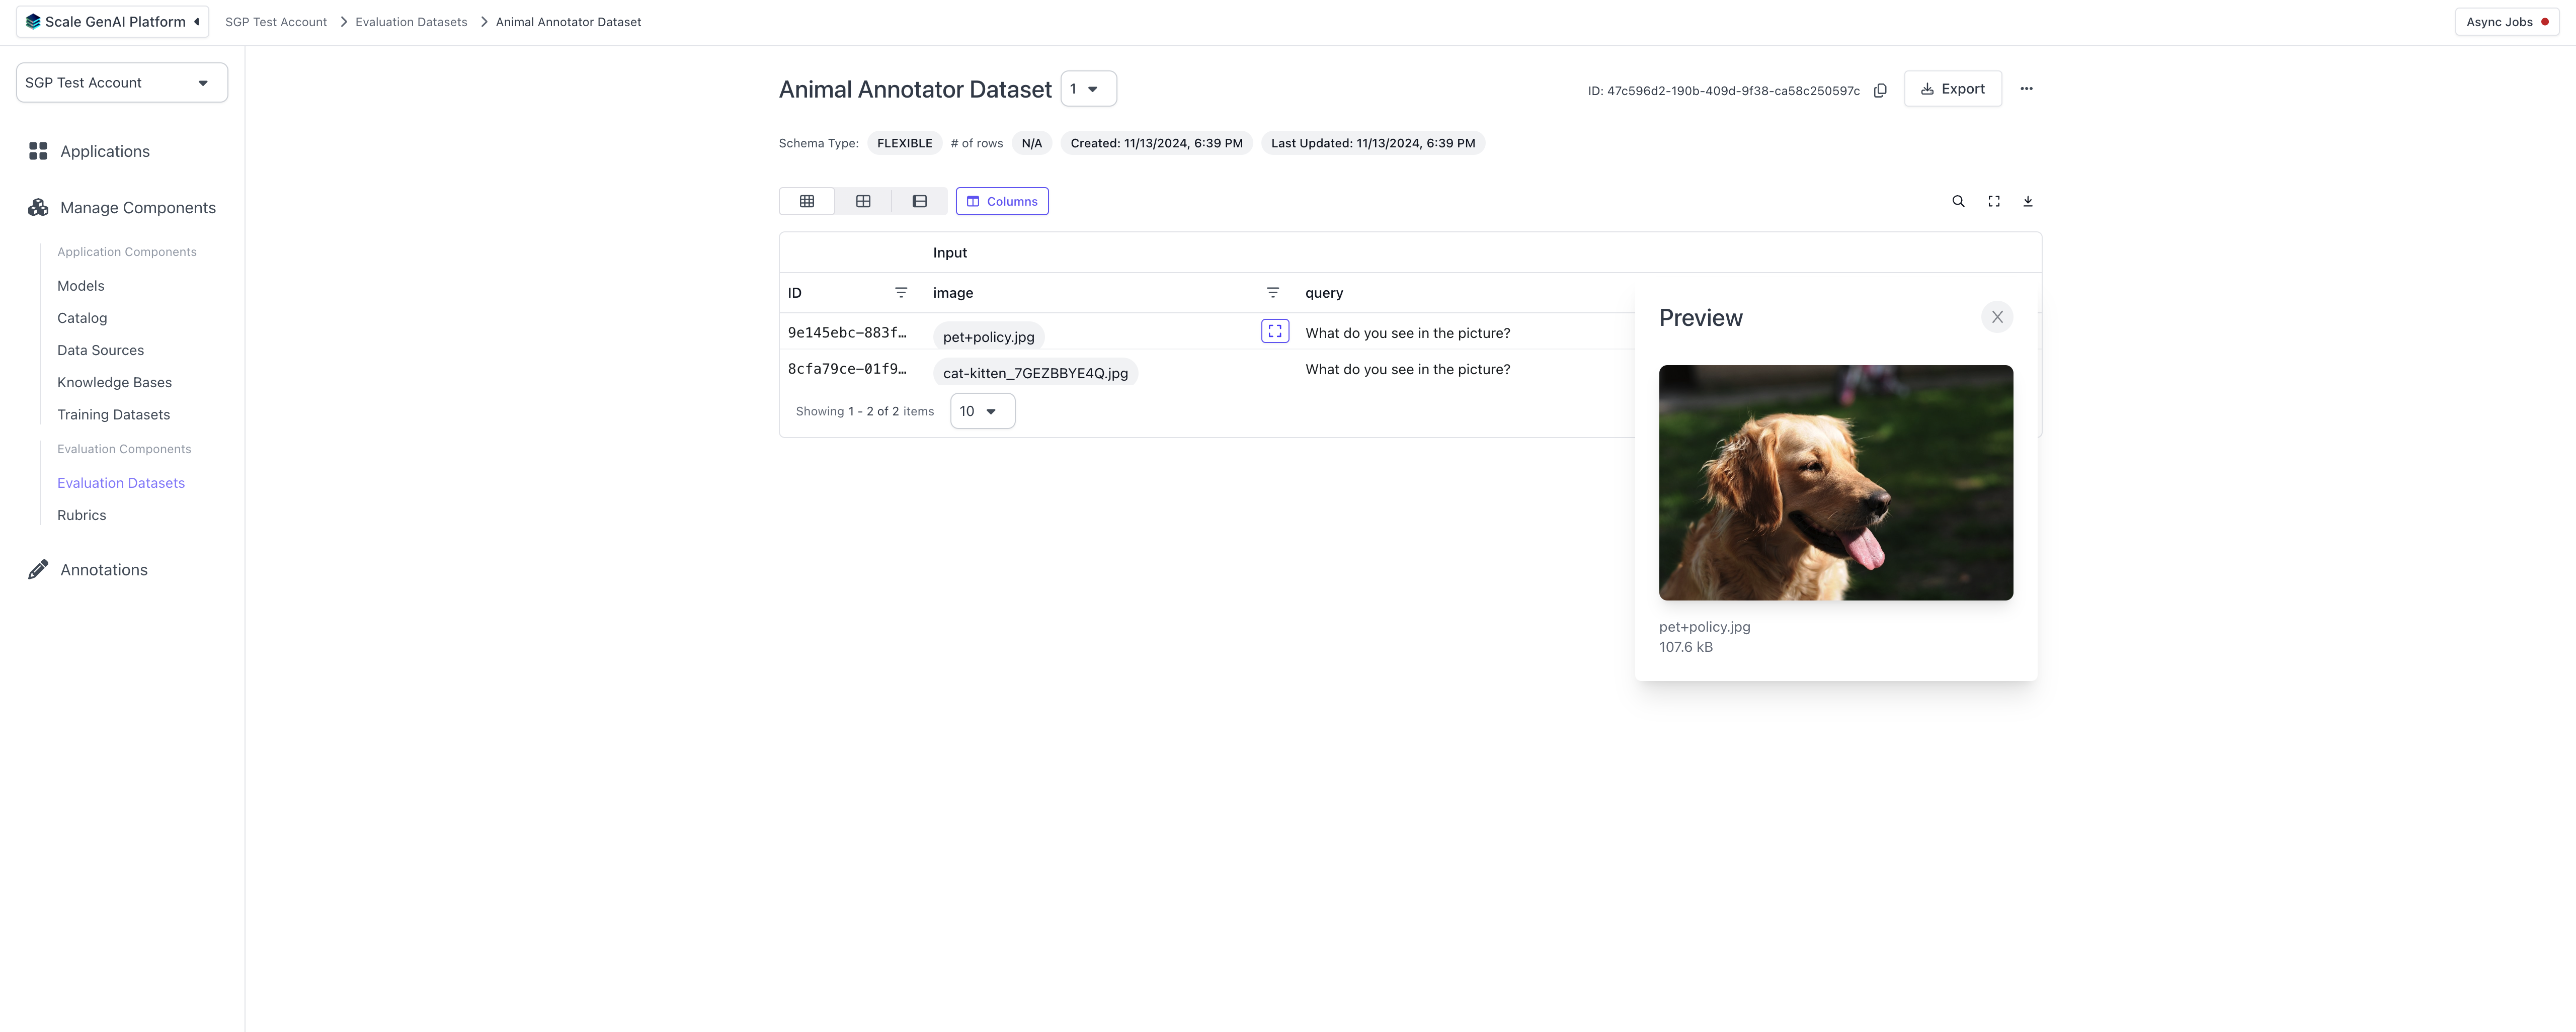
You can verify this dataset by navigating to "Evaluation Datasets" and clicking on the dataset:
 ## Generate Outputs
Next, generate outputs for the evaluation dataset.
You can also upload multimedia traces by adding `file_id`s in the traces. These traces will show up as images in the annotation view as well.
```python theme={null}
from datetime import datetime
from scale_gp.types.chat_completion_create_params import (
MessageEgpAPIBackendServerAPIModelsEgpModelsUserMessage,
MessageEgpAPIBackendServerAPIModelsEgpModelsUserMessageContentUnionMember1EgpAPIBackendServerAPIModelsEgpModelsImageURLUserMessageContentParts as ImageURLContent,
MessageEgpAPIBackendServerAPIModelsEgpModelsUserMessageContentUnionMember1EgpAPIBackendServerAPIModelsEgpModelsImageURLUserMessageContentPartsImageURL as ImageURL,
MessageEgpAPIBackendServerAPIModelsEgpModelsUserMessageContentUnionMember1TextUserMessageContentParts as TextContent,
)
from scale_gp.lib.external_applications import (
ExternalApplication,
ExternalApplicationOutputCompletion,
)
def animalbot_with_python(input: dict):
trace = []
start = datetime.now()
message = MessageEgpAPIBackendServerAPIModelsEgpModelsUserMessage(
role="user",
content=[
ImageURLContent(
image_url=ImageURL(
url=input["image"]["file_id"]
),
type="image_url",
),
TextContent(
text=input["query"], type="text"
),
],
)
response = client.chat_completions.create(
messages=[message],
model="gpt-4o",
)
trace.append(
{
"node_id": "animalbot_with_python",
"start_timestamp": start.isoformat(),
"operation_input": {"query": input["query"], "image": input["image"]},
"operation_output": {"answer": response.chat_completion.message.content},
}
)
print(
"Question:", input["query"], "Answer:", response.chat_completion.message.content
)
return ExternalApplicationOutputCompletion(
generation_output=response.chat_completion.message.content, trace_spans=trace
)
runner = ExternalApplication(
client,
).initialize(
application_variant_id=animalbot_with_python_variant.id,
application=animalbot_with_python,
)
```
You can now connect your application to your local inference via the code snippet below. The `generate_outputs` function will run you application on the dataset and upload responses to SGP.
You can see that we already wrapped this in an External Application, so you can easily call evaluation on this.
Let's use your runner to run the test-cases with the application. This step will generate the outputs and upload as evaluation test-case results.
```python theme={null}
runner.generate_outputs(
evaluation_dataset_id=multimodal_eval_dataset.id,
evaluation_dataset_version=1, # we only have 1 version of the dataset
)
```
## Create question set
An evaluation also needs a question set. You can create a question set either [through the UI](/docs/intro-to-the-sgp-ui) or through the SDK. Here is an SDK example below:
```python theme={null}
# Create questions for the labelers
question_requests = [
{
"type": "categorical",
"title": "Final Answer Accuracy",
"prompt": "Rate the accuracy of the Final Answer",
"choices": [
{"label": "1 - Inaccurate", "value": "1"},
{"label": "2 - Partial", "value": "2"},
{"label": "3 - Perfect", "value": "3"},
],
"account_id": ACCOUNT_ID,
}
]
question_ids = []
for question in question_requests:
q = client.questions.create(**question)
question_ids.append(q.id)
print(q)
# Create a question set so we can connect it to the evaluation config
q_set = client.question_sets.create(
name="test question set",
question_ids=question_ids,
account_id=ACCOUNT_ID,
)
# Create an evaluation config with the already created question set
evaluation_config = client.evaluation_configs.create(
account_id=ACCOUNT_ID,
question_set_id=q_set.id,
evaluation_type="human",
)
```
## Create evaluation
Once you have your data uploaded, we are ready to start an evaluation. You will need an evaluation config.
Auto evaluations are not supported for multimodal datasets.
Create a custom annotation configuration to configure the layout of what annotators will see, and create the evaluation. For more details about annotation configurations, see the [annotation configuration](/docs/flexible-evaluation/annotation-configuration) section in the Flexible Evaluations Guide.
```python theme={null}
# Showing the trace to annotators and changing annotation configuration on question
annotation_config = {
"components": [
[
# Let's put the image and the output side by side since that's what we care about most
{"data_loc": ["test_case_data", "input", "image"], "label": "Query"},
{"data_loc": ["test_case_output", "output"]},
],
[{"data_loc": ["test_case_data", "expected_output"]}],
[{"data_loc": ["test_case_data", "input", "query"]}],
]
}
animalbot_with_python_evaluation = client.evaluations.create(
account_id=ACCOUNT_ID,
application_variant_id=animalbot_with_python_variant.id,
application_spec_id=animal_annotator_app.id,
name="Animalbot with python evaluation",
description="Animalbot with python evaluation",
evaluation_config_id=evaluation_config.id,
type="builder",
evaluation_dataset_id=multimodal_eval_dataset.id,
evaluation_dataset_version=1,
annotation_config=annotation_config,
)
```
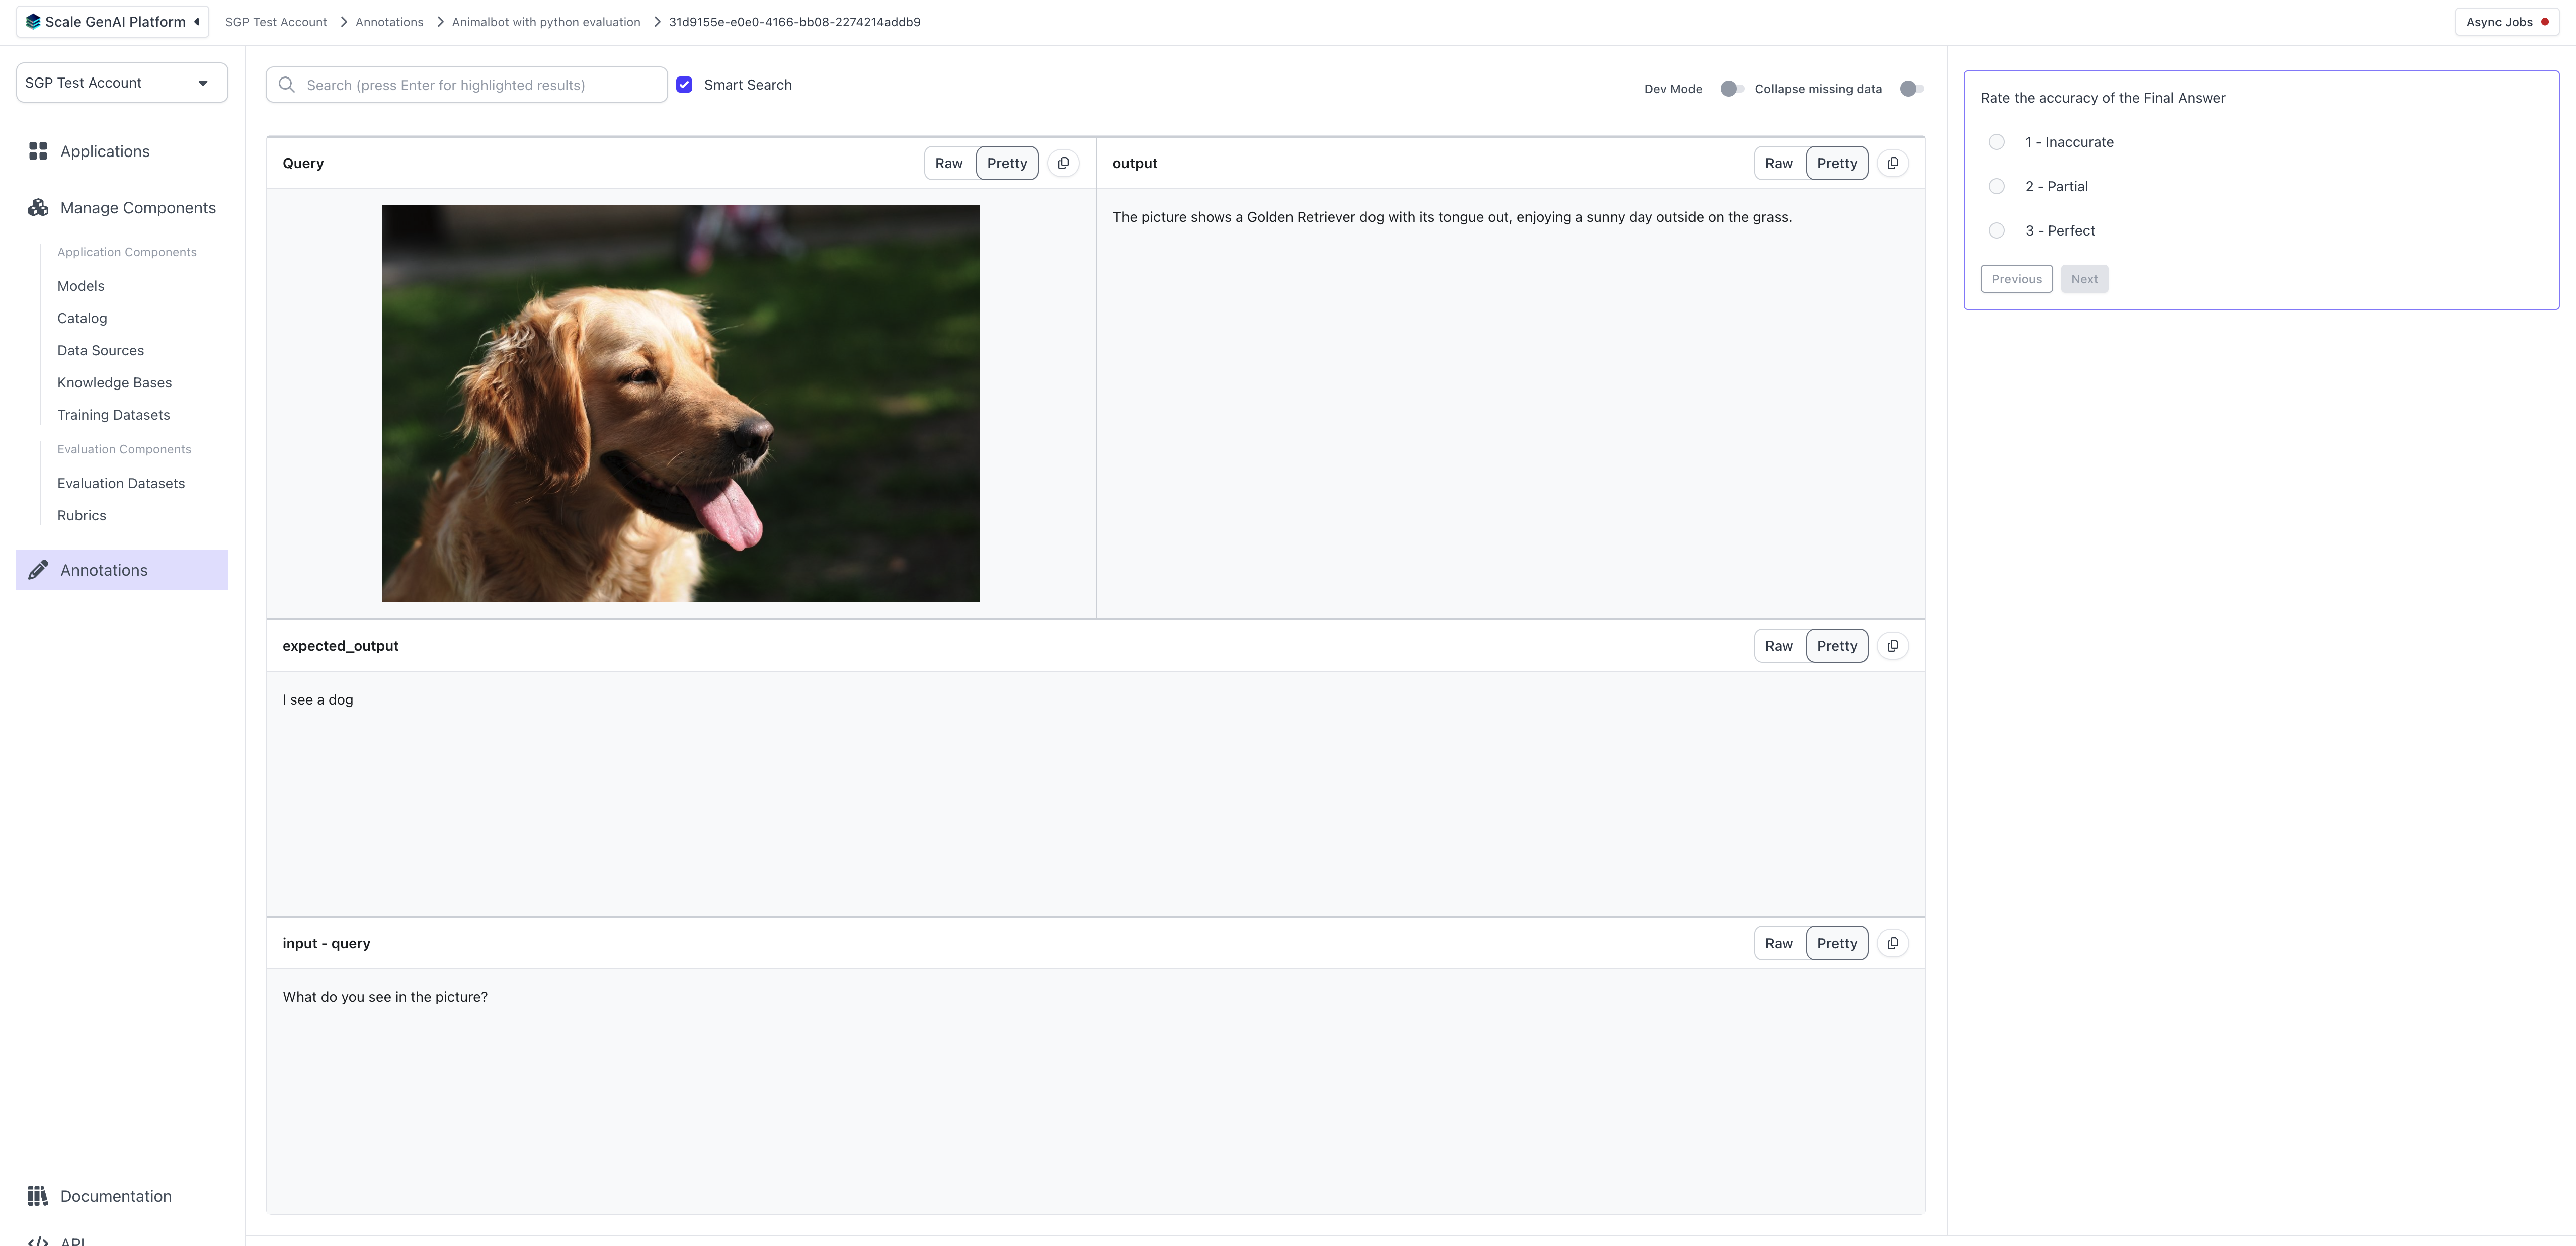
This will create an annotation view like the one below:
## Generate Outputs
Next, generate outputs for the evaluation dataset.
You can also upload multimedia traces by adding `file_id`s in the traces. These traces will show up as images in the annotation view as well.
```python theme={null}
from datetime import datetime
from scale_gp.types.chat_completion_create_params import (
MessageEgpAPIBackendServerAPIModelsEgpModelsUserMessage,
MessageEgpAPIBackendServerAPIModelsEgpModelsUserMessageContentUnionMember1EgpAPIBackendServerAPIModelsEgpModelsImageURLUserMessageContentParts as ImageURLContent,
MessageEgpAPIBackendServerAPIModelsEgpModelsUserMessageContentUnionMember1EgpAPIBackendServerAPIModelsEgpModelsImageURLUserMessageContentPartsImageURL as ImageURL,
MessageEgpAPIBackendServerAPIModelsEgpModelsUserMessageContentUnionMember1TextUserMessageContentParts as TextContent,
)
from scale_gp.lib.external_applications import (
ExternalApplication,
ExternalApplicationOutputCompletion,
)
def animalbot_with_python(input: dict):
trace = []
start = datetime.now()
message = MessageEgpAPIBackendServerAPIModelsEgpModelsUserMessage(
role="user",
content=[
ImageURLContent(
image_url=ImageURL(
url=input["image"]["file_id"]
),
type="image_url",
),
TextContent(
text=input["query"], type="text"
),
],
)
response = client.chat_completions.create(
messages=[message],
model="gpt-4o",
)
trace.append(
{
"node_id": "animalbot_with_python",
"start_timestamp": start.isoformat(),
"operation_input": {"query": input["query"], "image": input["image"]},
"operation_output": {"answer": response.chat_completion.message.content},
}
)
print(
"Question:", input["query"], "Answer:", response.chat_completion.message.content
)
return ExternalApplicationOutputCompletion(
generation_output=response.chat_completion.message.content, trace_spans=trace
)
runner = ExternalApplication(
client,
).initialize(
application_variant_id=animalbot_with_python_variant.id,
application=animalbot_with_python,
)
```
You can now connect your application to your local inference via the code snippet below. The `generate_outputs` function will run you application on the dataset and upload responses to SGP.
You can see that we already wrapped this in an External Application, so you can easily call evaluation on this.
Let's use your runner to run the test-cases with the application. This step will generate the outputs and upload as evaluation test-case results.
```python theme={null}
runner.generate_outputs(
evaluation_dataset_id=multimodal_eval_dataset.id,
evaluation_dataset_version=1, # we only have 1 version of the dataset
)
```
## Create question set
An evaluation also needs a question set. You can create a question set either [through the UI](/docs/intro-to-the-sgp-ui) or through the SDK. Here is an SDK example below:
```python theme={null}
# Create questions for the labelers
question_requests = [
{
"type": "categorical",
"title": "Final Answer Accuracy",
"prompt": "Rate the accuracy of the Final Answer",
"choices": [
{"label": "1 - Inaccurate", "value": "1"},
{"label": "2 - Partial", "value": "2"},
{"label": "3 - Perfect", "value": "3"},
],
"account_id": ACCOUNT_ID,
}
]
question_ids = []
for question in question_requests:
q = client.questions.create(**question)
question_ids.append(q.id)
print(q)
# Create a question set so we can connect it to the evaluation config
q_set = client.question_sets.create(
name="test question set",
question_ids=question_ids,
account_id=ACCOUNT_ID,
)
# Create an evaluation config with the already created question set
evaluation_config = client.evaluation_configs.create(
account_id=ACCOUNT_ID,
question_set_id=q_set.id,
evaluation_type="human",
)
```
## Create evaluation
Once you have your data uploaded, we are ready to start an evaluation. You will need an evaluation config.
Auto evaluations are not supported for multimodal datasets.
Create a custom annotation configuration to configure the layout of what annotators will see, and create the evaluation. For more details about annotation configurations, see the [annotation configuration](/docs/flexible-evaluation/annotation-configuration) section in the Flexible Evaluations Guide.
```python theme={null}
# Showing the trace to annotators and changing annotation configuration on question
annotation_config = {
"components": [
[
# Let's put the image and the output side by side since that's what we care about most
{"data_loc": ["test_case_data", "input", "image"], "label": "Query"},
{"data_loc": ["test_case_output", "output"]},
],
[{"data_loc": ["test_case_data", "expected_output"]}],
[{"data_loc": ["test_case_data", "input", "query"]}],
]
}
animalbot_with_python_evaluation = client.evaluations.create(
account_id=ACCOUNT_ID,
application_variant_id=animalbot_with_python_variant.id,
application_spec_id=animal_annotator_app.id,
name="Animalbot with python evaluation",
description="Animalbot with python evaluation",
evaluation_config_id=evaluation_config.id,
type="builder",
evaluation_dataset_id=multimodal_eval_dataset.id,
evaluation_dataset_version=1,
annotation_config=annotation_config,
)
```
This will create an annotation view like the one below:
 ## Annotate Tasks
Similar to other evaluation runs, you will find a new task queue in the annotation tab after creating the evaluations.
## Annotate Tasks
Similar to other evaluation runs, you will find a new task queue in the annotation tab after creating the evaluations.
